

Showing posts with label Silhouette CAMEO 2. Show all posts
How to Cut Fabric on Silhouette CAMEO without Rotary Blade
Thursday, September 26, 2024
You can cut fabric with any Silhouette CAMEO or Portrait machine - including those that can't use a Silhouette Rotary blade.

In a pinch you can use almost any NEW blade to cut fabric - in any machine.
Cutting Laminated Shapes and Print and Cuts with Silhouette (Plus Perfect Cut Settings)
Thursday, June 22, 2023
If there's one thing I know it's that there is always another way to use your Silhouette machine....like, say, with a laminator. I recently got myself a (very basic) laminator and let me tell you, nothing is safe! I know what you're thinking: laminators are only for teachers. WRONG!

I've combined the powers of my Silhouette CAMEO and my laminator to make custom bookmarks, planner inserts, photo booth props, dry erase games for my kids, luggage tags, the list goes on.

I've combined the powers of my Silhouette CAMEO and my laminator to make custom bookmarks, planner inserts, photo booth props, dry erase games for my kids, luggage tags, the list goes on.
Foil Quill Hack for Faster Foiling (But Be Warned)
Thursday, April 8, 2021
I love the Foil Quill Magnetic mat when foiling with my CAMEO 3 because of how much time it saves avoiding the need to tape the foil down. Unfortunately that magnetic mat isn't real Silhouette CAMEO 4 friendly due to the big metal bar which tends to "eat" the magnets.

That got this anti-tape crafter thinking...and I had a lightbulb moment and a Silhouette / Foil Quill hack that I will be using from here on out.

That got this anti-tape crafter thinking...and I had a lightbulb moment and a Silhouette / Foil Quill hack that I will be using from here on out.
Silhouette CAMEO 1, CAMEO 2, and Portrait 1: Tools and Machine Compatibility Series
Wednesday, October 21, 2020
Not sure which tools can be used in your older model Silhouette CAMEO or original Portrait 1?

Let's get to the bottom of tool compatibility for the Silhouette CAMEO 1, CAMEO 2, and Portrait.
How to Foil Quill and Cut with a Single Carriage Silhouette Machine (Silhouette CAMEO 1 and 2)
Monday, July 8, 2019
If you are using a single carriage Silhouette machine - such as a Silhouette CAMEO 1, 2 or Portrait - you are still able to Foil Quill and cut!

Using the Cut by Line Color is the trick when you need to swap tools between passes. It's an extra step or two - but nearly as easy as foiling and cutting on a Silhouette CAMEO 3 where you have two carriages, but it's definitely possible!

Using the Cut by Line Color is the trick when you need to swap tools between passes. It's an extra step or two - but nearly as easy as foiling and cutting on a Silhouette CAMEO 3 where you have two carriages, but it's definitely possible!
Second Silhouette CAMEO: 7 Ways to Justify Needing Another Cutter
Thursday, December 13, 2018
Many Silhouette crafters - at one point or another - question whether or not they need another (or a new) Silhouette machine.

There are a number of reasons why it's a good idea to seriously consider a second Silhouette cutting machine. Some of them would fall under the "want" category while others should definitely be considered a "need."

There are a number of reasons why it's a good idea to seriously consider a second Silhouette cutting machine. Some of them would fall under the "want" category while others should definitely be considered a "need."
What and When Can I Cut Without Silhouette Cutting Mat?
Tuesday, September 25, 2018
When it comes to cutting with a Silhouette Cutting Mat there are definitely differing opinions.
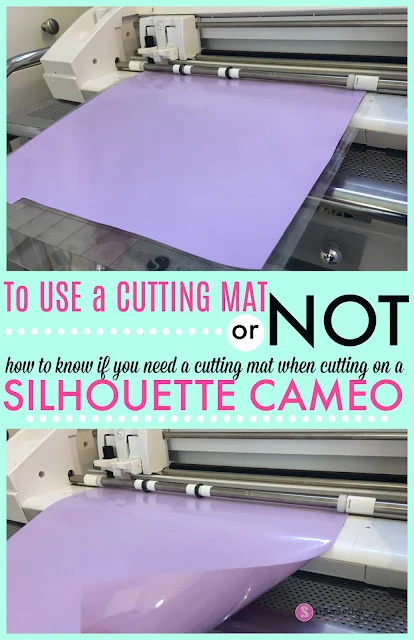
While it's not always necessary to cut with a mat, it is always necessary to cut certain materials with a mat. Today we're going to get to the bottom of when and what you can cut without the Silhouette cutting mat and when it's absolutely necessary.

Larger Silhouette Machine Survey and Why It's So Important
Tuesday, April 24, 2018
This is unlike any post I've ever written on Silhouette School...perhaps the most important of all posts I've ever written. And the most ironic part is it's not even a tutorial....it's basically an open letter.
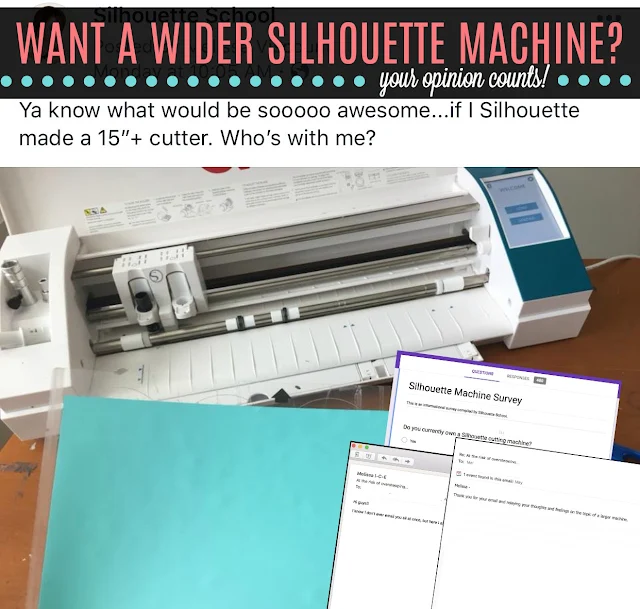
An open letter to you. An open letter to Silhouette America. It's me essentially begging you to help me. This is two years of me hinting...asking...begging Silhouette America to consider making a larger Silhouette CAMEO cutting machine.
I shared a photo on Silhouette School's Facebook page last week and some of you thought I knew something I wasn't saying. The only thing I know is there are currently no plans for a larger machine...but I reeeeeaaally want to change that. And I need your help.

An open letter to you. An open letter to Silhouette America. It's me essentially begging you to help me. This is two years of me hinting...asking...begging Silhouette America to consider making a larger Silhouette CAMEO cutting machine.
I shared a photo on Silhouette School's Facebook page last week and some of you thought I knew something I wasn't saying. The only thing I know is there are currently no plans for a larger machine...but I reeeeeaaally want to change that. And I need your help.
Cutting With Two Silhouette Machines with Silhouette Studio V4
Thursday, March 29, 2018
Silhouette Studio Business Edition allows you to cut with or connect multiple Silhouette machines at the same time.

BUT...it's not super obvious where to select the machine with which you want to cut in Silhouette Studio V4.

BUT...it's not super obvious where to select the machine with which you want to cut in Silhouette Studio V4.
Silhouette CAMEO Light Tote Bag Review
Thursday, July 20, 2017
When the new Silhouette CAMEO Light Tote bags were released a few months back, I immediately grabbed one.

I have to be honest, the price made me think the quality of this bag and
the material would be on the lower end. But I was wrong!

Gold Mine of Free Downloadable Sticker and Label Templates for Silhouette CAMEO
Monday, June 5, 2017
You guys!! I'm pretty sure I found the mother lode of free sticker and label templates!! I can't believe the hundreds of downloadable label templates have been sitting under my nose this whole time on the Online Labels website!!
And that's not even the best part...the best part is you can download them onto your computer in PDF format and open them in Silhouette Studio. They come in sized perfectly AND with cut lines. I mean...does it get much better?!!!
 |
| This is a sponsored post, but all opinions are my own. |
Silhouette School Launches First Virtual Classroom: Master the Silhouette Studio Text Tool
Wednesday, May 3, 2017
You guys!! I'm so excited to announce the release of our latest product: our first ever Virtual Classroom titled "Master the Silhouette Studio Text Tool."

You guys made me do this. Really you did. Here's the thing...I am constantly asked to travel to here, there, and everywhere. It's just not possible - this is a 2.5 (wo)man operation, we have littles, and there's work to be done (a lot of it) on Silhouette School blog and Silhouette U. It's all a whole lot of work that can't be done from the air or a hotel.
Even when I do travel - which I do multiple times a year (check out where I'll be later this year on the Events page) - it's not always to the places where you are. That ALWAYS leads to questions from people about if my talks/classes/presentations will be streamed live or recorded. Honestly - it's just not possible to do that. BUT Bob and I had this light bulb moment a few weeks back and we think we've found something just as good - if not better!
We're taking retired content - content that's still 100% still relevant but no longer among the presentations I'm teaching - and converting them into virtual classrooms. I'm thrilled to say our first Virtual Classroom: Master the Silhouette Studio Text Tool is now available
You guys made me do this. Really you did. Here's the thing...I am constantly asked to travel to here, there, and everywhere. It's just not possible - this is a 2.5 (wo)man operation, we have littles, and there's work to be done (a lot of it) on Silhouette School blog and Silhouette U. It's all a whole lot of work that can't be done from the air or a hotel.
Even when I do travel - which I do multiple times a year (check out where I'll be later this year on the Events page) - it's not always to the places where you are. That ALWAYS leads to questions from people about if my talks/classes/presentations will be streamed live or recorded. Honestly - it's just not possible to do that. BUT Bob and I had this light bulb moment a few weeks back and we think we've found something just as good - if not better!
We're taking retired content - content that's still 100% still relevant but no longer among the presentations I'm teaching - and converting them into virtual classrooms. I'm thrilled to say our first Virtual Classroom: Master the Silhouette Studio Text Tool is now available
Silhouette CAMEO: How to Cut from a USB Drive
Wednesday, August 10, 2016
Did you know it's possible to cut from a USB drive with a Silhouette CAMEO? The cutting feature was introduced with the Silhouette Cameo 2 machine (and remains on the Silhouette CAMEO 3) allowing the user to cut without a computer, but instead pulls the design from a flash or thumb drive.
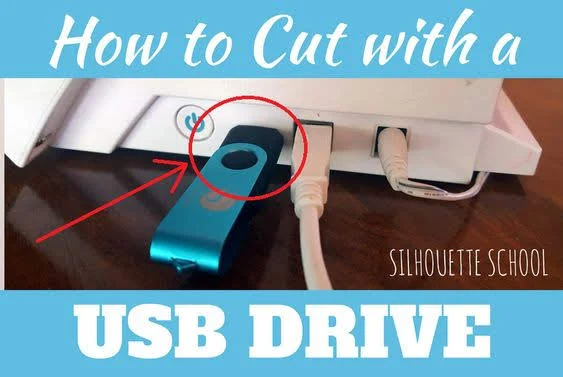
Silhouette School contributor Becky Dykes is here to explain how and why you might use the USB cutting feature with Silhouette CAMEO.
While it's not something that we would use every day, cutting with a USB drive is useful for those times when using your computer isn't practical or needed. For example, if I am working at a craft fair, I may choose to have preloaded cut files on my flash drive so I don't have to lug out my computer.

Silhouette School contributor Becky Dykes is here to explain how and why you might use the USB cutting feature with Silhouette CAMEO.
While it's not something that we would use every day, cutting with a USB drive is useful for those times when using your computer isn't practical or needed. For example, if I am working at a craft fair, I may choose to have preloaded cut files on my flash drive so I don't have to lug out my computer.
Amazon Prime Day 2016: Silhouette CAMEO Accessory Must Haves!
Monday, July 11, 2016
Prime Day Deals
I will keep this updated as I see deals! If you see a deal to share please email me at Melissa@SilhouetteSchoolblog.com with "Prime Deal" in the subject line!
Current Deals
Silhouette CAMEO 2 Starter Bundle - $179.97
Silhouette CURIO - $125
Silhouette Mint Stamp Machine $61.60
Gel Pens for Sketching with Silhouette CAMEO, Portrait or Curio
48 Pack of Gel Pens
Martha Stewart Glitter Set of 24
Label Paper (for stickers)
Onesies
Stemless Wine Glasses (great for etching or vinyl!)
Silhouette CURIO - $125
Silhouette Mint Stamp Machine $61.60
Gel Pens for Sketching with Silhouette CAMEO, Portrait or Curio
48 Pack of Gel Pens
Martha Stewart Glitter Set of 24
Label Paper (for stickers)
Onesies
Stemless Wine Glasses (great for etching or vinyl!)
30 OZ Double Wall Stainless Steel Tumbler $15.90 (Just like a Yeti!)
Pack of 4 Stainless Steel Straws for Yeti Cup - $5.32
Pack of 4 Stainless Steel Straws for Yeti Cup - $5.32
Upcoming Deals:
8 Pack Colored Liquid Chalk Markers (Starts at 5:30pm EST)
Fabric Markers 6:15pm EST
Unfinished Wood Crafting Blocks (7:30 pm EST)
Fabric Markers 6:15pm EST
Unfinished Wood Crafting Blocks (7:30 pm EST)

I know I'm not the only Silhouette crafter who has a hard time finding Silhouette items in the craft store, which is why I prefer Amazon Prime for my Silhouette supplies and blanks on Amazon. The yearly Amazon Prime membership fee is more than worth it for the two day free shipping, free Prime videos, Kindle books and Prime Music.
Silhouette CAMEO vs Cricut: Which Is Best For You?! (Honest Pros and Cons from the Pros!)
Monday, May 23, 2016
I get asked a decent amount about the differences between the Silhouette vs Circut. I'm always kinda like, "I can talk to you all day (every day) about Silhouette, but, um, I hear that the Circut Explore does this but..."

Let's just be real here for a second: I.don't.know.enough. I may know the Silhouette machines like I know my kids' bad habits, but I don't know a darn thing about the Cricut machines other than what people tell me. That's not very useful for someone who's trying to answer the question: "Should I buy a Silhouette or Cricut?"
While I have absolutely no doubt I could give you a 100% honest answer about the pros (powerful software, works offline, cuts up to 10') and cons of Silhouette (lacking customer support, some accessories and supplies are poor-ish quality), that's not what we're talking about here. We're talking about major differences between the Silhouette CAMEO and the Cricut... and who better to ask than those who have both machines?

Let's just be real here for a second: I.don't.know.enough. I may know the Silhouette machines like I know my kids' bad habits, but I don't know a darn thing about the Cricut machines other than what people tell me. That's not very useful for someone who's trying to answer the question: "Should I buy a Silhouette or Cricut?"
While I have absolutely no doubt I could give you a 100% honest answer about the pros (powerful software, works offline, cuts up to 10') and cons of Silhouette (lacking customer support, some accessories and supplies are poor-ish quality), that's not what we're talking about here. We're talking about major differences between the Silhouette CAMEO and the Cricut... and who better to ask than those who have both machines?
22 Silhouette Tutorials, Tips, Tricks, and Freebies
Monday, May 2, 2016
Silhouette School was a happening place in April! If you missed any of the 22 Silhouette Tutorials, you're in luck!

We've covered everything from how to design and print life-size graphics in Silhouette Studio to how to an easy hack for using craft foil on your heat transfer vinyl designs to creating mock ups in Silhouette Studio using your own photos!

We've covered everything from how to design and print life-size graphics in Silhouette Studio to how to an easy hack for using craft foil on your heat transfer vinyl designs to creating mock ups in Silhouette Studio using your own photos!
How to Customize Silhouette CAMEO and Silhouette Studio
Tuesday, March 8, 2016
Did you know you can customize your Silhouette CAMEO and Silhouette Studio with just a few clicks. Of course Silhouette America wouldn't expect us crafty types to live with the boring ol' gray defaults. That's why they're giving us options - color options - on both the Silhouette CAMEO2 (sorry CAMEO1/Portrait/Curio users) and in Silhouette Studio.


How to Move the Test Cut Location Anywhere: Silhouette CAMEO/Portrait Tutorial
Wednesday, February 10, 2016
Oh happy day...today I'm sharing a quick Silhouette trick for you that's going to save you a ton of wasted material and hair pulling. It's just not the beauty of the test cut, it's the ability to move the test cut location...anywhere!
 Let's say you take yourself on a little shopping spree at Expressions Vinyl...you wait your two or three days and all the pretty vinyl and glitter HTV arrives in the mail.

You're so anxious to cut it you go for it...wah wah wah. There's nothing like a kill joy when the gorgeous glitter heat transfer vinyl (or a new type you haven't cut before) isn't cut all the way through because you had the wrong cut settings.
I hear this time and time again from people that they've wasted an entire sheet of vinyl or HTV due to the wrong cut settings. If only they'd done a test cut and "wasted" half a square inch of that glitter HTV rather than the whole sheet.
The test cut gives you a tiny sneak peek into whether your cut settings will work for your material...no more guessing. But here's the best part...you can actually move the test cut location ANYWHERE. I love doing this for two big reasons:
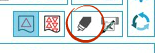
Open up Silhouette Studio and click on the 'Cut Settings' window. That's the little blade along the top tool bar.
Pick your material. In this case I have a custom material listing for 'Glitter HTV.' After you select the material, use the scroll bar to scroll further down the page. Use the suggested cut settings in Studio to adjust the blade.
Right below the cut settings, you'll see the test cut button. To the left of it are a few directional arrows on a blue square...bet you never noticed them before did, ya?. Don't press them yet....but they are key!
Place that pretty Glitter HTV onto the mat with confidence. Load the mat into the machine as you normally would.

Now in Silhouette Studio use your mouse to hold down one of those directional arrows - pick the one that correlates to the direction you want the blade to move. You can tap the arrow or hold it continuously until it goes where you want. For example, if you want the test cut in the bottom right corner...hold the "down" arrow and then hold the "right" arrow. Once you have the blade exactly where you want it to test cut, click "Test Cut."
Here's a quick video to demonstrate. Keep your eye on the mouse hovering over the test cut arrows as well as the blade housing.
When the test cut is complete, the bladewill should return (but doesn't always...I have no idea why) to the home position. Since the test cut is easily accessible and not blocked by the rollers, you can use your hook tool to peel up the little square or triangle to see if the current cut settings work well for your material.

If you're satisfied, you can confidently send your design to cut by clicking "Send to Silhouette."
If the material does not easily weed in the test cut location, adjust the cut settings and blade depth and perform another test cut, moving the test cut location to another spot on the material.
Now that you know you won't be wasting any more vinyl (or other materials)...buy all the pretty colors! Personally, the glitter HTV from Expressions Vinyl is my absolute favorite, but of course moving the test cut location works on any and all materials!
Note: This post may contain affiliate links. By clicking on them and purchasing products through my links, I receive a small commission. That's what helps fund Silhouette School so I can keep buying new Silhouette-related products to show you how to get the most out of your machine!
Thanks for coming to class today at Silhouette School. If you like what you see, I'd love for you to pin it!






You're so anxious to cut it you go for it...wah wah wah. There's nothing like a kill joy when the gorgeous glitter heat transfer vinyl (or a new type you haven't cut before) isn't cut all the way through because you had the wrong cut settings.
I hear this time and time again from people that they've wasted an entire sheet of vinyl or HTV due to the wrong cut settings. If only they'd done a test cut and "wasted" half a square inch of that glitter HTV rather than the whole sheet.
The test cut gives you a tiny sneak peek into whether your cut settings will work for your material...no more guessing. But here's the best part...you can actually move the test cut location ANYWHERE. I love doing this for two big reasons:
- The default test cut is in the upper left corner of the mat, but in that spot you have to fully unload the mat to examine the cut. Moving it further down the page allows you to check out the test cut without unloading the mat and material.
- If your design is placed in the upper left corner of the cutting area, as many crafters do, the test cut could get in the way of the design cut..moving it eliminates that worry. I prefer to move it to the right side, near the bottom.

Open up Silhouette Studio and click on the 'Cut Settings' window. That's the little blade along the top tool bar.

Pick your material. In this case I have a custom material listing for 'Glitter HTV.' After you select the material, use the scroll bar to scroll further down the page. Use the suggested cut settings in Studio to adjust the blade.
Right below the cut settings, you'll see the test cut button. To the left of it are a few directional arrows on a blue square...bet you never noticed them before did, ya?. Don't press them yet....but they are key!
Place that pretty Glitter HTV onto the mat with confidence. Load the mat into the machine as you normally would.

Now in Silhouette Studio use your mouse to hold down one of those directional arrows - pick the one that correlates to the direction you want the blade to move. You can tap the arrow or hold it continuously until it goes where you want. For example, if you want the test cut in the bottom right corner...hold the "down" arrow and then hold the "right" arrow. Once you have the blade exactly where you want it to test cut, click "Test Cut."
Here's a quick video to demonstrate. Keep your eye on the mouse hovering over the test cut arrows as well as the blade housing.
When the test cut is complete, the blade

If you're satisfied, you can confidently send your design to cut by clicking "Send to Silhouette."
If the material does not easily weed in the test cut location, adjust the cut settings and blade depth and perform another test cut, moving the test cut location to another spot on the material.
Now that you know you won't be wasting any more vinyl (or other materials)...buy all the pretty colors! Personally, the glitter HTV from Expressions Vinyl is my absolute favorite, but of course moving the test cut location works on any and all materials!
Note: This post may contain affiliate links. By clicking on them and purchasing products through my links, I receive a small commission. That's what helps fund Silhouette School so I can keep buying new Silhouette-related products to show you how to get the most out of your machine!
Thanks for coming to class today at Silhouette School. If you like what you see, I'd love for you to pin it!

Get Silhouette School lessons delivered to your email inbox! Select Once Daily or Weekly.
Subscribe to:
Posts (Atom)