The Foil Quill - which started shipping from certain retailers, including Swing Design, last week makes adding foil to adhesive vinyl - like Oracal 651 and 631 - very easy with the Silhouette. While this foil and cut tutorial is geared toward vinyl, the foil and cut process works the same for other materials as well.
This tutorial assumes you know the basics of how to use the Foil Quill so if you need a refresher on this beginner Foil Quill and Silhouette tutorial will walk you through the process step by step.
Before you get started with adding foil on vinyl, you'll need to set up the design in Silhouette Studio. This is a multi-step process and cutting is a separate process so to make this free Silhouette tutorial more manageable, I am going to split it into two parts. The second part - How to Foil on a Vinyl Decal - will be released on Silhouette School blog tomorrow.
Now because we need to both foil and cut, the Silhouette CAMEO 3's two tool carriages will be used and we'll assign cut lines and foil lines to each of the two tools.
Free Silhouette Mandala Vinyl Design
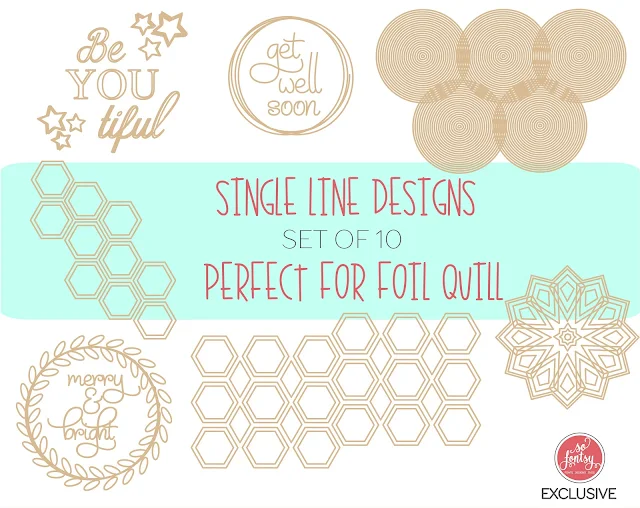
For your first foil vinyl decal, I suggest you download the free practice design created specifically for this project so you can follow along. You can grab the free mandala for Silhouette as part of the free set of 10 Foil Quill designs on our sister site So Fontsy. And bonus...it will also come with the commercial use license.Set Up a Foil and Cut Vinyl Decal Design
Open the design in Silhouette Studio.Start by ungrouping the design.
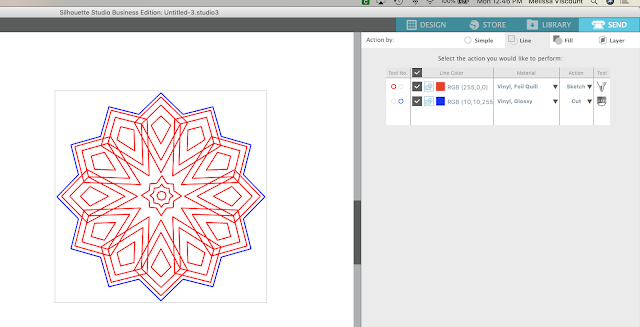
We want to cut the vinyl decal on that outer edge only, but foil all the rest of the lines. To make it easy, we'll give each different color lines.
Change the line color of the outer line only to blue.
Select all of the cut lines and size your design.
Place the design towards the bottom of the mat. This will allow you to remove the foil between the foiling and cutting process without removing the cutting mat from the machine.
How to Use Cut By Line Color with Two Silhouette Tools
Open the Send panel at the top click Action by: "Line".
From here we'll change the settings for each the red and the blue tools.
The red tool will be the Foil Quill so adjust the Silhouette cut settings for using the Foil Quill on Vinyl as follows:
Tip: Add a custom material setting to your Silhouette Studio material list so you don't need to manually enter them every time you foil on vinyl.
The blue line will be the vinyl cut line and will be associated with the Blue Tool 2. Change the blue tool material to Vinyl, Glossy and the tool to Ratchet Blade (the Autoblade can't go in the blue carriage) and adjust the action to "Cut."
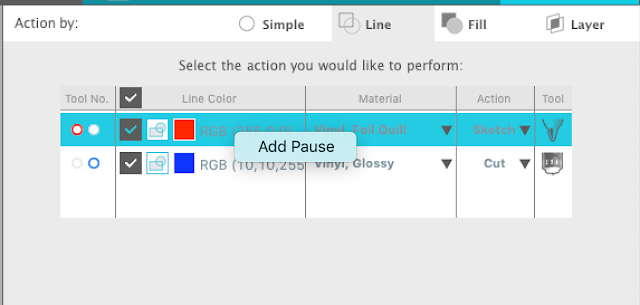
Now right click on red tool so you can add a Pause between the two options. This will give you time to remove the foil sheet before the cutting begins.
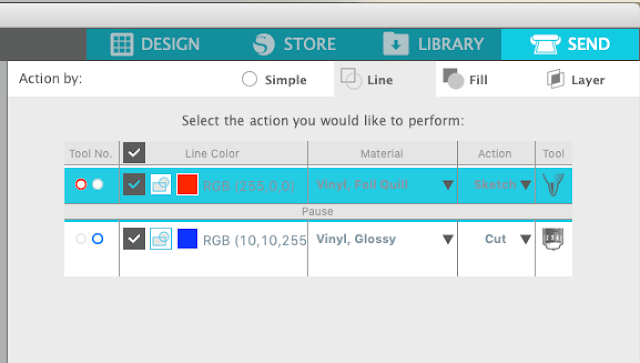
By this point your Send panel should look like this.
Take a deep breath - you got it all set up and you're finally ready to begin the foiling and cutting process. That part of the tutorial I'll be sharing tomorrow..including the trick to make sure the foil doesn't rub off the vinyl!
Note: This post may contain affiliate links. By clicking on them and purchasing products through my links, I receive a small commission. That's what helps fund Silhouette School so I can keep buying new Silhouette-related products to show you how to get the most out of your machine!
Get Silhouette School lessons delivered to your email inbox! Select Once Daily or Weekly.


.png)


No comments
Thanks for leaving a comment! We get several hundred comments a day. While we appreciate every single one of them it's nearly impossible to respond back to all of them, all the time. So... if you could help me by treating these comments like a forum where readers help readers.
In addition, don't forget to look for specific answers by using the Search Box on the blog. If you're still not having any luck, feel free to email me with your question.