There are actually two different ways to do this: using the Fill Patterns tool or using the crop tool in the Modify tool panel.
Showing posts with label Patterns and Backgrounds. Show all posts
How to Fill a Shape with a Pattern in Silhouette Studio
Wednesday, April 22, 2026
Filling a shape with a digital pattern is one of those Silhouette Studio features that often gets overlooked.
Read on for exactly how to do it in both Silhouette Studio V4 and V5.
Quick Fix When Scaling Patterns in Silhouette Studio Creates White Grid Lines
Monday, January 12, 2026
Have you ever tried to scale a seamless pattern in Silhouette Studio only to get white grid lines?
This is not an uncommon problem especially if you scale to a pretty small size like you might need to if you're creating patterns for printing vinyl, HTV or fabric. So how do you get rid of those annoying white grid lines?
In this tutorial I'm going to show you a quick and easy hack that I use in Silhouette Studio to hide seamless pattern grid lines!
How to Turn an Image into a Pattern in Silhouette Studio (The Easy Way)
Wednesday, December 4, 2024
You can turn images into a pattern with just a few clicks in Silhouette Studio.
The Advanced Replicate tool makes turning any image including a logo into a repeating pattern super fast and easy. Keep reading to learn how!
Design Trick! Using Glass Can Wraps as Patterns for Printing
Monday, October 14, 2024
If you want to get more out of the designs you own - use them in other ways! Glass can wraps become printed patterns or vertical sign designs are perfect for a sleeve or pant leg.
Here's my secret for turning glass can wraps into digital patterns I can print!
How to Design Pattern Sticker Sheets with Silhouette Studio
Wednesday, October 2, 2024
You can take your sticker sheets up a notch by replacing the boring white background with a fun pattern by making pattern sticker sheets.
This is relatively easy to do in Silhouette Studio. Follow the steps below to create your own custom sticker sheets with a pattern background.
How to Add New Digital Patterns to Silhouette Studio Pattern Fill
Tuesday, December 19, 2023
You can add new digital patterns to Silhouette Studio quickly and easily to be used to fill shapes.
You do need Silhouette Studio Designer Edition or higher in order to import custom patterns. Read on for a quick step by step and video for how to add your own patterns.
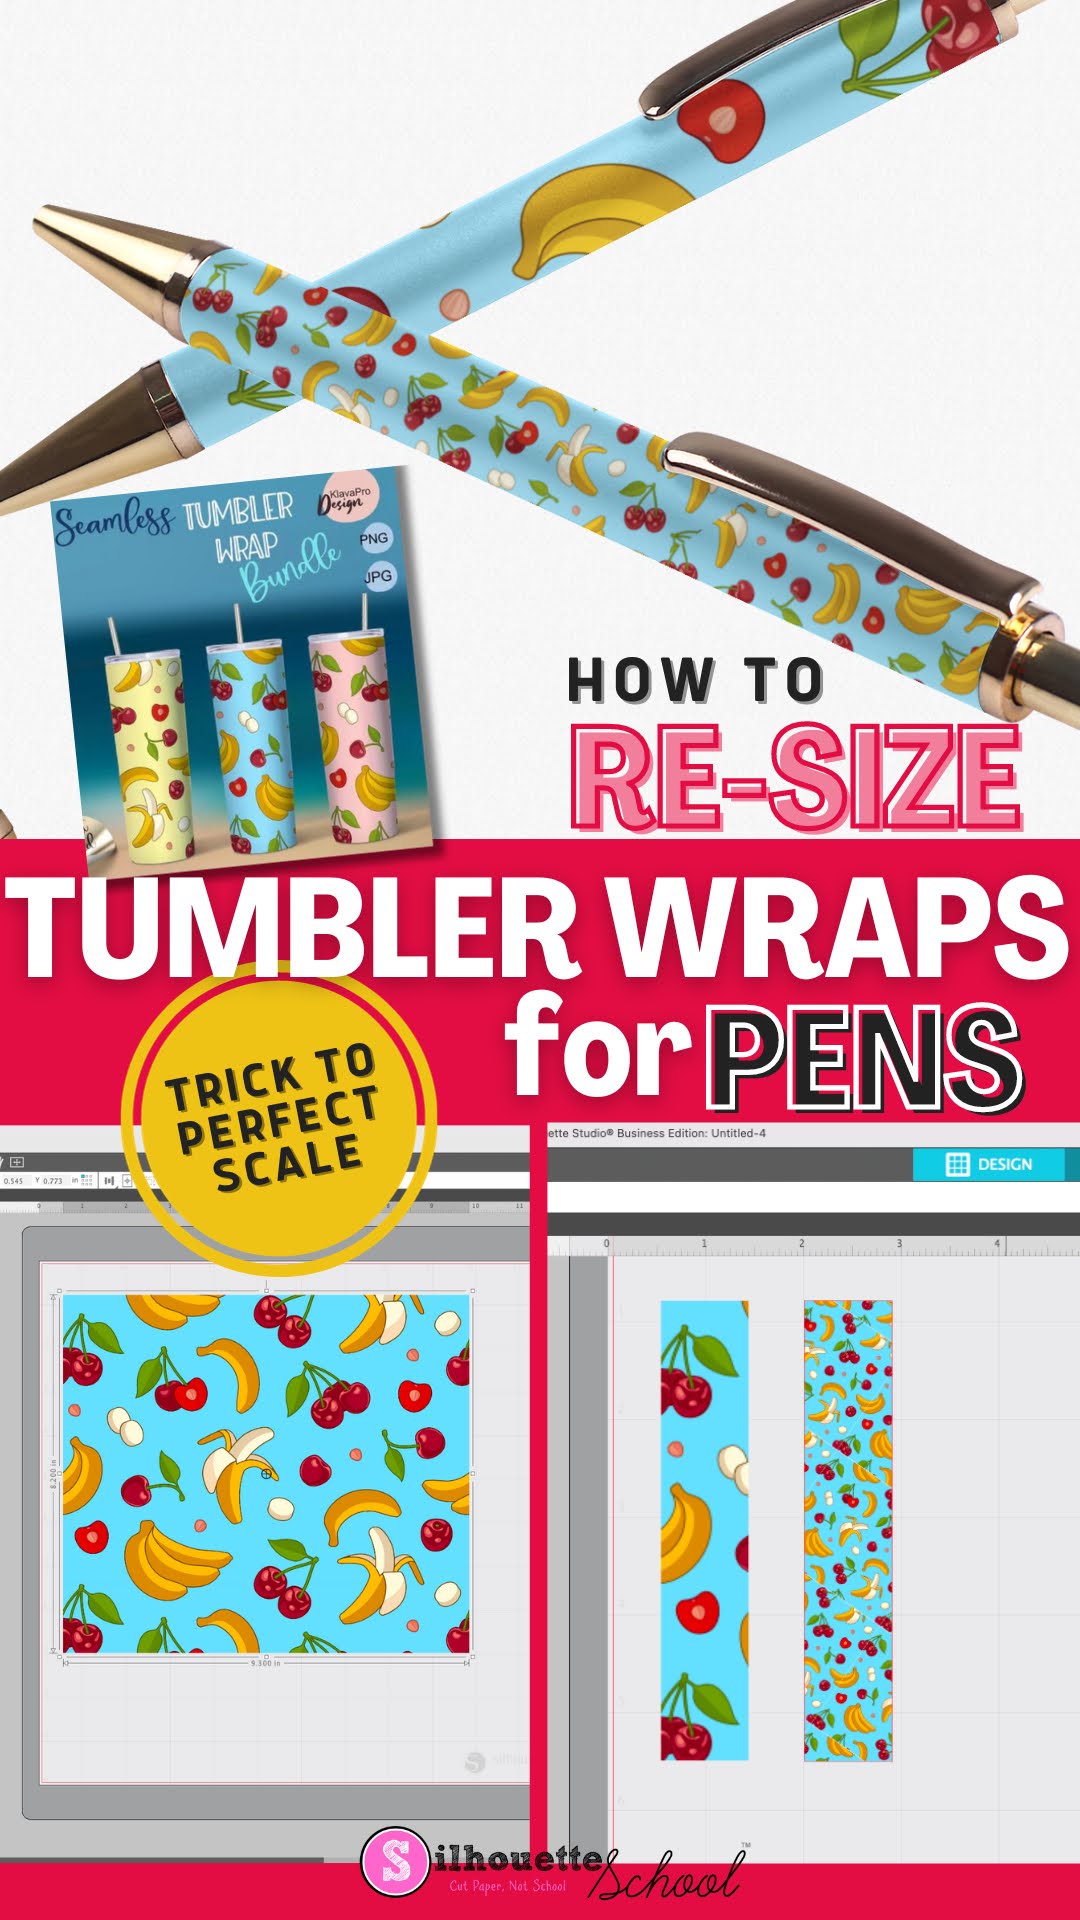
How to Re-Size Sublimation Tumbler Wraps for Sublimating Pens
Monday, October 23, 2023
Did you know you can use sublimation tumbler wraps for sublimating pens?!
The trick is all in how you resize them...and this can all be done in Silhouette Studio. Read on for the step by step tutorial on resizing sublimation tumbler wraps so they're the perfect size and scale for sublimation pens!
Transfer Properties Tool: Silhouette Studio V4 Tutorial
Thursday, August 25, 2022
Want to assign the same properties - font style, fill color, line style, etc - from one design or text box to another?
The Transfer Properties tool makes it super easy and fast. They moved it with the change to Silhouette Studio V4 so I thought it was worth pointing out again.
How to Fill an SVG with a Photograph in Silhouette Studio
Tuesday, July 26, 2022
There's no better way to customize your projects than using your own photographs!
In this tutorial, we'll show you how to fill an SVG design with a photograph in Silhouette Studio.
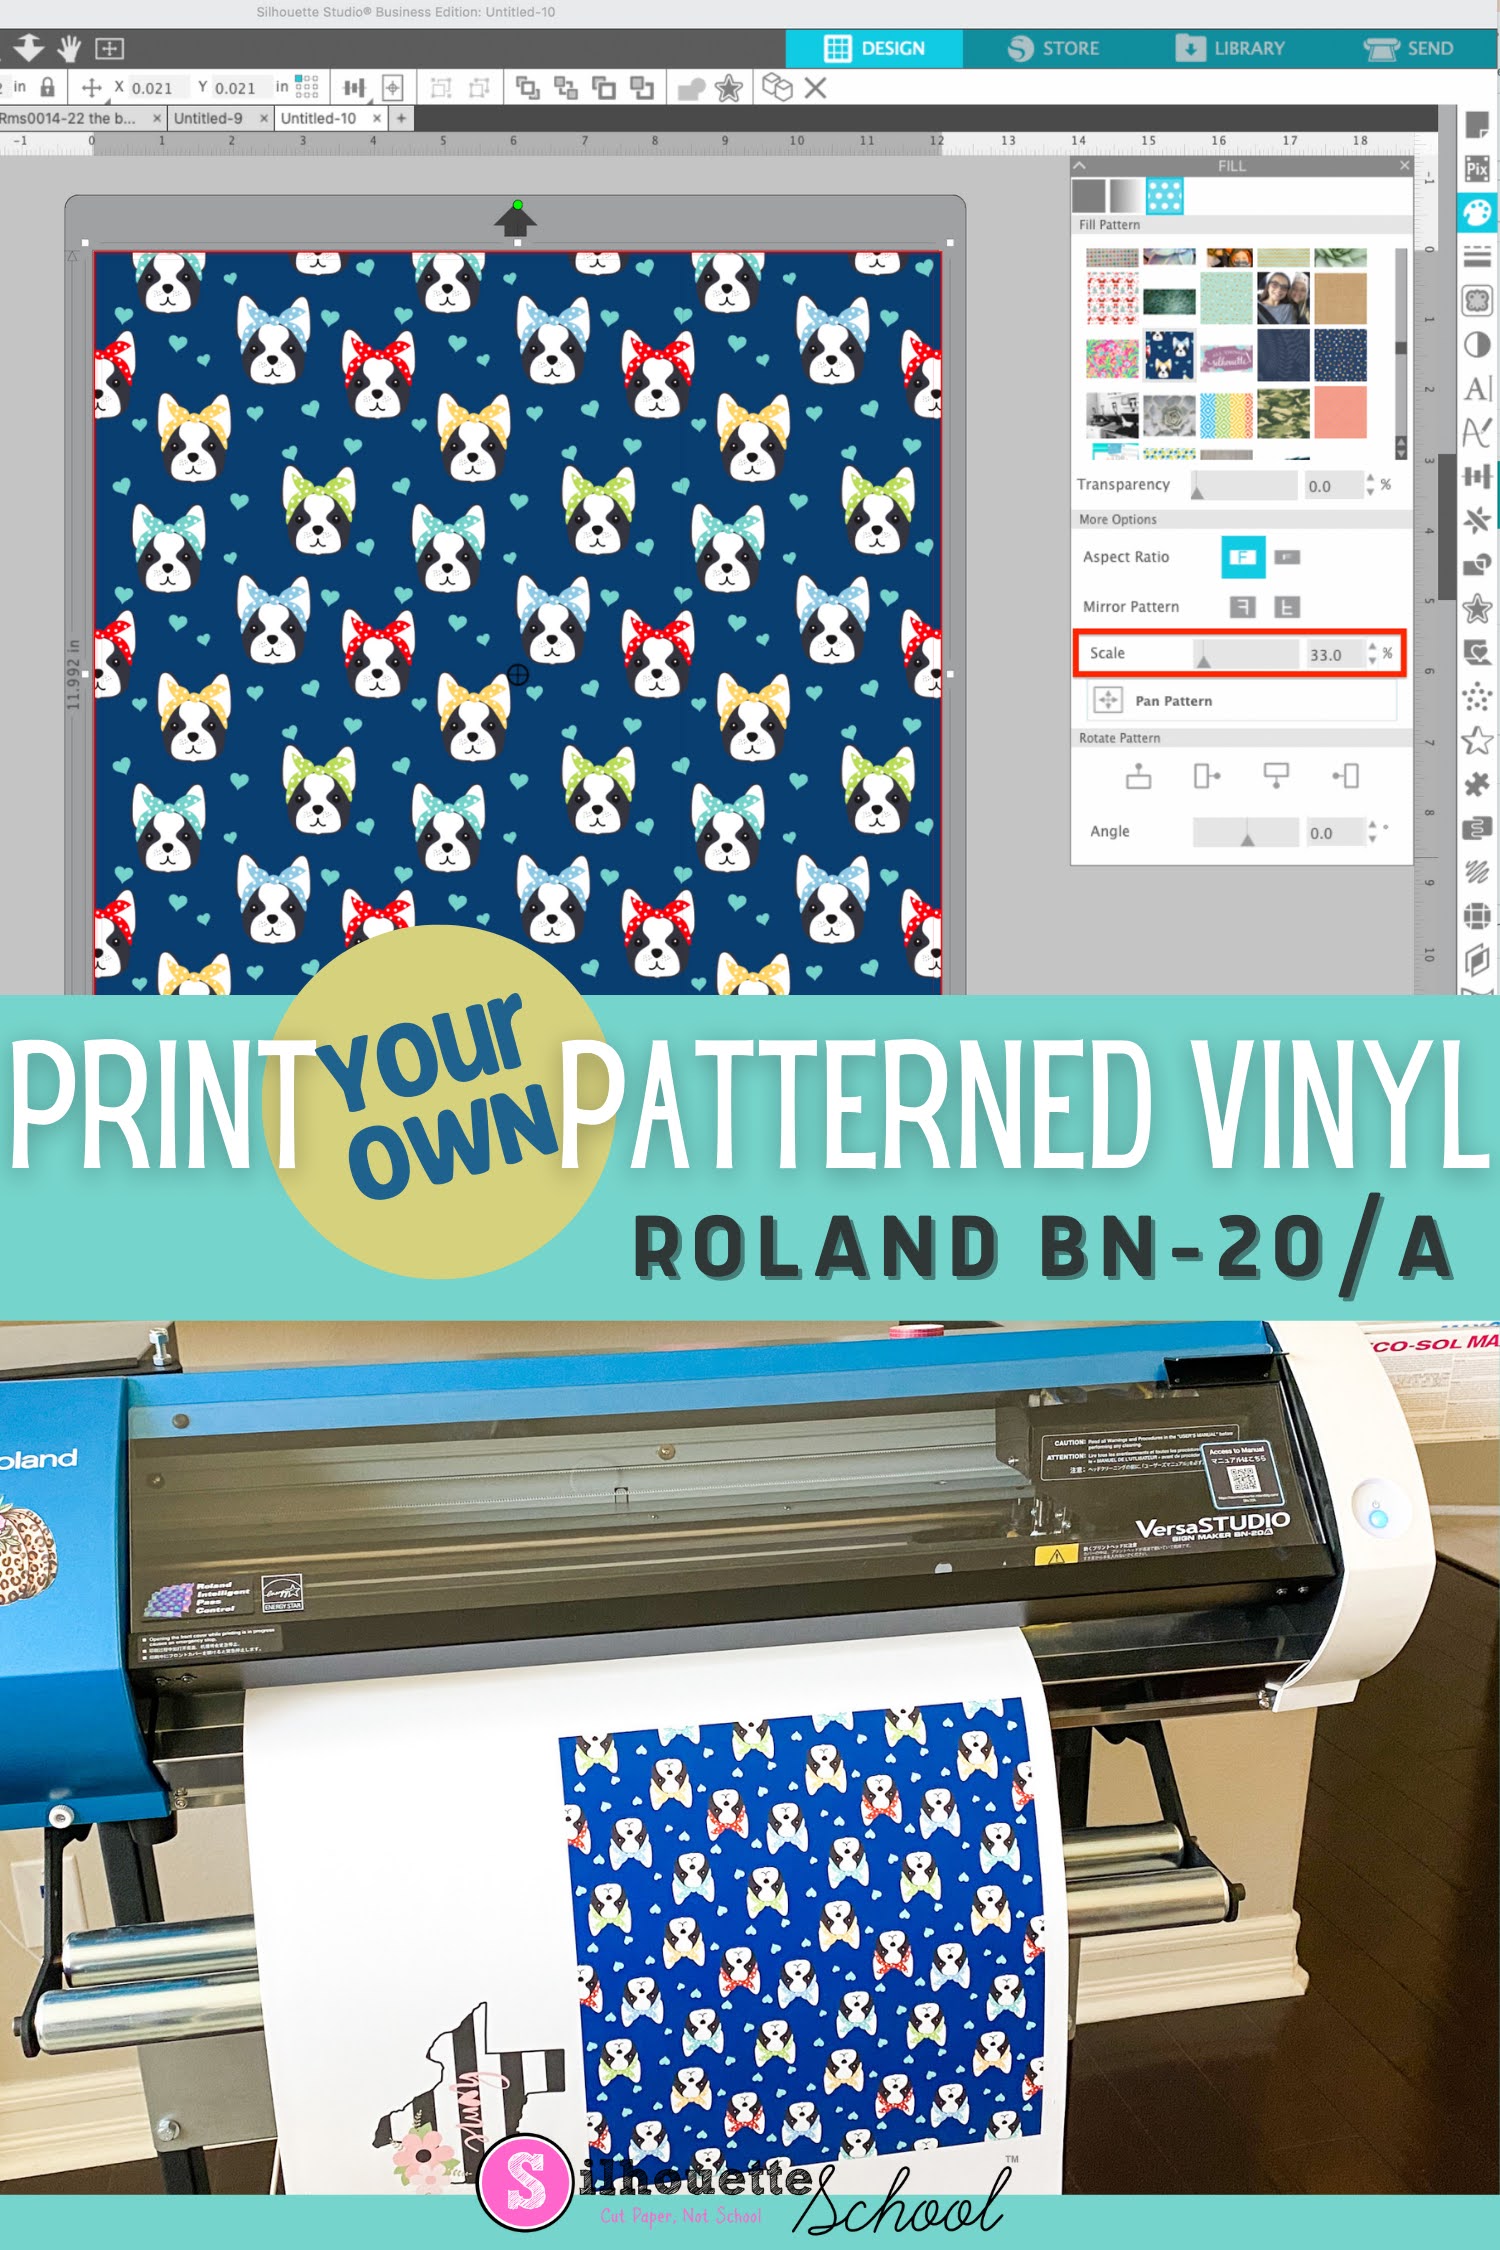
How to Print Patterned Vinyl at Home
Wednesday, July 20, 2022
There are various ways to print your own patterned vinyl.
You can print patterned vinyl with an inkjet printer and inkjet printable vinyl as I shared previously, but you'll get the best results, the longest lasting, and the highest quality with an eco solvent printer and cal vinyl. In this tutorial I'll share the steps for how to print patterned vinyl or heat transfer vinyl with the Roland BN-20A or BN-20.
How to Make DIY Paper Medallions with Silhouette CAMEO
Tuesday, June 21, 2022
Paper medallions are a fun paper craft that allow for a lot of creativity.
How to Fill Designs with Custom Patterns in Silhouette Studio
Wednesday, December 8, 2021
Need some ideas on how to use digital patterns in Silhouette Studio?
This tutorial will show you how to use custom patterns to fill designs for print and cuts!
How to Print Full Sheets of Custom Patterned Paper with Silhouette
Tuesday, December 7, 2021
If you haven't yet been introduced to working with digital paper and digital patterns in Silhouette Studio, then say hello to a whole new world of paper crafting!
Digital patterns give you this amazing ability to customize and print your own patterned paper and allow you to be even more creative in your paper crafts. No need to be intimidated when it comes to digital paper and digital patterns because in this tutorial we'll show you how you can use digital patterns with Silhouette Studio for your paper crafting projects!
How to Import Photos to Silhouette Studio To Use as Fill Patterns (3 Easy Steps)
Wednesday, October 6, 2021
You can import photos into Silhouette Studio and use the photo to fill a shape in just a few easy steps.
Importing photos to Silhouette Studio through the Patterns folder allows you the greatest control including cropping photos in Silhouette Studio, filling other shapes with the image and printing and cutting photos.
Patterned HTV: 3 Reasons I Love Thermoflex Patterned Heat Transfer Vinyl
Wednesday, September 23, 2020
If you're a fan of patterned heat transfer vinyl (and who isn't?), you know that sometimes cutting and applying it can be a rather confusing process.
This is a sponsored post, but all opinions are my own
The patterned HTV often comes without a carrier sheet (meaning some HTV goes against the rule of cutting in reverse) and the design can get lost in the pattern making it difficult to weed. But with Thermoflex Fashion Patterns both of those issues are non-existent. With the Thermoflex patterned HTV there's no second guessing - you cut it just like normal heat transfer vinyl and the back is white making the cut lines easy to see when weeding.
How to Vinyl Wrap a Coffee Mug (Without Wrinkled Vinyl)
Tuesday, July 7, 2020
If you love the look of animal print, but don't have a sublimation printer and mug press, you can still add striking animal print patterns to your coffee mugs - just use adhesive vinyl and your Silhouette Cameo!
So, for all you animal lovers out there, here's how to do it.
Measure Your Mug & Trace the Pattern
First, wrap a tape measure around the widest part of the mug to measure how wide your vinyl needs to be. Then, measure how tall the mug is to get the height measurement of your vinyl. To give yourself a little leeway, add an inch or so to the measurements just to make sure you cut enough vinyl to cover the mug.
Next, open the animal print file in Silhouette Studio and resize it to the appropriate measurements you just took of your mug. For this coffee mug, I used one of the tiger stripe animal print patterns from the Mug and Tumbler Designs Bundle.
You can find a total of 19 animal print patterns (and so many more designs) in the Mug and Tumbler Designs Bundle over at SoFontsy.
This tiger stripe animal print pattern is a PNG file, which is an image file because it really meant to be a fill pattern and the perfect file format for printing this design on sublimation paper for pressing.
However, a PNG file is not a cut file. See what happens when you go to the Send panel? The only cut lines (red outlines) that appear is a big rectangle around the edge of the whole design (which is not what we want). We want the individual tiger stripes to be cut out.
So, to create cut lines around the tiger stripes, you need to trace this image.
Open the Trace Panel from the right tool bar. Click Select Trace Area and drag a box around the entire animal print pattern.
Since this image file has very high contrast, the trace is very easy, and you shouldn't need to make any adjustments. Just click the Trace button and then red lines will appear around the black stripes. Click into the black part of one of the stripes, then drag it down and away from the red lines.
When you click one of the red lines, you can change the fill and outline color of them to black. While the traced tiger stripes may now look exactly the same as the original file, when you go to the Send Panel, you'll see that now a red outline (cut lines) appears around each of the stripes.
Be sure to delete the original PNG file (or move it off your mat) before sending this design to your Silhouette Cameo for cutting.
I'm using patterned permanent adhesive vinyl, but you can use any color of permanent vinyl that you like. Load your mat, then send to cut.
After cutting, do not weed the vinyl. If your printed vinyl has a white border around the edge, just use a paper trimmer to trim that part off so that all that remains is the colorful pattern.
Prepare Your Mug for Vinyl
Now, take your mug and line either side of the handle with a 1/8-inch-wide strip of tape like Scor Tape. Then, line the top and bottom edge with 1/4-inch-wide Scor Tape. These strips of tape will create guidelines for trimming off the excess vinyl later.
Usually you would use transfer tape to move the vinyl onto the mug, but we are going to hand place each of the stripes.
Peel up one of the stripes from your cut vinyl and begin wrapping it around the mug. Start applying it at one of the 1/8-inch Scor Tape strips and be sure to overlap the vinyl over the tape a little.
Press the vinyl stripe down firmly as you wrap it around the mug. The vinyl is pliable so you can slightly stretch it around the
mug to make it lay completely flat. If you’re using printed vinyl, then don’t scrape the vinyl down too hard so you don’t scratch the pattern. If you didn't get the placing quite right at first, you can lift the vinyl stripe and re-place it.
Next, pick up another vinyl stripe and lay it across the mug just like the previous one, but leave a little gap between the two pieces. Repeat this process until you've covered the mug with the striped pattern, leaving a gap between each of the vinyl stripes.
If you find one of the vinyl stripes is too long and difficult to work with, you can always trim it with scissors first before laying it down. Just don’t leave any hard-cut lines in the vinyl, round them off with the scissors, and no one will even know you trimmed them down.
Burnish and Trim the Excess Vinyl
When the vinyl animal print has been applied to the mug, burnish the vinyl to the mug very, very well. Also, burnish the vinyl where it overlaps the pieces of Scor Tape. When you burnish this area well, you will see an impression of the Scor Tape in the vinyl where it overlaps underneath it.
Take a sharp craft knife and run the blade along this impression in the vinyl. Because Scor Tape has a little bit of "thickness" to it, you can gently rest the side of the blade against the Scor Tape as you run it along the tape's edge to cut off the excess vinyl.
Use a sharp blade, work slowly, and be careful. Cut off the excess vinyl along either edge of the handle and around the top and bottom as well. Remove the excess pieces of vinyl and then remove the pieces of Scor Tape.
Then, burnish the edges of the vinyl along where you trimmed them and then admire your handy work! What a gorgeous custom animal print pattern on this coffee mug.
You will want to be sure to let the vinyl cure for about 72 hours before using or gently hand washing (only) the mug!
Why lay the vinyl stripes one at a time?
At first, I tried to apply the vinyl stripes to the mug all at once with a piece of transfer tape - just like a regular vinyl decal. It was a big mess! The problem is the mug is slightly tapered which makes it almost impossible to get the transfer tape and vinyl stripes to lay down smoothly. The transfer tape buckled, and the vinyl stripes started to overlap and stick to each other. I spent more time pulling up and re-placing the transfer tape, than I did when I just applied each stripe individually.
Additionally, when you try to apply the stripes all at once with transfer tape, you have to weed out the excess vinyl between the stripes. When you place each stripe individually, you don't need to weed, and you can actually use the vinyl between the stripes as stripes on another mug - so no waste!
There are many more animal print patterns in the Mug and Tumbler Designs Bundle, plus so much more that they really isn't a reason to drink out of plain boring mugs and tumblers again. This bundle is sure to make all your mugs and tumblers look fabulous. Check out the bundle over at So Fontsy before it ends on July 13.
Note: This post may contain affiliate links. By clicking on them and purchasing products through my links, I receive a small commission. That's what helps fund Silhouette School so I can keep buying new Silhouette-related products to show you how to get the most out of your machine!
Get Silhouette School lessons delivered to your email inbox! Select Once Daily or Weekly.
Free Bandana Dog Pattern (& Design Your Own Seamless Patterns Tutorial VIDEO)
Friday, May 1, 2020
It's everyone's favorite time of the week again here at Silhouette School! Freebie Friday where we give you a free Silhouette Design!!
This week I'm actually sharing a free digital pattern for download with you that you can import into Silhouette Studio as a fillable pattern.

But I'm also going to reveal my secret and give you a rare opportunity!
Adding Patterns to Silhouette Studio in 3 Easy Steps (V4 Tutorial)
Tuesday, March 5, 2019
How to Bulk Import Digital Patterns into Silhouette Studio
Wednesday, September 19, 2018
If you haven't been using digital patterns or paper packs for your Silhouette projects, you're missing out.
It's not only easy to use them, they can take your custom paper projects to the next level.
How to Add Custom Pattern Fills in Silhouette Studio V4
Thursday, May 10, 2018
Did you know you can add your own pattern fills in Silhouette Studio?
If you have Silhouette Studio Designer Edition you're able to import custom digital patterns directly into Silhouette Studio. Custom patterns can be anything from a photo to a digital background or seamless pattern.
Subscribe to:
Posts (Atom)


.png)