


Secret to Easily Designing Subway Art in Silhouette Studio
Monday, February 29, 2016
I get asked regularly about how to design subway art in Silhouette Studio. It’s actually far easier than you’d think....if you know the one easy trick!
Silhouette Hack: How to Print and Cut on Scraps (Without Registration Marks)
Thursday, February 25, 2016
We've all been there - you print on a piece of printable material (sticker paper, printable htv/vinyl, or transparency) and then you end up throwing the rest of the piece out. Today Silhouette School weekly contributor Becky is here with a clever trick for maximizing scraps after you print and cut on them!

Today I'm sharing a Silhouette tip rather than a full blown tutorial. Many of you may have already figured this out but for me it was one of those "ah ha" moments. I love being able to put together a quick last minute gift using printable media. I've used printable vinyl, white and clear sticker sheets, transparencies and heat transfer material but I'm sure there are a gazillion more materials that I haven't discovered yet.
My only hang up is that once I print my full sheet with the registration marks it can't be put through the printer again because the registration marks won't line up. This means I have to fill up the page with designs or all the blank space on the sheet is wasted. At that point my quick last minute gift turns into a huge time guzzler.
Getting back to my tip, I wanted to place a personalized wine label on a bottle of champagne for an anniversary gift only to discover that I had no full sheets of printable vinyl or sticker paper left. {UGH} But I did have some scraps that for whatever reason I was
hoardingsaving for a rainy day. And that's when it hit me. My printer settings adjust to accommodate various paper sizes including 4" x 6" (and other various sizes!).
That's when it hit me - cut the scrap to size, print on it and then use Pixscan to cut it! And that means no registration marks are required!
I pulled out my handy dandy paper cutter and cut the scrape of printable vinyl to 4" x 6". I adjusted by printer settings to accommodate the smaller size material and then printed my image.
I then followed Melissa's post Silhouette PixScan Tutorial for Beginners. And yes, I confess, I had never used my PixScan mat before this (yikes!). Her step by step instructions made this so easy.

The short of it is: I placed by printed image directly onto the Pixscan mat and took a picture of the entire mat. The image was imported it into Silhouette Studio using the Pixscana tool in Silhouette Studio. I simply traced the outer edge of the design, since I was working with a simple rectangle, in this case. Without moving my image on the mat I loaded the PixScan mat into the Silhouette CAMEO and got the perfect cut.

Excited by my first successful experiment, I tried it again with a small piece of transparency I had left from making Floating Christmas Ornaments. Even the transparency printed perfectly at this size. I can't tell you how many times I cut one template for an ornament and threw out the rest of the sheet - and these transparencies can be expensive!

So now you really have a reason to save your scraps - and some money! When you can't print registration marks, you can always print and use Pixscan for scraps!

Note: This post may contain affiliate links. By clicking on them and purchasing products through my links, I receive a small commission. That's what helps fund Silhouette School so I can keep buying new Silhouette-related products to show you how to get the most out of your machine!
Thanks for coming to class today at Silhouette School. If you like what you see, I'd love for you to pin it!


Get Silhouette School lessons delivered to your email inbox! Select Once Daily or Weekly.

Heat Press Comparison: Clam Shell vs Swing Away Heat Press
Wednesday, February 24, 2016
I think it's about time we do a heat press comparison around here! I know lots of you want to know which heat press is best and so today I'm going to go through the pros and cons of a swing away vs a clam shell heat press and you can decide what's best for you.


Silhouette School Office/Craft Room Makeover: Behind the Scenes
Tuesday, February 23, 2016
I get a whole lotta questions about my office...none more than about my lamp (which I picked up from a neighbor at a yard sale and spray painted). But today I'm not talking about the lamp or the chair, I'm talking about how I finally got my home office/craft room/blogging headquarters organized!!

As you can imagine when you have a blog like Silhouette School you have a lot of...stuff. I'm talking five Silhouette machines (Portrait, CAMEO, CAMEO 2, Curio, and Mint), a heat press, lamintor, Xyron, printer, computer, enough vinyl to make my husband cringe every time another tube mailer shows up in the mail, endless stacks of papers, supplies, tools and gadgets to demo, review, and use.
The problem is I only have so much room.
Love You a Latte Mug: Free Silhouette Studio Cut File
Friday, February 19, 2016
It's Freebie Friday and this week I'm sharing a cute little mug and text design with you that can be used two ways.

Silhouette School Launches Live One-on-One Web-Based Silhouette Tutoring
Thursday, February 18, 2016
 Oh man, am I nervous...I always get that knot in my stomach when I launch a new book or a new product or service or something totally out of my comfort zone. Today's no different - as I am thrilled to announce Silhouette School is now offering LIVE web-based tutoring!
 The Silhouette School Tutoring Program is a really unique program that provides live one-on-one hour-long tutoring sessions. The best part is it doesn't matter where you are - since it's all web-based!!! All you need is an internet connection and Skype and you can connect with your tutor and get all the help you need to get more out of your Silhouette machine!
Importing .Studio Files, JPEGs and SVGs Directly into Silhouette Studio Library
Wednesday, February 17, 2016
Did you know you can quickly and easily import files directly into your Silhouette Studio library? You can do so without having to open the designs in a work space first and manually saving them to the library.

This is great for when you download a file from somewhere other than the Silhouette Online Store, but you want to keep in it your library.

This is great for when you download a file from somewhere other than the Silhouette Online Store, but you want to keep in it your library.
Pallet Wood and Paper Signs with Silhouette (The Unlikely, but Awesome Combo)
Tuesday, February 16, 2016
Wood pallet projects are a popular one with Silhouette crafters - but did you ever consider combining wood with paper?! One of the great things about having guest bloggers on Silhouette School every once in a while is sharing different crafting techniques...and that's just what Holly from Ribbons & Glue is sharing today!

Silhouette School Returns to All Things Silhouette Conference November 2016
Monday, February 15, 2016
Guess who's headed south again to speak at the third All Things Silhouette Conference? This girl right here! Terri Johnson, who organizes the amazing two day conference about all things Silhouette, has just opened up registration for the November 2016 conference which will be held November 5 and 6 outside of Atlanta.

Using an OttLite Light Box for Weeding Vinyl (Silhouette School Review and Giveaway)
Anyone else guilty of holding their vinyl and HTV up to the light or window at every possible angle to try to get an easier read on where to weed?
 |
| This is a sponsored post, but as always, all opinions are my own. |
Free Weekly Meal Planner Printable or Planner Insert (Silhouette Studio Cut File)
Friday, February 12, 2016
It's Friday and on Fridays we share a free Silhouette Studio Cut File at Silhouette School. This week I'm sharing a meal planning design that can be used as a planner insert or as a printable to hang on the side of the fridge!


Exporting a Silhouette .Studio File as PDF on PC
Thursday, February 11, 2016
Exporting Silhouette Studio designs as PDF is something that's necessary at times - most often for remote print and cuts, printables, and sharing. I've shared on Silhouette School previously how to export as a PDF on a MAC, but today Silhouette School weekly contributor and house PC expert, Becky Dykes from My Paper Craze, is here with details on how to export a .studio file as a PDF on a PC.
")
")
How to Move the Test Cut Location Anywhere: Silhouette CAMEO/Portrait Tutorial
Wednesday, February 10, 2016
Oh happy day...today I'm sharing a quick Silhouette trick for you that's going to save you a ton of wasted material and hair pulling. It's just not the beauty of the test cut, it's the ability to move the test cut location...anywhere!
 Let's say you take yourself on a little shopping spree at Expressions Vinyl...you wait your two or three days and all the pretty vinyl and glitter HTV arrives in the mail.

You're so anxious to cut it you go for it...wah wah wah. There's nothing like a kill joy when the gorgeous glitter heat transfer vinyl (or a new type you haven't cut before) isn't cut all the way through because you had the wrong cut settings.
I hear this time and time again from people that they've wasted an entire sheet of vinyl or HTV due to the wrong cut settings. If only they'd done a test cut and "wasted" half a square inch of that glitter HTV rather than the whole sheet.
The test cut gives you a tiny sneak peek into whether your cut settings will work for your material...no more guessing. But here's the best part...you can actually move the test cut location ANYWHERE. I love doing this for two big reasons:
Open up Silhouette Studio and click on the 'Cut Settings' window. That's the little blade along the top tool bar.
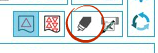
Pick your material. In this case I have a custom material listing for 'Glitter HTV.' After you select the material, use the scroll bar to scroll further down the page. Use the suggested cut settings in Studio to adjust the blade.
Right below the cut settings, you'll see the test cut button. To the left of it are a few directional arrows on a blue square...bet you never noticed them before did, ya?. Don't press them yet....but they are key!
Place that pretty Glitter HTV onto the mat with confidence. Load the mat into the machine as you normally would.

Now in Silhouette Studio use your mouse to hold down one of those directional arrows - pick the one that correlates to the direction you want the blade to move. You can tap the arrow or hold it continuously until it goes where you want. For example, if you want the test cut in the bottom right corner...hold the "down" arrow and then hold the "right" arrow. Once you have the blade exactly where you want it to test cut, click "Test Cut."
Here's a quick video to demonstrate. Keep your eye on the mouse hovering over the test cut arrows as well as the blade housing.
When the test cut is complete, the bladewill should return (but doesn't always...I have no idea why) to the home position. Since the test cut is easily accessible and not blocked by the rollers, you can use your hook tool to peel up the little square or triangle to see if the current cut settings work well for your material.

If you're satisfied, you can confidently send your design to cut by clicking "Send to Silhouette."
If the material does not easily weed in the test cut location, adjust the cut settings and blade depth and perform another test cut, moving the test cut location to another spot on the material.
Now that you know you won't be wasting any more vinyl (or other materials)...buy all the pretty colors! Personally, the glitter HTV from Expressions Vinyl is my absolute favorite, but of course moving the test cut location works on any and all materials!
Note: This post may contain affiliate links. By clicking on them and purchasing products through my links, I receive a small commission. That's what helps fund Silhouette School so I can keep buying new Silhouette-related products to show you how to get the most out of your machine!
Thanks for coming to class today at Silhouette School. If you like what you see, I'd love for you to pin it!


You're so anxious to cut it you go for it...wah wah wah. There's nothing like a kill joy when the gorgeous glitter heat transfer vinyl (or a new type you haven't cut before) isn't cut all the way through because you had the wrong cut settings.
I hear this time and time again from people that they've wasted an entire sheet of vinyl or HTV due to the wrong cut settings. If only they'd done a test cut and "wasted" half a square inch of that glitter HTV rather than the whole sheet.
The test cut gives you a tiny sneak peek into whether your cut settings will work for your material...no more guessing. But here's the best part...you can actually move the test cut location ANYWHERE. I love doing this for two big reasons:
- The default test cut is in the upper left corner of the mat, but in that spot you have to fully unload the mat to examine the cut. Moving it further down the page allows you to check out the test cut without unloading the mat and material.
- If your design is placed in the upper left corner of the cutting area, as many crafters do, the test cut could get in the way of the design cut..moving it eliminates that worry. I prefer to move it to the right side, near the bottom.

Open up Silhouette Studio and click on the 'Cut Settings' window. That's the little blade along the top tool bar.

Pick your material. In this case I have a custom material listing for 'Glitter HTV.' After you select the material, use the scroll bar to scroll further down the page. Use the suggested cut settings in Studio to adjust the blade.
Right below the cut settings, you'll see the test cut button. To the left of it are a few directional arrows on a blue square...bet you never noticed them before did, ya?. Don't press them yet....but they are key!
Place that pretty Glitter HTV onto the mat with confidence. Load the mat into the machine as you normally would.

Now in Silhouette Studio use your mouse to hold down one of those directional arrows - pick the one that correlates to the direction you want the blade to move. You can tap the arrow or hold it continuously until it goes where you want. For example, if you want the test cut in the bottom right corner...hold the "down" arrow and then hold the "right" arrow. Once you have the blade exactly where you want it to test cut, click "Test Cut."
Here's a quick video to demonstrate. Keep your eye on the mouse hovering over the test cut arrows as well as the blade housing.
When the test cut is complete, the blade

If you're satisfied, you can confidently send your design to cut by clicking "Send to Silhouette."
If the material does not easily weed in the test cut location, adjust the cut settings and blade depth and perform another test cut, moving the test cut location to another spot on the material.
Now that you know you won't be wasting any more vinyl (or other materials)...buy all the pretty colors! Personally, the glitter HTV from Expressions Vinyl is my absolute favorite, but of course moving the test cut location works on any and all materials!
Note: This post may contain affiliate links. By clicking on them and purchasing products through my links, I receive a small commission. That's what helps fund Silhouette School so I can keep buying new Silhouette-related products to show you how to get the most out of your machine!
Thanks for coming to class today at Silhouette School. If you like what you see, I'd love for you to pin it!
Get Silhouette School lessons delivered to your email inbox! Select Once Daily or Weekly.
Adding Reactive Foils to a Silhouette Print and Cut: Tutorial & Free Cut File
Tuesday, February 9, 2016
If you've been following Silhouette School for any length of time, you know there's no shortage of ways to create with it. Today I'm so excited to have Pam from Get Silvered on the blog sharing an awesome way to take your print and cut projects up a notch by adding reactive foil!

Hi! I'm Pam from Get Silvered and today, I'm sharing a tutorial to create a Valentine's Day card using Print and Cut techniques embellished with Reactive Foil. Download the Silhouette Studio cutting file V3 version here or V2 version here so you can play along, or use the techniques with another design of your choice.
This project requires a laser printer or copier and a laminating machine. If these aren't available see the other suggestions at the end of the post. I also used Red Reactive foil.
Using 'Merge' to Open Multiple .Studio Files or (Layered) SVGs in a Single Silhouette Studio Work Area
Monday, February 8, 2016
Did you know you can open two or more .Studio files or SVGs in the same work area without manually copying and pasting them? It's true - it's called the Merge function in Silhouette Studio. Let me show you how it works and why you might want to use it. (I've included the written tutorial and below I've also included a YouTube video for those who prefer to watch than read.)

Set of 6 Valentine's Day Free Silhouette Studio Cut Files
Friday, February 5, 2016
If you're looking for some adorable Valentine's Day Silhouette Studio cut files you've come to the right spot! I'm teaming up with Cuttable Designs again for this week's Freebie Friday. Just like last time, they're offering not one, but six awesome freebies!


Silhouette Tips: Creating Your Own Designs in Studio with Basic Shapes
Thursday, February 4, 2016
If there's one thing I want to scream from the roof tops it's that you should NOT be intimidated to create your own designs in Silhouette Studio. There's nothing to be intimidated about...because you can always click UNDO. I talked extensively about designing in Silhouette Studio at the All Things Silhouette Conference in November, and now Silhouette School weekly contributor, Becky Dykes from My Paper Craze, is here to share her tips on how to go about designing in Silhouette Studio.

Designing a Shaped Print and Cut Card in Silhouette Studio
Wednesday, February 3, 2016
One of my favorite ways to use my Silhouette is with Print and Cut. Today I'm going to show you how to use a print and cut or a JPEG/PNG design to easily and quickly create a custom shaped card.

 The first thing you want to do is find your design. This can be a print and cut design from your Silhouette Studio library that already has cut lines around it or it can be a JPEG or PNG graphic that you import into Silhouette Studio. I'm going to use this adorable gem heart design from the February Bundle from The Hungry JPEG.

 The first thing you want to do is find your design. This can be a print and cut design from your Silhouette Studio library that already has cut lines around it or it can be a JPEG or PNG graphic that you import into Silhouette Studio. I'm going to use this adorable gem heart design from the February Bundle from The Hungry JPEG.
DIY Reusable Stencils with Silhouette (The I-Bet-You-Didn't-Think-Of-That Technique)
Tuesday, February 2, 2016
I get asked weekly (at least) what the best reusable stencil material is to cut with Silhouette. I'm gonna be honest, I'm always kind of "eehhhh...well...um...". Well, my friends, I'm pretty stinkin' sure I just found it in the most unlikely spot!

So a few weeks back I cutting some laminated pieces with my Silhouette...when I made what I'm considering the discovery of the year. After I cut the laminated pieces out I was left with a nice piece of lamination material with some perfectly cut shapes in it...and hello, lightbulb moment!!!

So a few weeks back I cutting some laminated pieces with my Silhouette...when I made what I'm considering the discovery of the year. After I cut the laminated pieces out I was left with a nice piece of lamination material with some perfectly cut shapes in it...and hello, lightbulb moment!!!
24 Silhouette Tutoroals, Tips, Freebies, and Hacks
Monday, February 1, 2016
And just like that, January is in the books! It was a super busy month here at Silhouette School!

We shared tons of free Silhouette Studio Cut Files, tutorials ranging from how to set up Silhouette Mobile App to how to stipple with Curio and Cut with Cameo's advanced settings. There were a number of "why didn't I think of that" hacks and some awesome guest posts. I'd say it was yet another successful month! In case you missed any tutorials, here's a recap of everything from Silhouette School in January.
(Just a heads up, if you want to make sure you never miss a tutorial, be sure to subscribe to the daily Silhouette School newsletter to get tutorials delivered right to your email!
Subscribe to:
Comments (Atom)


.png)


