If you are using inkjet printable vinyl sheets to print your own vinyl or create printable vinyl decals you need protect them with laminate.
Oracal's clear laminate sheets will help protect against smearing and fading to ensure your DIY pattern vinyl and printed decals keep their color!
Showing posts with label Saving Money. Show all posts
How to Clean and Restick a Silhouette Cutting Mat
Wednesday, April 17, 2019
Since you all went pretty much crazy over my tip on how to easily clean Silhouette cutting mats I figured why not just give the people what they want...
Best Oracal Vinyl Bundle...Ever (For Everyone)
Wednesday, February 20, 2019
Usually when I get asked about what's the best vinyl bundle I have to say...well it depends on what you want. No more!
If you're looking for the best Oracal 651 vinyl pack there's one bundle that's better than the rest...the one you can build yourself!
And good news - since originally sharing the Build a Vinyl Bundle option on Silhouette School, Swing Design is now offering even more Vinyl Build a Bundle options and they are continually adding more!
How (and Why) to use a Graphtec CB09 Blade with Silhouette CAMEO or Portrait
Monday, October 22, 2018
Looking for a Silhouette blade alternative that can cut smaller designs or text cleanly? I'm not taking about a sketch pen or an embossing tip - I'm talking about a cutting blade that cuts materials much like the way a Silhouette CAMEO or Portrait blade does - only, some would argue, better.
Perhaps you're looking for a longer lasting cutting blade or a cheaper alternative to Silhouette brand blades or blade that can deep cut. One of the most popular alternatives to the Silhouette ratchet blade is the Graphtec CB09 blade also called a Carbide blade.
Increased Tariffs Driving Silhouette CAMEO and Craft Supply Prices Up
Thursday, September 6, 2018
The price of the Silhouette CAMEO and Portrait machines - along with other craft machines, supplies and accessories - is going up.
The price increase is due to increased tariffs - an import tax - imposed on imported goods from China.
The price increase is due to increased tariffs - an import tax - imposed on imported goods from China.
Cheaper Alternative to Pressing Pillows: Pressing Pads!
Thursday, February 8, 2018
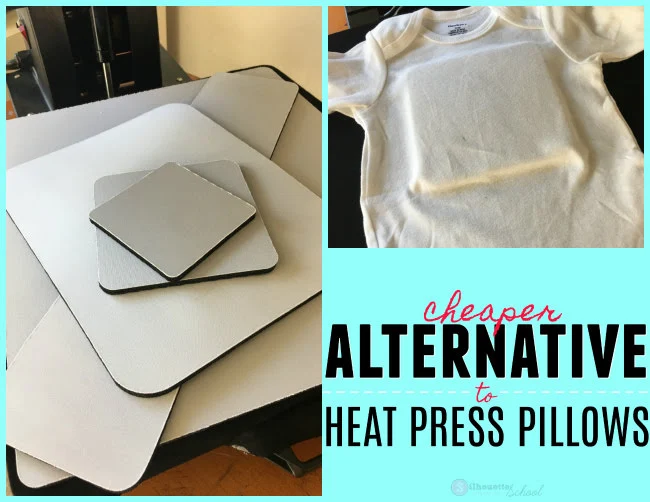
Pressing pillows are pretty much an essential heat pressing accessory - the problem is they're not cheap. BUT...I recently found out about an alternative to heat press pillows - and they're a fraction of the cost.
I'm not talking about making your own pressing pillows, which shared how to do here. I'm talking about pressing pads.
I'm not talking about making your own pressing pillows, which shared how to do here. I'm talking about pressing pads.
Amazon Prime Day 2017: Silhouette Craft Stuff to Watch, Buy, and Stalk!
Monday, July 10, 2017
Amazon Prime Day is back for 2017 and what better excuse to stock up on Silhouette CAMEO accessories and craft stuff!!
This year Amazon Prime Day (which boasts better deals than Black Friday) spans two days beginning Monday, July 10 at 9pm EST and stretching into late Tuesday, July 11.
I've been scoping out deals for more than a week now to get you ready for this and make sure you don't miss any of the Prime Day Deals. They don't really tell you what's going to be on sale too far ahead of time...but I have put together a Silhouette Prime Day Watch List for you - with a few love notes... so you can justify to the Mr. if necessary ;)
What Silhouette Accessories to Buy With Your Tax Refund
Wednesday, April 5, 2017
It's either your favorite time of year or your least favorite time of year. I hope you're on the favorite time of year side: the time you get a tax refund! Did you know that 8 out of 10 Americans get a refund and the average tax refund is $2800 according to the IRS!?
I don't know about you, but my craft habit could really do some damage with that! Since I get asked a lot about what types of Silhouette products I love and which accessories I can't live without I thought it would be fun to show you what I'd do if I used 20% of the average tax refund on craft supplies! (Let's be honest - no one is blowing their full tax refund on craft supplies...but if they are I need to be friends with them).
So...here's what I'd spend $560 on...
Easy DIY Cake Stencils with Silhouette
Monday, March 28, 2016
Happy Monday! I'm on vacation this week, but that doesn't mean Silhouette School's out of session....definitely not! Today we have Alexandra from Hedgehog Hollow blog in as a special guest blogger! She's here to share her tips and tricks for decorating cakes with Silhouette stencils - they're fast, easy and cheap to make!
8 Beautiful Commercial Craft Fonts with Special Characters (That WILL ALL Open in Silhouette Studio)
Wednesday, October 14, 2015
Silhouette crafters know it can be frustrating to buy a new commercial font only to realize later all the special characters are not accessible in Silhouette Studio - so today I'm sharing not one or two but EIGHT commercial fonts that you can fully open in Studio!
Being able to open the glyphs and characters has to do with how the fonts are coded by the font designer. Unfortunately, there are only a handful of font designers who are fulling unicoding their OTF fonts which allows them to be opened in Studio without the need for any other type of software.
Are you just hearing a bunch of font speak and designer jargin? Yeah me too...just know this:
The extra ornaments, glyphs and swooshes can all be accessed, as well, to make the fonts that much more exciting. It's a two step process...
1) Download and Install: For both MAC and PC users start by downloading and installing each font on your computer while Silhouette Studio is closed.
2) Opening Extra Fonts Characters: I have two tutorials on Silhouette School on how to access font glyphs and extras for MAC and PC users so I'm not going to bog down this post by repeating the steps....so refer to these tutorials if you're unsure how to gain access to the characters. Again, remember this only works with fonts that are specially coded like the 8 in The Hungry JPEG Crafters bundle.
Alright now for a few practical uses...For my first design, I used the Amigirl font.
I cut this one on etched vinyl and placed the decal on a glass candle jar that I emptied out and re-filled with mini pinecones and a tea light.
The design process was much the same for this pillow cover that I updated by adding the word 'family' using the Monkuta font from the Crafters Bundle. The original f and y were replaced with fancy letters to add some flare. For this no sew pillow cover project, I actually cut the text design on painters drop cloth to adhere to the pillow!
Using the beautiful - and perhaps my favorite of the set, Edelwies - I created this 'Stay Strong' design. You can see the two b's are different, as well as the e's - that's because, along with the v, they are all special characters.
I used Mastura, from the bundle, for 'Broom' on this Halloween sign I created!
As you can see the possibilities are pretty much endless and now that you are able to - and know how to - easily access the the special font characters designing text designs is a lot more exciting!
Remember though, as with all deals from The Hungry JPEG the Crafters Font Bundle will only be around for a month...the 8 specially coded commercial fonts for $15 will be gone mid November!
Note: This post may contain affiliate links. By clicking on them and purchasing products through my links, I receive a small commission. That's what helps fund Silhouette School so I can keep buying new Silhouette-related products to show you how to get the most out of your machine!
Thanks for coming to class today at Silhouette School. If you like what you see, I'd love for you to pin it!

Being able to open the glyphs and characters has to do with how the fonts are coded by the font designer. Unfortunately, there are only a handful of font designers who are fulling unicoding their OTF fonts which allows them to be opened in Studio without the need for any other type of software.
Are you just hearing a bunch of font speak and designer jargin? Yeah me too...just know this:
The Hungry JPEG worked with one of those designers to put together a beautiful set of 8 commercial use fonts - all of them with special characters and glyphs - and all of them accessible in Silhouette Studio. The best part is you get all of them in the Crafters Font Bundle with commercial license includes - for just $15!Here's a look at a few of the fonts, but remember, these are just 6 of the 8 fonts in their basic version.
1) Download and Install: For both MAC and PC users start by downloading and installing each font on your computer while Silhouette Studio is closed.
2) Opening Extra Fonts Characters: I have two tutorials on Silhouette School on how to access font glyphs and extras for MAC and PC users so I'm not going to bog down this post by repeating the steps....so refer to these tutorials if you're unsure how to gain access to the characters. Again, remember this only works with fonts that are specially coded like the 8 in The Hungry JPEG Crafters bundle.
Alright now for a few practical uses...For my first design, I used the Amigirl font.
- I typed 'happy' and 'fall' in two separate text boxes.
- All the purple characters are special glyphs I replaced the original font with.
- After I replaced the characters, I welded to the two lines together.
- Finally I put my text design in a circle and subtracted all to create my circle design.
I cut this one on etched vinyl and placed the decal on a glass candle jar that I emptied out and re-filled with mini pinecones and a tea light.
The design process was much the same for this pillow cover that I updated by adding the word 'family' using the Monkuta font from the Crafters Bundle. The original f and y were replaced with fancy letters to add some flare. For this no sew pillow cover project, I actually cut the text design on painters drop cloth to adhere to the pillow!
Using the beautiful - and perhaps my favorite of the set, Edelwies - I created this 'Stay Strong' design. You can see the two b's are different, as well as the e's - that's because, along with the v, they are all special characters.
I used Mastura, from the bundle, for 'Broom' on this Halloween sign I created!
As you can see the possibilities are pretty much endless and now that you are able to - and know how to - easily access the the special font characters designing text designs is a lot more exciting!
Remember though, as with all deals from The Hungry JPEG the Crafters Font Bundle will only be around for a month...the 8 specially coded commercial fonts for $15 will be gone mid November!
Note: This post may contain affiliate links. By clicking on them and purchasing products through my links, I receive a small commission. That's what helps fund Silhouette School so I can keep buying new Silhouette-related products to show you how to get the most out of your machine!
Thanks for coming to class today at Silhouette School. If you like what you see, I'd love for you to pin it!

Get Silhouette School lessons delivered to your email inbox! Select Once Daily or Weekly.
Labels:
Deals,
Designing,
Fabric,
Fonts,
Holidays,
How to,
How to...,
Personalized,
Saving Money,
Tips & Tricks,
Tips and Tricks
Sharpening a Silhouette Blade: Cutting Foil to Extend the Life of a Blade
Tuesday, August 18, 2015
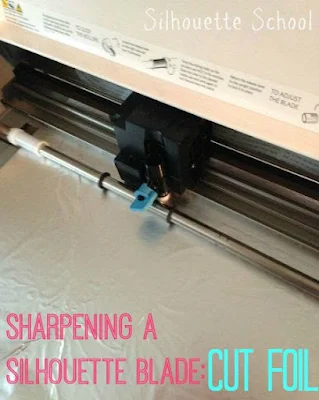
A few months ago I put the foil ball method for sharpening a Silhouette blade to the test. Let's just say I wasn't too impressed as I went into detail on here. It make sense that cutting foil with the blade which is why I decided on another method. This time instead of balling up the aluminum foil and poking the blade in and out of it I actually cut the foil with the blade.
I'm just going to put this out there right off the bat - sharpen your blade at your own risk. I would honestly just recommend you buy a new cutting blade if you're sure it's a dull blade that's causing your cutting issues. But if you'd rather not spend the $8 on a new blade every 4-6 months, then carry on.
Rip off a sheet of foil from the roll about the same size as the Silhouette cutting mat. It's already 12" wide so you just need to cut a piece that's about 12" long too. Stick it right onto the mat trying to make it as smooth and wrinkle-free as possible.
Applying Heat Transfer Vinyl on Glass: Silhouette Tutorial
Tuesday, July 28, 2015
Did you know it's possible to apply heat transfer vinyl to glass? Totally is! Today Becky and Glenna from My Paper Craze are back to explain exactly how to do this!
***
I'm constantly stocking up on glitter everything. Between me, my daughter and my friends, there's always something that needs glittered up. I love keeping it on hand, but when a project arises, it always seems like I have stocked up on everything EXCEPT what I need. So for this project, I typically would have chosen glitter permanent adhesive vinyl, but I already had the HTV (heat transfer vinyl) on hand and I knew the colors were perfect. The only question was, could I put it on glass?
Silhouette Studio Trace and Detach Tool to Make Print and Cuts
Thursday, June 25, 2015
Vector graphics are amazing for print and cuts IF you know this little trick known as the Silhouette Studio Trace and Detach tool. What's even better is if you can find a huge set of vectors, like this one from Mighty Deals, where you get 500+ vectors, with the commercial license, for less than $20.
The first thing you need to do to turn your vector graphics into Print and Cuts is to import the vector image into Silhouette Studio. I went over this process in great detail in this tutorial so I will breeze through it here, but if you need a refresher check this Silhouette School tutorial out.
The first thing you need to do to turn your vector graphics into Print and Cuts is to import the vector image into Silhouette Studio. I went over this process in great detail in this tutorial so I will breeze through it here, but if you need a refresher check this Silhouette School tutorial out.
Wood Look Tile Signs with Vinyl Tutorial (Silhouette Tutorial)
Monday, June 22, 2015
Hey Guys! We're doing things a little differently around here today! I'm remote teaching over on Simply Kelly Designs!
I'm sharing a really fun tutorial on how to make faux wood or wood-look tile signs with vinyl for just a few dollars each. Talk about a quick alternative on the authentic wood signs. These make awesome gifts, housewarming gifts and decor - and I love that there are SO many options!
So head on over to Kelly's blog today to see my shortcuts and tips on making one for yourself! Believe me, you'll thank me!
If you like what you see, I'd love for you to pin it!
Get Silhouette School lessons delivered to your email inbox! Select Once Daily or Weekly.
How to Conserve Vinyl & Your Silhouette Cutting Mat
Wednesday, May 13, 2015
Hi there! It's Becky and Glenna from My Paper Craze substituting in today! We're so excited to be here and share with another great tutorial!
One thing that we love about Silhouette School is all the awesome tutorials and information on how to save money. I mean seriously, crafting is a very expensive hobby, especially when it comes to supplies. So today, we want to add another nifty trick to the list! You may already be using a method similar to this, but it's one of those that is too easy to pass up!
13 Way to Save Money on Silhouette Supplies
Monday, February 16, 2015
If your craft fund is running low or is getting a little too pricey, there are ways to save money on Silhouette supplies. We all know crafting isn't exactly a cheap hobby - but it can be a cheaper one. Just follow these 13 tips for saving money on Silhouette supplies.
HTV and Vinyl Storage in an Over the Door Shoe Organizer (Bigger and Better)
Tuesday, October 21, 2014
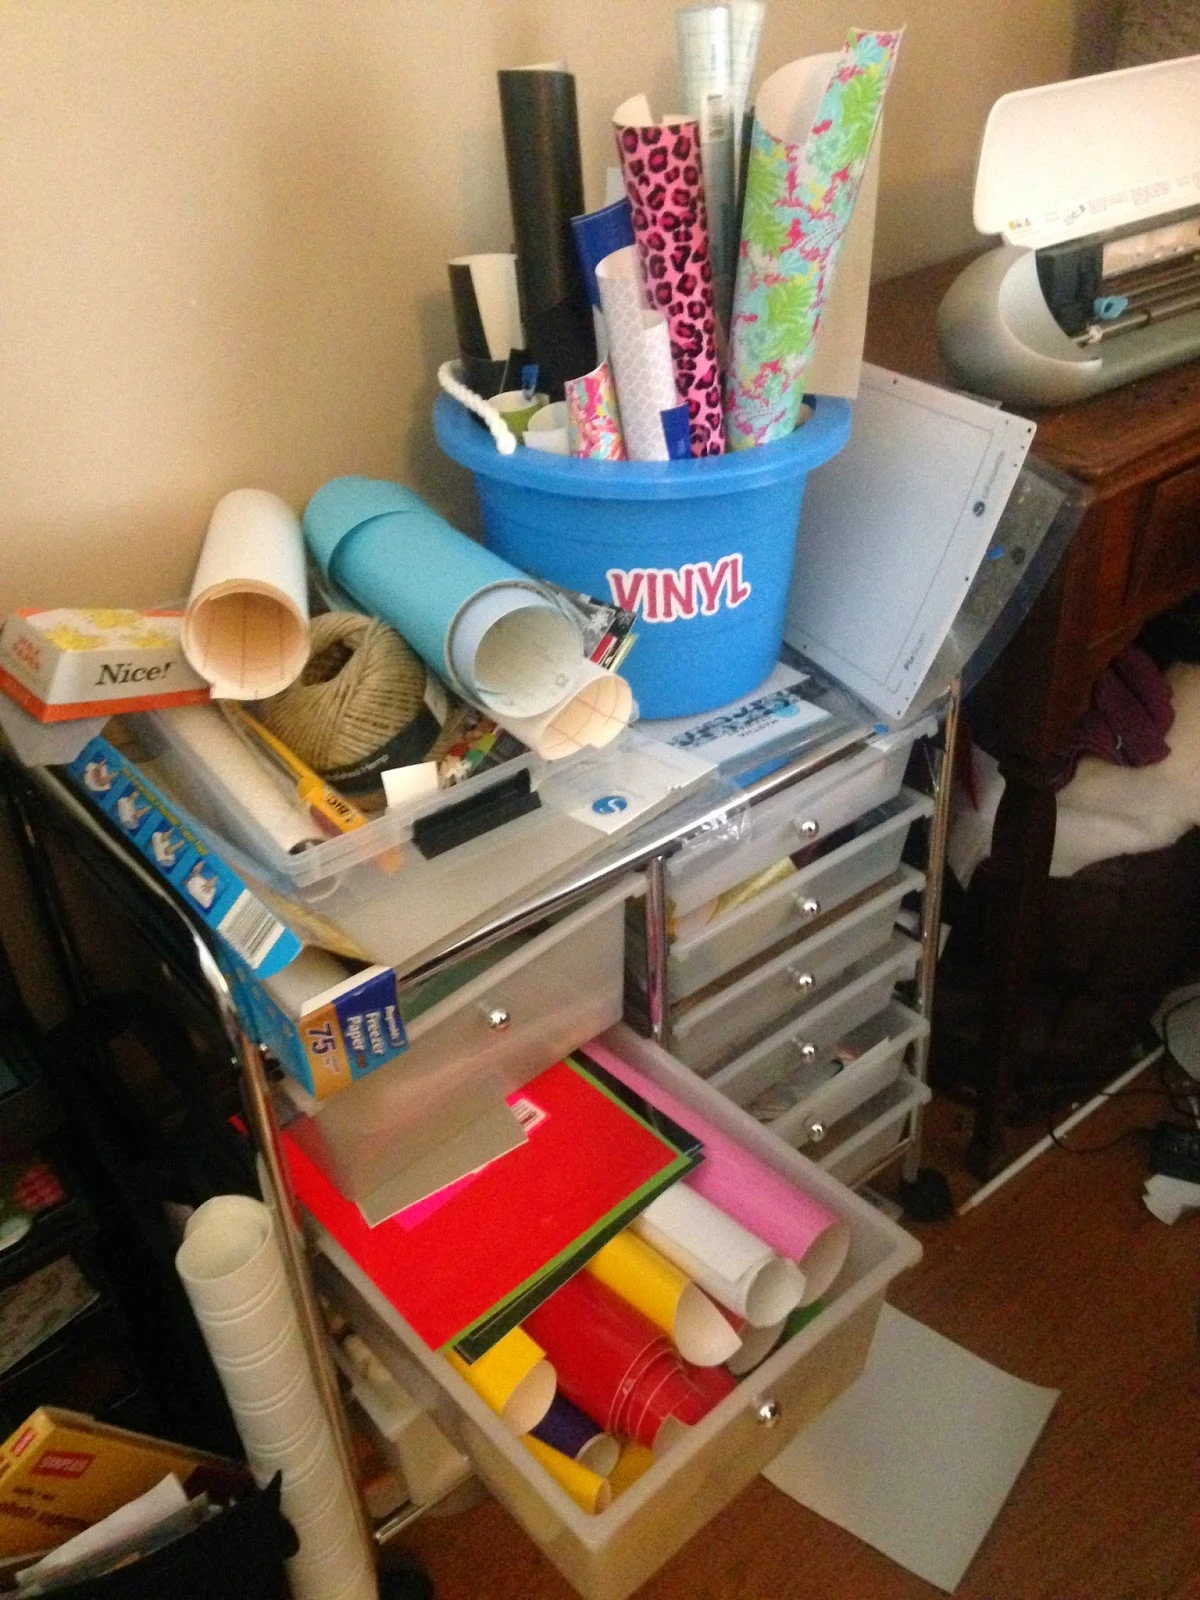
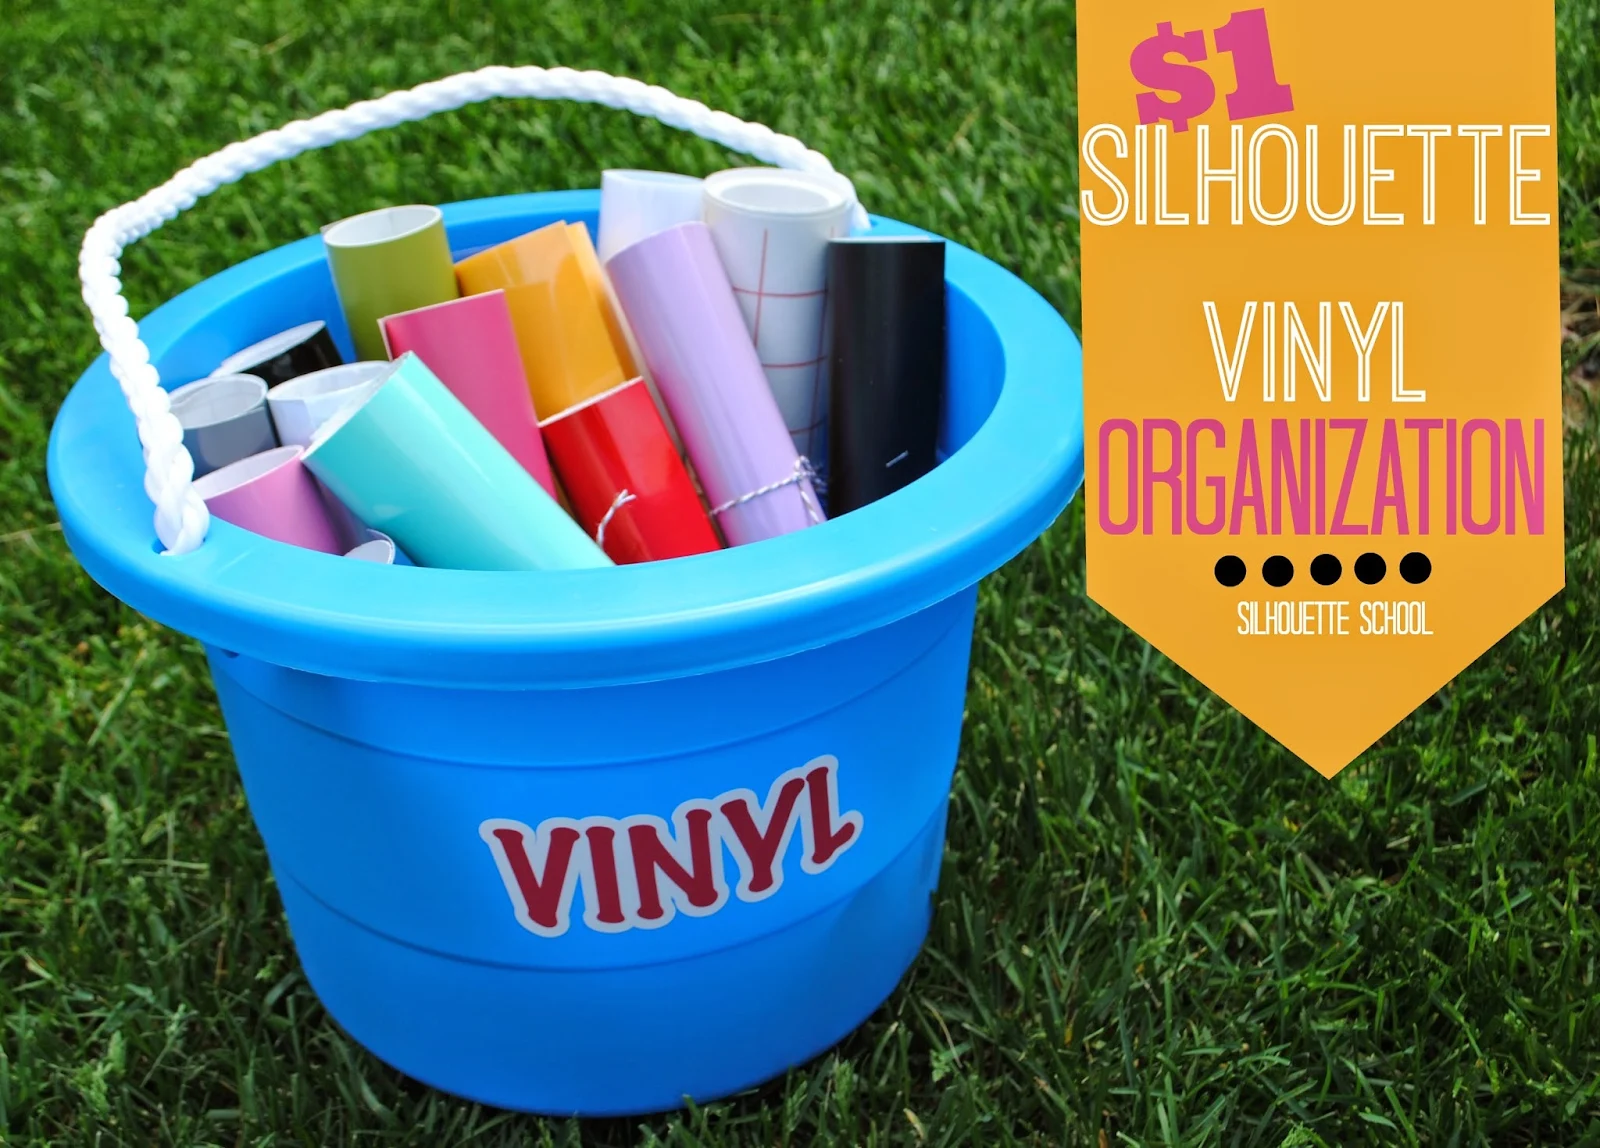
 A few months ago I shared my vinyl storage solution on the blog. Back then my handy dandy little bucket from the dollar store did the trick. After some custom orders, purchasing the extreme deal of 30 sheets of 24x24" vinyl from Amazon, and few other "I just have to get more vinyl" purchases the bucket just ain't cutting it.
Vinyl was literally spilling onto the floor and all over my desk(s). Scraps were taking over. Rolls were coming undone. I was ordering more vinyl because I didn't realize what I actually had because I couldn't find it or worse it was bent because I hadn't stored it neatly.
Perhaps my husband has a point when he slips into his hazmat suit to enter... (I'm mortified to even share this because my house is honestly very tidy with the exception of this one little space but...for the good of the blog.)
Regardless I'm on a mission to make my craft room neater (at least for the next 8.5 minutes until I get into 12 more projects at the same time) and more organized and that starts with getting my vinyl stash in order.
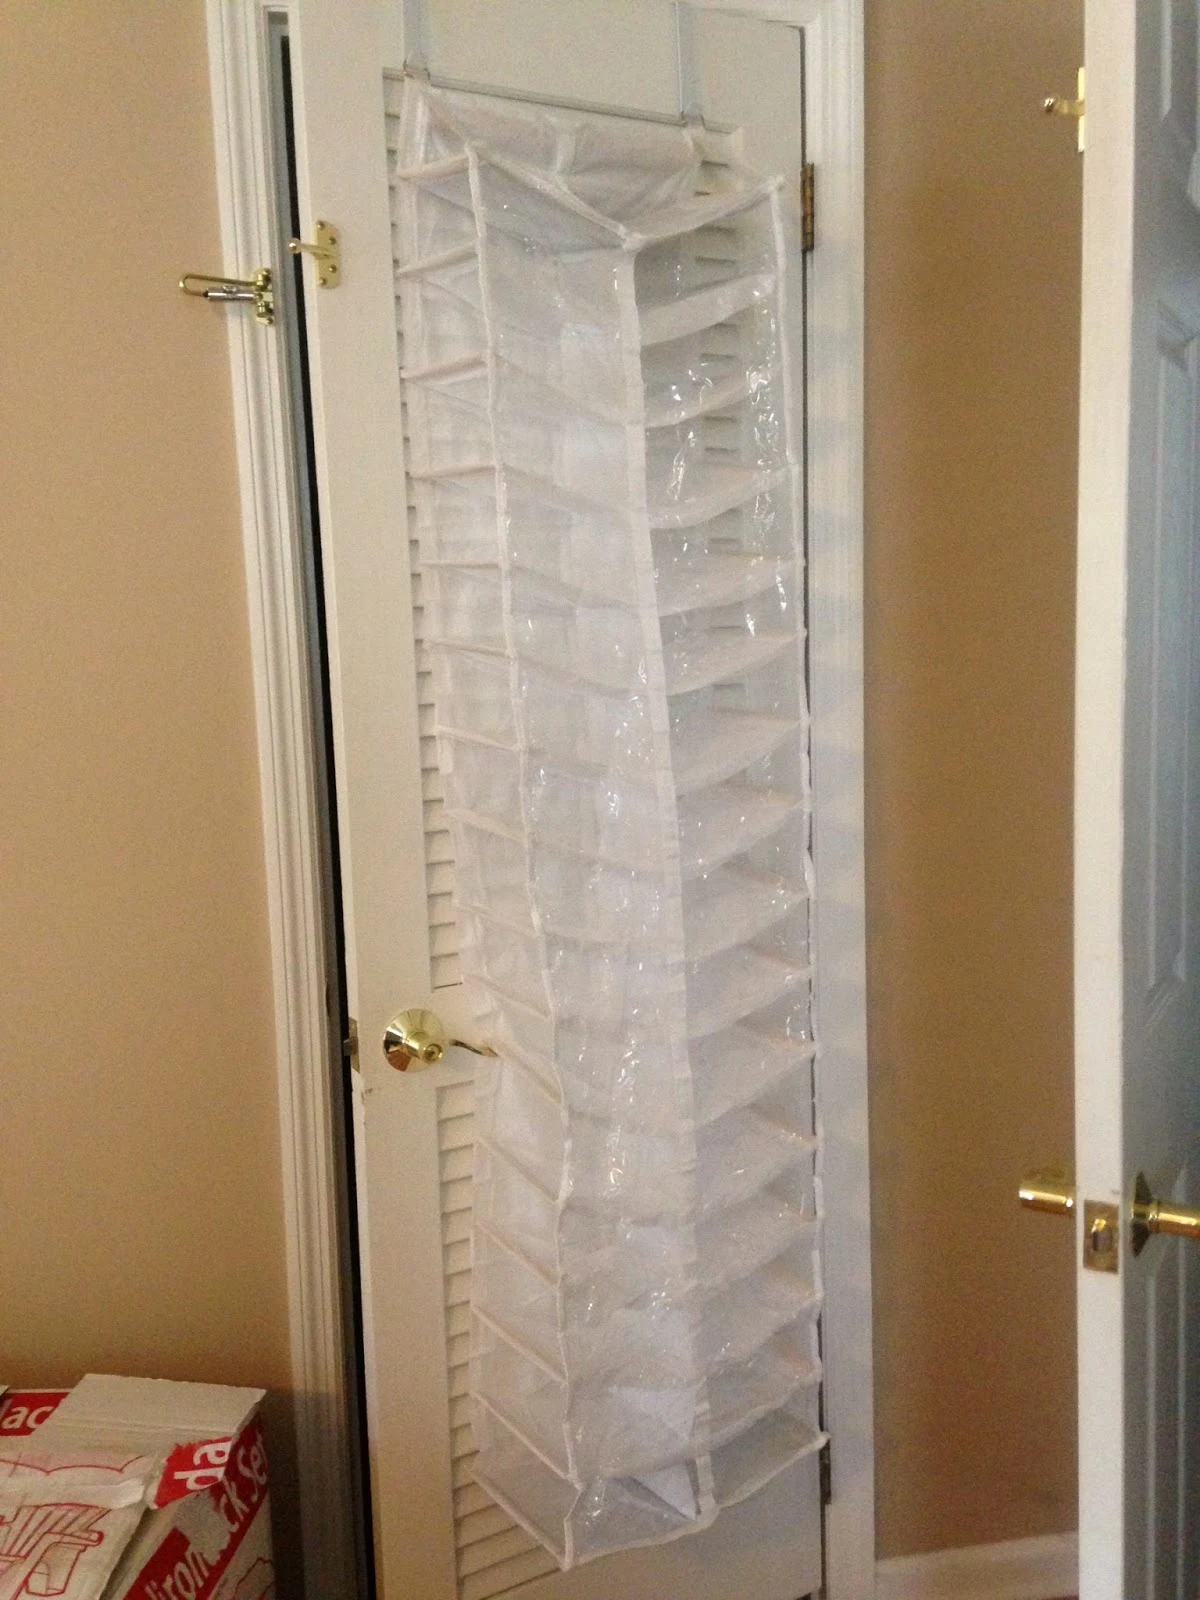
A few of my fellow vinyl hoarders suggested an over-the-door shoe organizer as the solution to my vinyl woes. I researched a few different shoe organizers and finally settled on this 30 pair Shoes Away organizer.
I picked this one for a few different reasons:
- It has a lot of compartments. I have a lot of vinyl.
- The compartments are horizontal, but angled slightly upwards so the vinyl won't fall out. I just had a feeling the organizers with the vertical slots would cause my vinyl to look messy as it was sticking up on top of each other.
- The compartments are clear so I can easily see the vinyl without pulling everything out.
- It was on sale.
I started by rolling each roll/sheet of vinyl neatly and secured it loosely with a piece of painters tape to keep it rolled. I know that not everyone agrees with storing vinyl in a roll (some prefer to store vinyl in a long flat container like this) due to the possibility of bubbles, but I have had no problems.
I put adhesive - glossy and matte - on the left side and all my HTV on the right according to color.
And as for my scrap pieces...they're now in my vinyl bucket. You can check out the tutorial on how I layered the 'Vinyl' label here!
Note: This post may contain affiliate links. By clicking on them and purchasing products through my links, I receive a small commission. That's what helps fund Silhouette School so I can keep buying new Silhouette-related products to show you how to get the most out of your machine!
Thanks for coming to class today at Silhouette School. If you like what you see, I'd love for you to pin it!
Subscribe to:
Posts (Atom)











.png)


