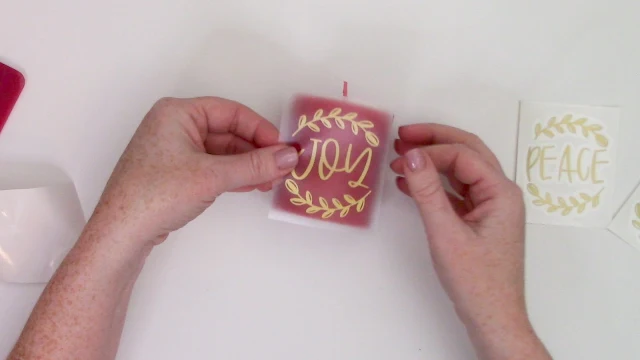
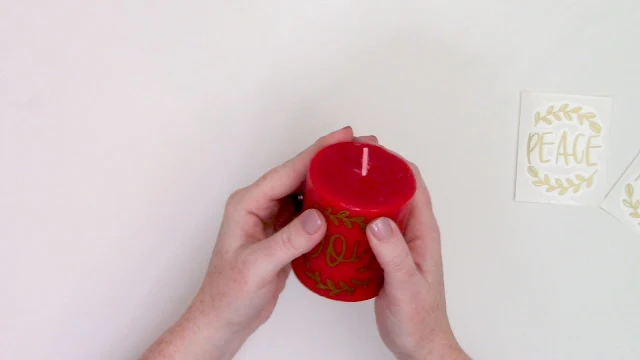
Just when you thought you might have applied vinyl to just about every surface in your home, here's a quick and easy home decor project using permanent adhesive vinyl on wax candles!
This is really easy to do, but there's a few simple tricks to making sure you get a good stick with the vinyl on the wax. Keep reading to find out how to do it!
You can customize candles with just about any design you like, but don't these festive sentiments in gold vinyl really pop against the red candles?!
These designs are part of a set of 7 that are included in the November SVG and Fonts Bundle at So Fontsy. The entire bundle includes 132 SVGs, 11 fonts, 12 digital papers, and 10 sublimation designs in all. And there's a ton of variety in the bundle as well - not just seasonal designs - so be sure to grab this bundle while it's still 92% off!
One of the first tips for making sure the vinyl will stick to a slick, waxy candle is to use a good quality permanent adhesive vinyl - like the Oracal 651 gold vinyl used in this project. If you need a quick vinyl refresher, take a look at this blog post on what types of vinyl to use for different Silhouette projects.
Open the designs in Silhouette Studio and size them to fit your project.
Silhouette Studio has a material cut setting for glossy vinyl in the Send panel, but honestly, you may need to adjust the default cut settings for better results. Here are the cut settings I've been using lately with Oracal 651 that have been working particularly well:
Select the default material cut settings for Vinyl, Glossy (blade of 1, speed of 5, 1 pass) but change the force to 14 (I've even gone as high as 24!).
Remember, it's always best to do a test cut before every project. When you find the perfect settings, you can always save a custom cut setting, and here's a post that explains how easy it is to add new custom material cut settings in Silhouette Studio.
Load the vinyl into your machine and send the design to your Silhouette machine for cutting.
Once you have a good cut, weed out all the excess vinyl.
Next, transfer the vinyl designs onto transfer tape.
Once on the transfer tape, apply the vinyl onto the candle working from the center out towards the sides. Burnish the vinyl down really well with your fingers. Your fingers will be the best burnishing tool for this project because you can really press down every little spot of the design.
Did I say burnish really, really well?
Next, to remove the transfer tape, start by rolling back one of the corners.
The key to removing the transfer tape without it lifting up the vinyl, is to roll the transfer tape back onto itself instead of just pulling it straight up.
Work slowly as your roll off the transfer tape! If part of the vinyl doesn't stick to the candle, hold it down with your finger while you continue to roll the transfer tape off the vinyl. Again, work slowly.
Once the transfer tape has been completely removed, use your finger to gently burnish the vinyl again onto the candle. This time, trying pressing straight down onto the vinyl instead of rubbing back and forth because the vinyl may want to slide around on the wax.
But, this next trick helps to make sure that the vinyl doesn't go anywhere. Grab a heat tool (or a blow dryer would work too) and run the warm air quickly over the vinyl decal.
Be sure to keep the heat tool moving - don't hold it over one spot too long or you'll just completely melt the candle. Quickly move the warm air around the vinyl decal until the wax just barely begins to melt. You'll know that this is happening because the wax will take on a glossy sheen, and once this happens quickly remove the heat tool.
Then, as soon as you remove the heat tool, press straight down onto the vinyl decal again as the wax begins to cool. This gives you excellent adhesion of the vinyl onto the wax!
Perfect!
Since the addition of the vinyl, these candles are just for display as a home decor piece - they shouldn't be lit.
Look for more designs to customize your candles in the November SVG and Fonts Bundle over at So Fontsy - you could even create your own monogram design with one of the fonts in the bundle. There's so much you can do with them so these would make the perfect crafty holiday gift!
Here are a few more projects made with the November Bundle!
Note: This post may contain affiliate links. By clicking on them and purchasing products through my links, I receive a small commission. That's what helps fund Silhouette School so I can keep buying new Silhouette-related products to show you how to get the most out of your machine!
Get Silhouette School lessons delivered to your email inbox! Select Once Daily or Weekly.


.png)


One suggestion: cut off the wick to be sure there are no "accidental lightings"
ReplyDelete