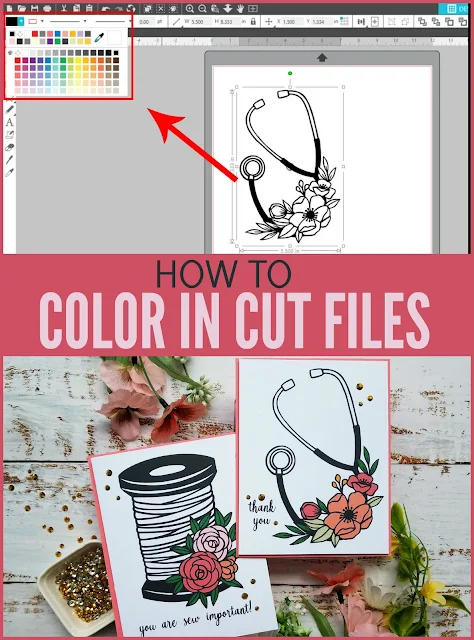
You can customize these designs by choosing your own fill colors for the spaces in between the black outlines (like a digital coloring book!)
Creating your own thank you cards could not be any faster or easier when you color in an outlined SVG in Silhouette Studio. This technique works great with SVGs that have bold, black outlines - like the gorgeous floral designs from the Floral SVG Bundle by Wild Pilot over at SoFontsy.
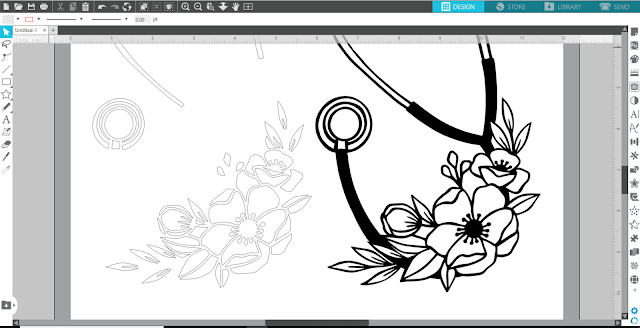
If you try to color in this stethoscope SVG right after opening it in Silhouette Studio, the fill color would be applied to the entire design because right now you can only select the entire design, not the individual spaces you want to color.
So, all you need to do is separate the SVG into its different constituent shapes so you can add a fill color to them individually. But, don't worry, it's super quick to do!
So, all you need to do is separate the SVG into its different constituent shapes so you can add a fill color to them individually. But, don't worry, it's super quick to do!
First, open the SVG in Silhouette Studio, right-click to make a copy, and then paste it off to the side for now (we'll come back to it later). If you need help importing designs into Silhouette Studio, check out this blog post.
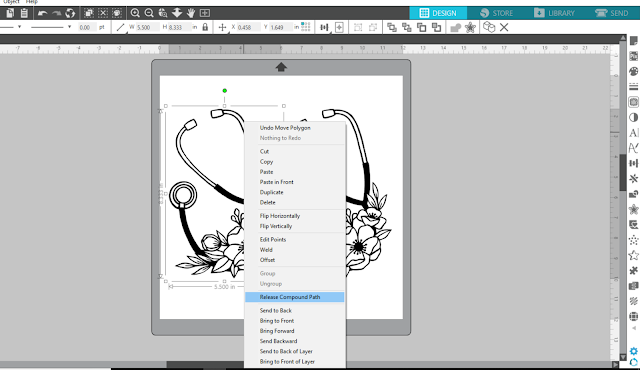
Next, right-click on the original SVG and select Release Compound Path from the menu. This is what will separate the design into all the smaller individual shapes that compose it.
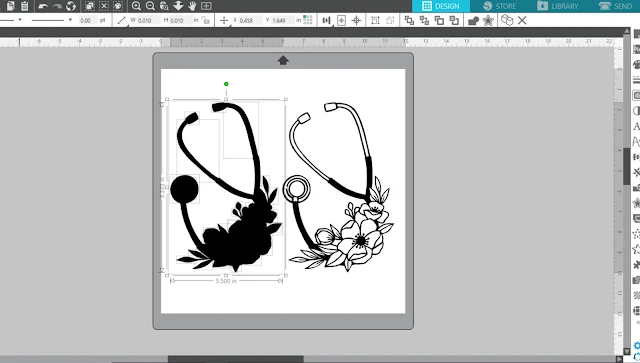
See how there is now gray boxes around each and every shape?

See how there is now gray boxes around each and every shape?
Now the SVG just looks like one big blob because every shape in the design now has a black fill color, so you need to change that in order to actually see each individual shape.
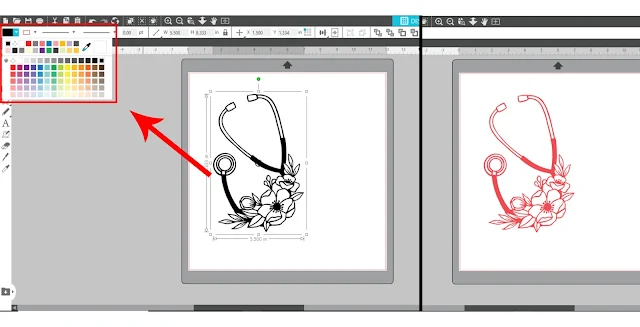
Go up to the Quick Access tool bar and change the fill
color to white (more on why I chose white in a bit).
If you're working on a white workspace in Silhouette Studio, it may now look like your design has just disappeared, but don’t panic because it hasn’t (see all the gray selection boxes?). It just means there isn’t an outline color set for any of the shapes.
If you're working on a white workspace in Silhouette Studio, it may now look like your design has just disappeared, but don’t panic because it hasn’t (see all the gray selection boxes?). It just means there isn’t an outline color set for any of the shapes.
With everything still selected, in the Quick Access tool bar, change the line color to black.
Next, click on the outermost outline of the SVG and delete it. What is left are the shapes that you'll want to add fill colors to. Let the coloring begin!
Select a shape by clicking in it and then selecting a different fill color from the Quick Access tool bar.
Hold down the Shift key on your keyboard while clicking each shape to select more than one. Then you can change the fill color for many shapes at the same time.
Select a shape by clicking in it and then selecting a different fill color from the Quick Access tool bar.
Hold down the Shift key on your keyboard while clicking each shape to select more than one. Then you can change the fill color for many shapes at the same time.
If you accidentally clicked on a shape you didn’t mean to, just
hold down the Shift key and click on it again to deselect it. One important thing to remember is not to move any of the shapes out of place while you're selecting them. If you do, immediately click Undo from the Edit menu.
So, the reason I recommend selecting a white fill color instead of selecting “no fill” is because it will be MUCH easier to select the shapes you want. When a shape has a fill color (even if it's white), you can click anywhere inside the shape to select it. When a shape has “no fill" or is transparent, you have to click right on the actual outline itself to select it (which can get very tedious and difficult if you want to select multiple shapes).
Refer to the copy of the design you made earlier if you can't tell what a shape is. For example, in this stethoscope, some of the shapes are actually "empty spaces" in the complete design, so I didn't add fill colors to those.
If once you've added colors to your design and you change your mind about them, you don't have to click on each individual shape again to change the fill color.
Instead, click the Select By Color icon in your Quick Access tool bar. Then, click the By Fill tab in the panel that opens, and now you can see a list of all the fill colors in your document. Click the color in that list that you want to change, and then all the shapes on your mat with that fill color will become selected. Then, you can change the fill color for all of them like before.
When you're done coloring, drag the copy of the design you made earlier and align it right on top of the coloring. Zoom in and use the arrow keys on your keyboard to nudge the outline into just the right spot.
Now select everything, right-click, and select Group from the drop-down menu so that everything will now stay together, and you can easily move it all around your mat.
To turn these SVGs into cards, change your document's media size to Letter (in the Portrait orientation) in the Page Setup Panel in Silhouette Studio.
Size your design to fit inside a 4.0 by 5.25 inch rectangle (you can draw a rectangle if you want, but don't change the default line weight from zero).
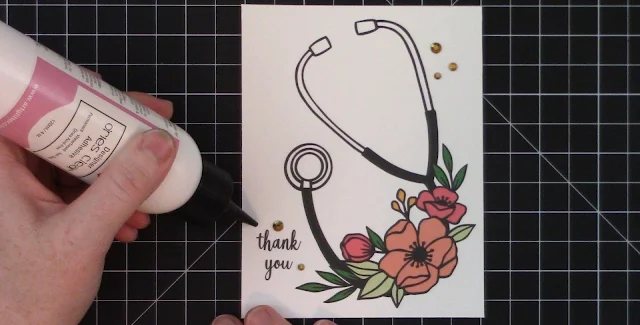
Use the text tool to type a sentiment and change to your desired font (I used the free So Fontsy exclusive font!). Then, group the text, SVG and rectangle together.
Use the text tool to type a sentiment and change to your desired font (I used the free So Fontsy exclusive font!). Then, group the text, SVG and rectangle together.
Arrange the rectangle on the right-hand side of the your media and duplicate one on the bottom to print two cards on one page (or choose another image from the Floral SVG Bundle and make another one because there are so many beautiful images in this bundle).
Then, send to print (the rectangles won't print because they do not have a line weight/thickness)
Then, fold each in half to make two cards.
You can add embellishments (like flatback gems) and don't forget to write a special message inside. Then, you're ready to give your card to someone you are thankful for.
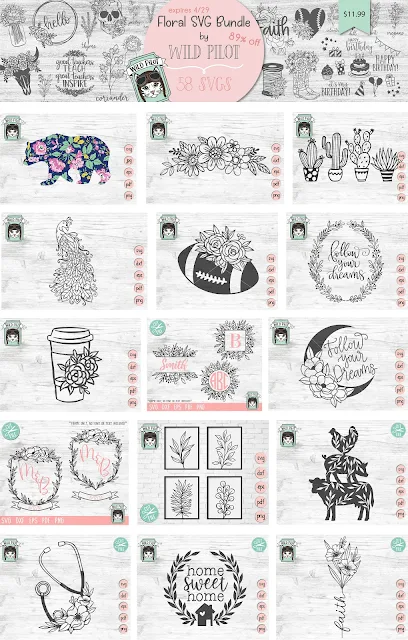
Grab these designs (and more!) from the Floral SVG Bundle by Wild Pilot from the SoFontsy shop!
This gorgeous collection of 58 designs is perfect not only for cards, but also totes, shirts, signs, home decor and much, much MORE!
Note: This post may contain affiliate links. By clicking on them
and purchasing products through my links, I receive a small commission.
That's what helps fund Silhouette School so I can keep buying new
Silhouette-related products to show you how to get the most out of your
machine!
Get Silhouette School lessons delivered to your email inbox! Select Once Daily or Weekly.










.png)


Wow! I am so excited to try this. It looks much more simple than I had expected. Thanks for another great tutorial.
ReplyDelete