Don't feel like layering glitter heat transfer vinyl or don't have every color glitter HTV on hand? You're in luck because I have a hack for you today!
You can apply printable HTV to white glitter HTV and get a multi-color glitter look a lot quicker and even without having every different color HTV for your project!
A few weeks ago we shared a trick to apply inkjet printable HTV to flocked heat transfer vinyl and that gave me the idea that the same concept may also work on glitter.
And.it.does.
While this process will not give you the exact same brilliant glitter look as if you were using all glitter heat transfer vinyl, it's good enough for me especially on projects that would otherwise require the cutting and pressing of more than 3 or 4 colors - like this pineapple design from the Monogram Bundle on So Fontsy.
Here's how this works.
One copy keep full color. The other copy you only want the outer most cut line so delete everything else.
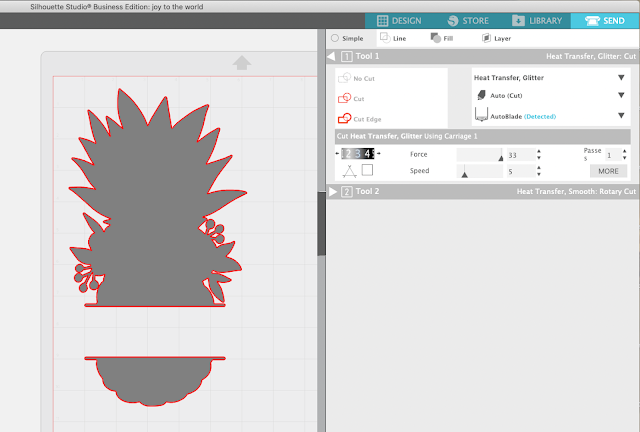
For this design I just ungrouped and pulled away the black piece. This is the piece that is going to be cut on white glitter heat transfer vinyl.
For this design I just ungrouped and pulled away the black piece. This is the piece that is going to be cut on white glitter heat transfer vinyl.
Select both the full color copy and the outline copy, size at the same time, and flip horizontally.
Do not change the size or orientation after you get it set or the pieces won't fit together correctly.
Do not change the size or orientation after you get it set or the pieces won't fit together correctly.
Let's work with the Glitter HTV design first. (Move the full color copy off your work space or put in a separate work area.) Move to the Send panel ands select Heat Transfer, Glitter as the material.

Cut the white glitter heat transfer vinyl and weed.

Cut the white glitter heat transfer vinyl and weed.
Press the design on your shirt or another surface at 320 degrees for 20 seconds. Remove the carrier sheet - but save the sheet.
Increase the temperature on the heat press to 375 and 30 seconds and let it come up to temperature while you work on the full color printed design.
Silhouette Print and Cut Inkjet Printable Heat Transfer
Back in Silhouette Studio and working with the full color design, change the Page Setup to printer, turn on the print border, and add registration marks. Remember not to change the size of the design at all.
Place a piece of Starcraft Inkjet Printable Heat Transfer for Lights in your home printer. Click the Printer icon on the top tool bar so your page prints.
Place the printed sheet on a Silhouette cutting mat and load into the Silhouette CAMEO or Portrait.
In Silhouette Studio Studio, move to the Send panel. Select the design and change to "Cut Edge" so you only cut the edge of your design. The best Silhouette cut setting for Starcraft Printable HTV for Lights are to use the Vinyl, Printable material option.
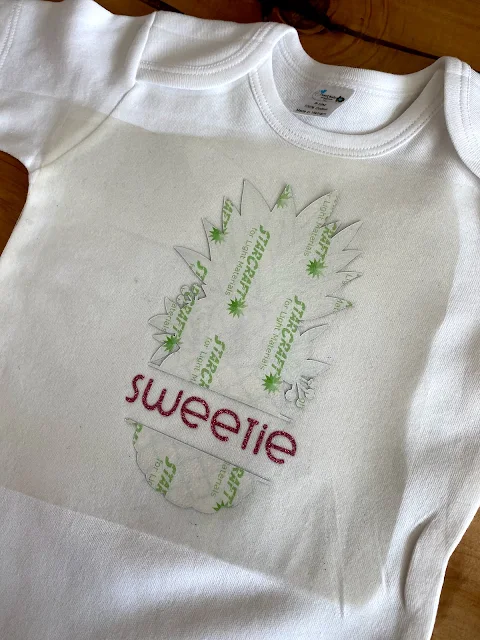
Take your printable HTV pieces and lay them face down directly onto the glitter HTV.
They're not sticky so they will not want to stay in place. This is where you are going to use the leftover carrier sheet from the glitter HTV to hold them in place while you press.
They're not sticky so they will not want to stay in place. This is where you are going to use the leftover carrier sheet from the glitter HTV to hold them in place while you press.
With your heat press now at 375, press the printable HTV onto the glitter HTV with firm pressure for 30 seconds.
When the time is up, as quickly as possible remove the carrier sheet and the Starcraft liner.
The faster you can get the liner off the more glittery your HTV will be.
If you let the printable HTV cool too much it leaves a slight film which dulls the glitter.
The faster you can get the liner off the more glittery your HTV will be.
If you let the printable HTV cool too much it leaves a slight film which dulls the glitter.
Note: This post may contain affiliate links. By clicking on them and purchasing products through my links, I receive a small commission. That's what helps fund Silhouette School so I can keep buying new Silhouette-related products to show you how to get the most out of your machine!
Get Silhouette School lessons delivered to your email inbox! Select Once Daily or Weekly.


.png)


woe!
ReplyDeleteCan't wait to give it a go. Thanks so much. Amazing!!
ReplyDeleteThank you. What printable HTV do you recommend?
ReplyDeleteThis one is my favorite for sure: https://shrsl.com/2i7za
Delete