 If you're like me you have a whole drawer (or two) full of scraps. I have one of paper, another of fabric, another of HTV and yet another of adhesive vinyl. That's a lot of scraps. Many of the scrap pieces are odd shaped which makes cutting on them difficult because you have to line up the design and the scrap exactly on the cutting mat to hit the target. Well....the Silhouette PixScan mat makes cutting scraps a whole lot easier.
 If you're not familiar, read my PixScan 101 tutorial here to fully understand how it works. In a nutshell, PixScan utilizes a special mat with pre-printed registration marks that the software and machine can read to cut out a very precise design. Usually you'd trace the design in the software, but in the case of scraps, we're going to place a design instead of tracing. You'll see what I mean in a minute.
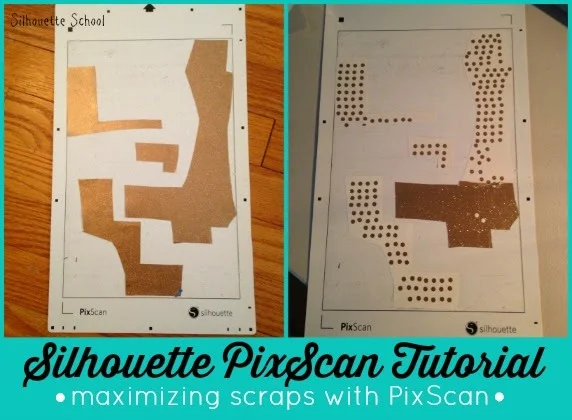
The first thing you want to do is grab some scraps and lay them on your Pixscan mat.
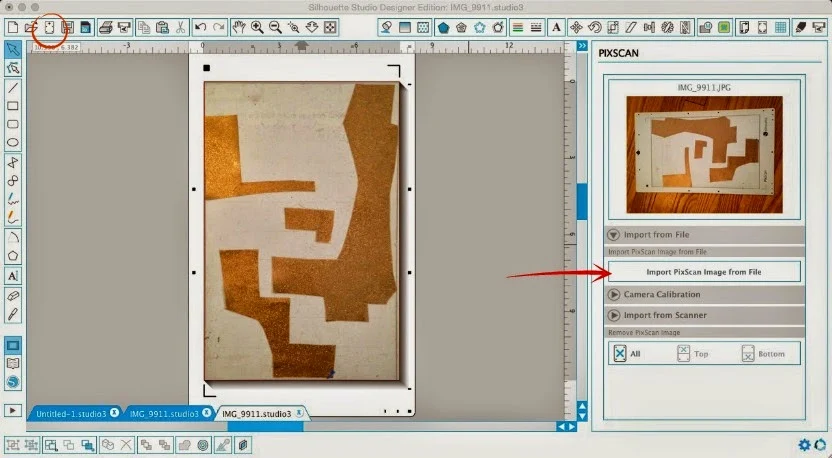
Snap a picture of the PixScan mat, making sure the entire mat is in the shot. Upload the photo onto you computer either by emailing the image to yourself from your phone or connecting the camera with a USB cable.
Once the image is on the computer, open up Silhouette Studio.
Click on the PixScan icon along the top tool bar. Click on Import from File > Import PixScan Image from File and navigate to the image you just saved to your computer. The image will load into the software and open up in the work area.
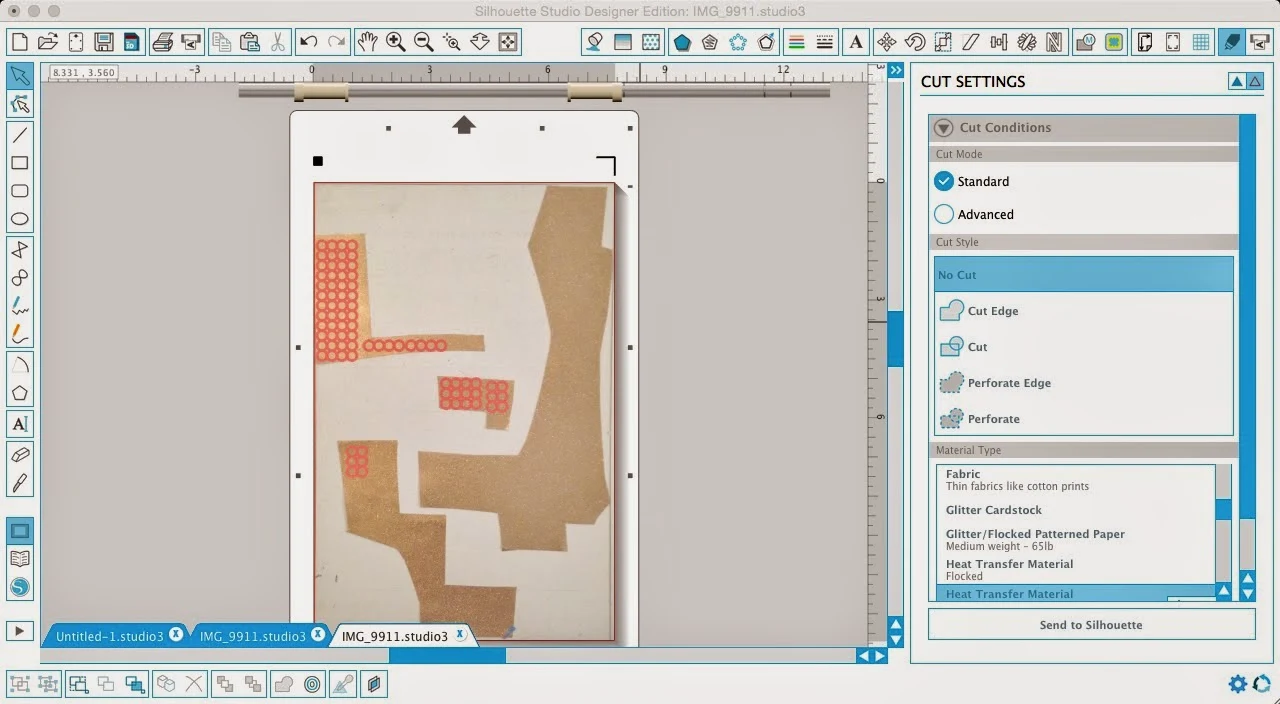
Once you've got your designs to be cut ready, load the Pixscan mat into the Silhouette. (I have the Portrait size mat that I am using on the CAMEO which is why it looks smaller and why I had to move my rollers.)

Send that baby to cut. Just like a print and cut, the machine will first use it's laser to find the registration marks on the mat and then it will re-set to cut.
And after I weeded....
For more on techniques found in this tutorial, refer to the following pages in
The Ultimate Silhouette Guide:
Page 104 -PixScan
Note: This post may contain affiliate links. By clicking on them and purchasing products through my links, I receive a small commission. That's what helps fund Silhouette School so I can keep buying new Silhouette-related products to show you how to get the most out of your machine!
Thanks for coming to class today at Silhouette School. If you like what you see, I'd love for you to pin it!


.png)


Very clever idea! I'm looking forward to getting rid of some scraps.
ReplyDeleteThis is great! I just used this to cut something from a scrap. :)
ReplyDeleteI am liking this more and more. Just out of curiosity what did you do with the dots?
ReplyDeletethank you Melissa i've had my pix scan mat for almost a year now after seeing it on create & craft not used it yet as forgot what she showed to do with it so thank you again Vanessa x
ReplyDeletehi melissa im having trouble with calibration, it says no calibration could be found im not quite sure how to get this to work. I read on another silhouette post i think you have to print a calibration sheet but i dont have access to a printer and other people on facebook have not had to do this. Any tips would be great thank you.
ReplyDeleteim having the same problem :(
Deleteim having the same problem :(
DeleteThis is the most awesome post! Who knew?!?! I just got a Pixscan mat and I'm anxious to try it out. Thanks for the step by step tutorial, I'm confident I can do it.
ReplyDeleteAwesome post! I love your ideas!
ReplyDelete