Yesterday, I shared a full basics tutorial on making shaped cards using the Studio mirror tool. See how cute this baby boy shaped card came out?!
...So cute that I wanted to make a little girl version. So today I'm going to show you how to use that same basic design from the 'Baby Boy Motif' and slightly modify. Of course, this is only one example, but the concept of editing points on a design can be used in countless ways.
Sure, you could just use the design as it is and print on girl-themed paper, but why not take it to the next level and turn those overalls into a cute little dress? It's actually very simple. All you need is the point editing tool.
Pull your design into Silhouette Studio. Again, we're only working with the overalls and the onesie so I ungrouped and deleted the other design elements to give myself some room to work.
I also immediately rotated the overall piece so it's right side up to avoid any confusion when mirror that image. I don't need the buttons, so I deleted them.
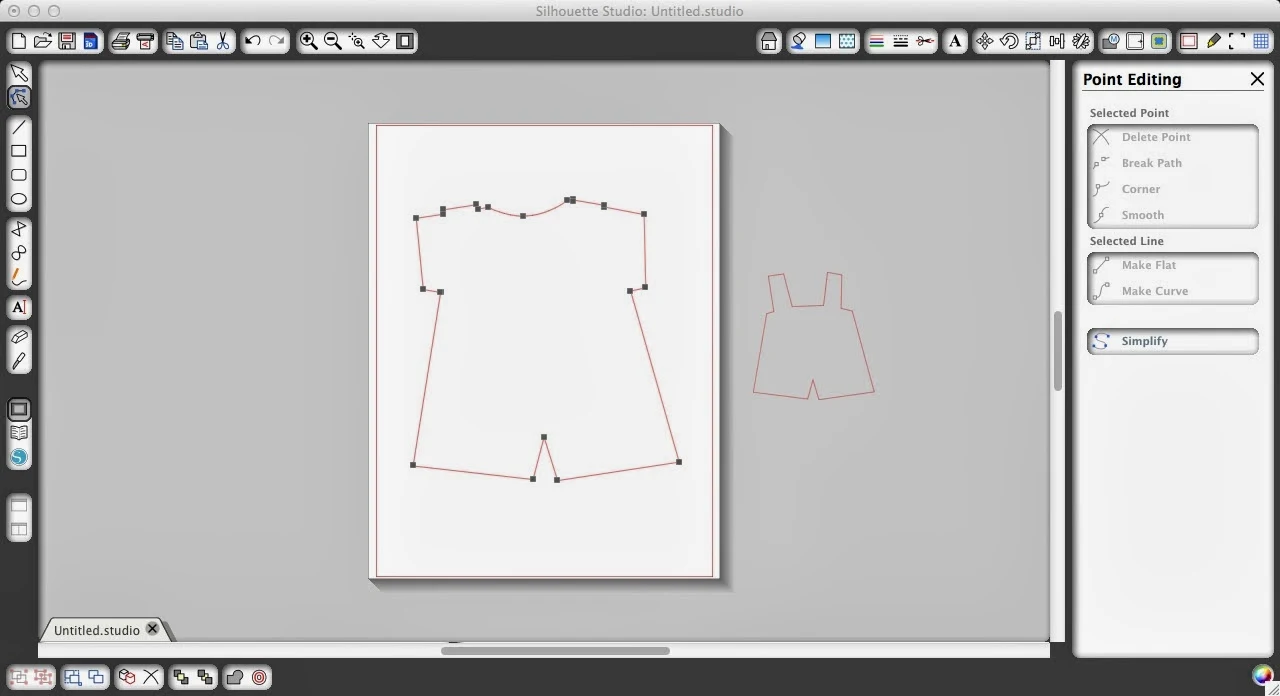
The basic design needs to be adjusted in just a few places...the most obvious is at the legs. Let's work first with the onesie. If you click on the design once you get the highlight box around the image. While it's highlighted, double click right on on red outline. This reveals a whole bunch of edit points. It also brings up the Point Editing window on the right side of the screen.
Each one of those dots or edit points can be moved or deleted to edit the shape of the design. I simply pulled the crotch point down to turn the little onesie shorts into a dress. I also moved the points at the arm pits in slightly so the design was a little less boxy.
That's it for the overalls! I told you this was easy peesey!
Now to make sure the overalls/dress line up correctly when it's cut, you want to drag it on top of the onesie, adjust the size to match and then move the edit points the same way you did with the onesie.
Thanks for coming to class today at Silhouette School. If you like what you see, I'd love for you to pin it!


.png)


ReplyDeleteThanks a lot. Thanks for sharing this information. I appreciate.
online design courses