Copyright Silhouette School 2016. Powered by Blogger.


Showing posts with label Advanced Settings. Show all posts

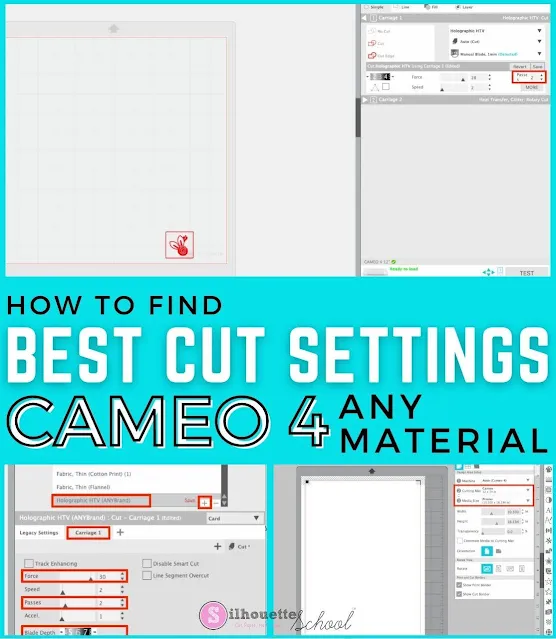
Silhouette CAMEO 4 Cut Settings: How to Find The Best Settings for ANY Material! (Video)

If you haven't asked "What's the Best Silhouette Cut Setting for ____FILL_IN_THE_BLANK___?" are you even really a Silhouette crafter?

Silhouette 101, Silhouette America Blog, Cut Settings, CAMEO 4, Silhouette CAMEO 4

While Silhouette Studio offers 100+ recommended cut settings for various materials they are a starting point. They don't take into account the exact material you are using, the condition of your blade, and sometimes (like in the case of permanent vinyl and smooth HTV) they're just wrong.  For this reason it's important to know how to find the best Silhouette CAMEO 4 cut settings so you don't waste an entire sheet of material.

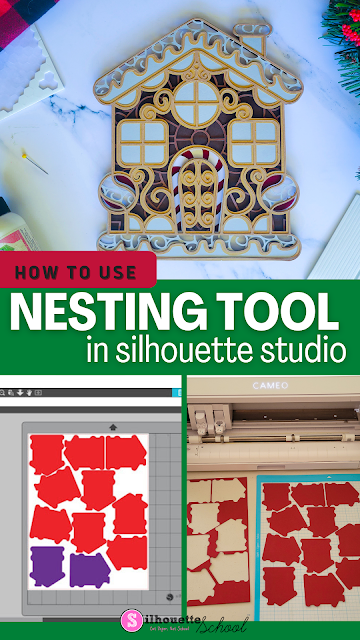
How to Use Nesting Tool in Silhouette Studio

You can get more out of your material if you know how to use the nesting tool in Silhouette Studio. 

silhouette 101, silhouette america blog, silhouette studio v4, nesting tool, silhouette studio designer edition

The nesting feature allows you to automatically rotate and space designs to use the least amount of material while cutting the most amount of designs.  Read on for how to use the Silhouette Studio nesting tool to fit the most designs on your page. 

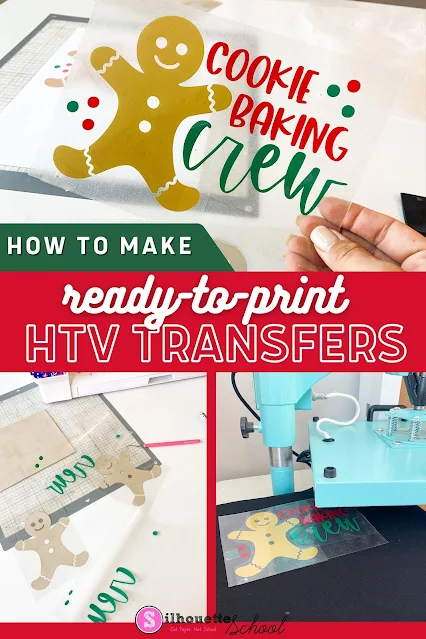
How to Make Ready to Press Heat Transfers with HTV and Silhouette CAMEO

If you've ever tried to make a ready to print HTV transfer you probably very quickly realized it's not the easiest thing to do. 

silhouette 101, silhouette america blog, heat press, htv, advanced silhouette tutorial

When layering multiple colors of heat transfer vinyl each layer needs to be pressed separately making ready to ready to print transfers challenging.  Sometimes though - whether it's to ship a HTV transfer to an uncrafty friend or prepare your shop before the busy holiday rush - making ready to heat press transfers is necessary.  In this advanced Silhouette tutorial I'll show you how to make ready to print heat transfers for shipping or storing!

How to Set Up a Foil and Cut in Silhouette Studio with Foil Quill (Free Practice Design)

Did you know you can add foil accents to your vinyl decals?!

foil quil, foil quill silhouette, foil quill designs, silhouette america blog, silhouette 101

The Foil Quill - which started shipping from certain retailers, including Swing Design, last week makes adding foil to adhesive vinyl - like Oracal 651 and 631 - very easy with the Silhouette.  While this foil and cut tutorial is geared toward vinyl, the foil and cut process works the same for other materials as well.

Exporting Custom Material Cut Settings from Silhouette Studio

If you're like me and you have added a bunch of custom cut settings to Silhouette Studio then you should take the extra step of exporting - as a back up.

Silhouette Studio Software tutorials, Silhouette Design Studio tutorials, silhouette tutorial, how to use silhouette studio, studio, silhouette studio

Exporting your custom material cut settings takes just a few quick steps.

How to Make 3D Stars in Silhouette Studio: Designing Tutorial

I can't be the only one who wnats to make 3D paper stars in Silhouette Studio as part of my Christmas decor!

paper projects, 3d designs, 3d paper designs, Advanced silhouette Studio Tutorials, silhouette 101

Stars are such a great but easy decoration for Christmas. You can use them as ornaments, on wreaths, as a garland. The possibilities are only as limited as your imagination. But first you need to know how to create my favorite 3D star shape. 

Silhouette Studio Advanced Replicate Tutorial for Putting Shapes on a Path

Finally! Finally I figured out a use for that oft-annoying center of rotation! You can use it to essentially put shapes on a path!


I would consider this an advanced Silhouette tutorial, but once you get the hang of it you're going to be addicted. 

Silhouette Studio Packet Size: Why You SHOULD Change the Default

There are several Silhouette Studio defaults that, when changed, actually improve the performance of your Silhouette cutting machine and Silhouette Studio.  One of them is the Packet Size which is an advanced default setting.  Changing it can actually not only increase the performance of your Silhouette CAMEO or Portrait, but also give you better cuts.


Read on to understand more about this little know, but so important setting! 

Silhouette U: Silhouette School Launches Premium Content Membership Site

It's here, it's here, it's here! I am so nervous and excited and anxious and feeling all the feels as we officially open the doors of Silhouette U! Welcome to Silhouette School's new exclusive membership site - an extension, not a replacement for Silhouette School blog (can't stress that enough)!!! If you're looking for the best online Silhouette CAMEO classes and video tutorials, you found it!
silhouette u, silhouette school membership, silhouette video tutoroals,best silhouette cameo classes, online silhouette cameo classes, silhouette tracing help, silhouette commercial use designs, silhouette cameo help, silhouette cameo beginner help

The idea for Silhouette U was born out of the needs and requests I hear daily from Silhouette users and Silhouette School readers.  We've compiled them all and created a brand new site -unlike anything else out there - for Silhouette crafters around the world!


best silhouette cameo classes online, silhouette video tutorials, online silhouette cameo classes

Still not convinced...grab your coffee and stick around because telling you all the amazing Silhouette U member benefits could take awhile...

How to Trace Multi-Colored Layered Images in Silhouette Studio

Tracing is perhaps one of the biggest challenges for Silhouette users.  Tracing in Silhouette Studio is one of those things that takes practice because every design and every trace will be different. There's no exact formula for making the perfect trace that works across the board. That's especially the case with tracing multi-colored layered designs.

silhouette studio tracing tool tutorial for beginners

One thing to keep in mind with tracing layered images is you need to combine a lot of Silhouette Studio tools and build on the basics that you know about compound paths, fill colors, grouping and ungroup, edit points and the Modify tools to successfully trace a layered image.  For this reason - please know this should be considered an advanced Silhouette tutorial.

How to Use the Layers Tool in Silhouette Studio

One little known tool in Silhouette Studio Designer Edition is the Layers function. Now before you think of layering, such as for vinyl, this is a slightly different concept.

silhouette 101, silhouette america blog, layers function, Silhouette Studio designer edition tutorials, Silhouette Design Studio tutorials

While you can use it for layering vinyl, the Layers function is layering within your design inside the software, before the actual cutting takes place. Utilizing layers is beneficial when you have a multi-layer project that will be cut from different materials or different colors (pretty similar to Cut by Color).

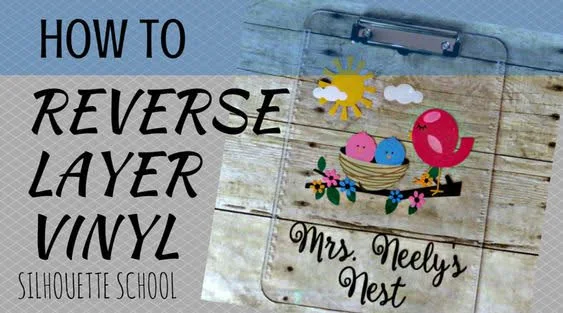
Applying Vinyl to the Back of a Surface Using Reverse Layering (Silhouette Tutorial)

Although we love our vinyl, it can be tricky on some projects. With Teacher Appreciation week in full swing, we wanted to show off a cute little project that uses a different vinyl technique: reverse layering.

silhouette 101, silhouette america blog, reverse layer vinyl, adhesive vinyl, reverse layer

Silhouette School weekly contributors Becky and Glenna from My Paper Craze are here to explain this technique. 

Reverse layering is needed when you have a multi-color design that you want to apply on the BACK of an object, such as a clear clipboard, a cutting board, or a glass block, for examples. We didn't want the vinyl on the front of the clipboard because it makes the writing surface bumpy for the teacher. So to be both cute and functional, we need to layer it on the back.

How to Cleanly Cut Cardstock with Silhouette: Line Segment Overcut Tutorial

If you're among the large majority of us who've experienced bad Silhouette cuts on cardstock...fear not! Today we're sharing the one click trick to cutting cardstock cleanly with your Silhouette CAMEO or Portrait!

Silhouette School contributor Becky Dykes is here with the answer to all your torn, ripped, and tattered paper problems!

Silhouette paper cuts, Paper cutting machine, paper cut, silhouette america blog, silhouette 101


As a papercrafter, snagged and ripped corners quickly became the bane of my crafting existence. When I first began, I actually avoided sharp corners altogether because my Silhouette just seemed to destroy them, especially when cutting cardstock.

I tried new blades, I tried point editing, I tried offsets... pretty soon I just accepted the fact that I wasn't going to get nice, sharp corners with my (cheap) cardstock. I had heard that the secret was purchasing the more expensive cardstock, but the truth is, this was happening on some of my more intricate vinyl projects, too.

Well, thankfully, Silhouette America heard our pleas and gave us an updated cutting function along the way with Version 3: Line Segment Overcut.

Running Two Silhouette Machines Simultaneously from Different Silhouette Studio Work Areas

If you want to literally cut your cutting time in half you can actually run two Silhouette machines at the same time - and they don't have to be cutting the same design or even cutting from the same work area.
Two Silhouettes, 2 Silhouettes, Silhouette Studio, Silhouette Cameo
This is a sponsored post, but all opinions are my own.
I recently got my hands on a few rolls of high gloss permanent vinyl from ProWorld. It was the first time I've used their vinyl and I was anxious to try it out.  This was a perfect excuse for cutting with two machines - I got results in half the time!

How to Cut By Color: Silhouette Studio Advanced Cut Settings (Don't be Scared!)

If you've never been brave enough to click the "Advanced Cut Settings" box, today's you're lucky today!  Silhouette School weekly contributor, Becky Dykes from My Paper Craze is here to walk you through exactly how to use the Advanced Cut Settings...and why and when you'd need to!

silhouette 101, silhouette america blog, Silhouette Cut Settings, Silhouette Cameo Cut Settings, cut by color

Have you ever worked on a project that needed two different tools or even just two different sketch pens? With Silhouette Curio it's pretty easy thanks to the dual head. But with Silhouette CAMEO and Portrait, it can become tedious and time consuming to change your cut lines, then Send to Silhouette, then change the pen and cut lines again, then Send to Silhouette... over and over until you get all the colors down? 

Today we are introducing you to the joys of cutting by color. You'll be humming "A Whole New World" soon enough, promise!