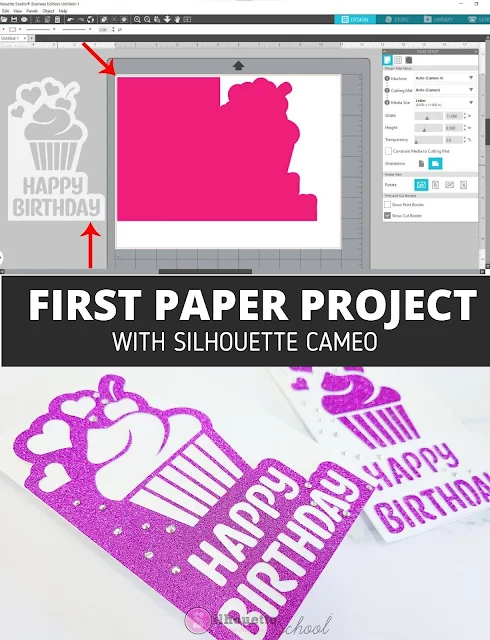
If you're new to Silhouette and looking for a first Silhouette CAMEO paper project, you've come to the right spot.
In this Silhouette CAMEO beginner tutorial we'll share the ins and outs of cutting paper while making a paper card.
Getting Started in Silhouette Studio
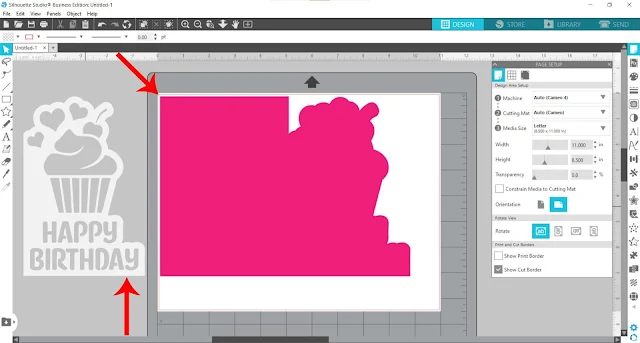
First, turn on your Cameo 4, then open Silhouette Studio and the Page Layout Panel. Select the following settings to cut on your Cameo 4, using a letter sized piece of cardstock on a 12 x 12-inch mat.
Machine: Cameo 4
Cutting mat: Cameo
Media Size: Letter (or 12x12 works too)
Then, import the design file by either going to File > Open or dragging and dropping the design. This cupcake card design is perfect for a first paper project because it's relatively large and simple in shape which means it's easier for the machine to make cleaner, smoother cuts. As you become more and more experienced with cutting paper, you can experiment with smaller and more intricate designs.
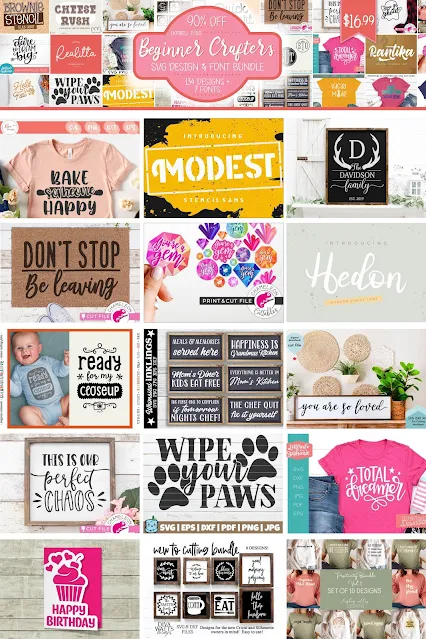
You can find this design file and others just perfect for Silhouette first-timers in the Beginner Crafters SVG Design and Font Bundle over at So Fontsy.
Click and drag the top cupcake piece somewhere off the mat (you'll come back to it later), and arrange the larger card base in the top left corner, but still within the red cut line border.
Loading the Cutting Mat
Grab your 12 x 12-inch Silhouette cutting mat and place a letter sized, high quality, heavyweight cardstock in the top left corner. This is an 80 lb. weight, smooth cardstock which is perfect for a card base. My favorite cardstock is American Crafts Precision cardstock.
Make sure the cardstock lays flat against the cutting mat. If the mat is brand new, you probably don't need much pressure from your hands to adhere the cardstock to the mat.
Note: before cutting your project, make sure you have already performed a test cut. Read more about how to do a test cut in this blog post.
Also, a new(ish) cutting blade always makes for better cuts. Paper will also dull your blade faster than vinyl will. So, if you're so inclined, you can keep a dedicated paper blade and a dedicated vinyl blade. Just write on the back so you can tell them apart!
Load the mat into the Cameo then go back to Silhouette Studio.
Cutting the Project
Open the Send Panel in Silhouette Studio by clicking the blue "SEND" button along the top of the software.
From the material list, select the material cut settings you determined were best from the test cut you performed earlier. Click Send and let the machine start cutting!
Once the CAMEO 4 is done cutting, unload the mat by pressing the unload button on the panel.
Here's a trick to remove cardstock from a sticky mat without it curling up on you - flip the mat over and roll the mat off the cardstock! The cutting mat is flexible so don't be afraid to bend it back upon itself so that the cardstock stays flat against your work surface and the mat releases from the back of the cardstock.
Repeat the previous steps but this time cut the cupcake design from a different color cardstock. Here I used glitter cardstock, and if you use a different material than the card base, then you may need to perform another test cut in the new material to get accurate cut settings.
This second cut doesn't need to be cut from a letter sized piece of cardstock, just a piece generously larger than the cupcake design.
After cutting, remove the large cupcake cut from the mat, but keep all the small pieces - you can actually make a second card with them!
Assembling the Card
Fold the card. For a super crisp fold line, use a scoring board with a scoring tool to add a fold line in the card base.
You can use any kind of adhesive you like, but a spray adhesive is really quick and easy. Spray it onto the back of the cut cupcake design. Use the spray adhesive outside or cover your work area before spraying to protect it from over spray. Line up the cupcake over the folded card base and press to adhere.
With the small bits left from the cupcake cut out, you can then create another card by adhering them to a second card base. Cut another card base from cardstock just like before.
Again, adhere the cut outs to that card base. Tweezers can be especially helpful to hold the smaller pieces. Just add a little white glue to the back and press gently to adhere them to the card.
... like a scattering of flat back gems.
Quick Tips for your First Paper Project
- Use a large, relatively simple design
- Use a new(ish) blade & dedicate it to cutting paper only
- Use a sticky mat
- Always perform a test cut
- Use high quality cardstock
- Roll the mat off the cardstock to avoid curling the paper
You can create this happy birthday cupcake card with the design file found in the Beginner Crafters SVG Design and Font Bundle at So Fontsy.
Get Silhouette School lessons delivered to your email inbox! Select Once Daily or Weekly.


.png)


No comments
Thanks for leaving a comment! We get several hundred comments a day. While we appreciate every single one of them it's nearly impossible to respond back to all of them, all the time. So... if you could help me by treating these comments like a forum where readers help readers.
In addition, don't forget to look for specific answers by using the Search Box on the blog. If you're still not having any luck, feel free to email me with your question.