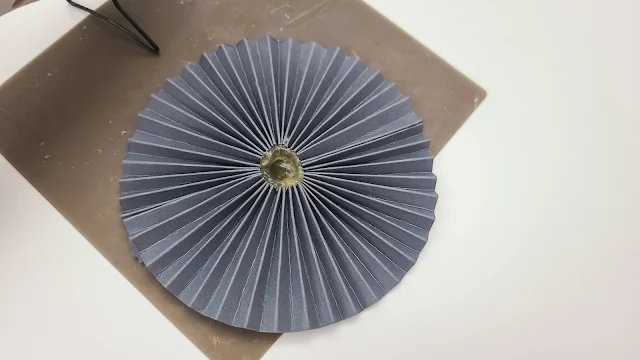
I recently shared a trick on how to use the foil quill to score lines in paper using a Silhouette CAMEO or Portrait. It's a perfect hack when creating paper rosettes or medallions for banners or other paper projects.
Today I thought I'd go one stop further to show you how to design the paper medallion cut files in Silhouette Studio...and a few tips on how to assemble them!
How to Set up Score Lines in Silhouette Studio to Make Rosettes
In a Silhouette Studio Design area, use the Draw a Line tool to draw two straight vertical lines.
Tip: Hold down Shift while drawing the line, so the line is perfectly straight.
Adjust the height of the lines to about the desired size of the finished rosettes (I drew 4-inch lines and the rosettes ended up being about 4.25 inches across).
Select one of the lines and change the X value of its position to 0.00 (located in the top quick access too bar). Select the second line and change its X position value to the width of your media size - in this case 11 because I was using an 11-inch wide piece of cardstock.
To create a rosette that has score lines that are 0.25 inches apart, you need to duplicate these lines until you have 44 of them in all. How did I get to the number 44? Take the width of your material and divide it by 0.25 (the space between the score lines). Yes, math .. ahhh! If you wanted score lines that were 0.5 inches apart on 11-inch wide cardstock, you would divide 11 by 0.5 to find out how many total score lines you would need.
How to Quickly Replicate Multiple Copies
Now don't worry, you don't need to click Copy and Paste over 40 times to duplicate these lines. Instead, open the Replicate panel from the right sidebar. This sounds more complicated than it is, so just follow me here...
Go to the Advanced Replicate tab. Enter the number of lines you want to add (we already have 2 lines on the page and we want 44 total so enter the number 42).
Click the direction in which you want the copies to be applied (so that they sit in between the first two lines you drew). Keep 0.0 as the setting in the Rotate each Copy section. Then, just click Replicate!
The copies of the line will then appear on your page and it ends up looking like one rectangle, but it is actually just 42 lines right next to each other.
Click and drag your cursor across all the lines on the page to select all of them at one time.
Open the Transform Panel now from the right sidebar and click Space Horizontal.
This positions all the lines equally apart!
Next, delete the first and last line. These lines don't need to be scored because they are the edges of the cardstock - we just needed to create them to position all the other lines.
That's it..you've created your score lines to make a paper medallion so you're ready to score with the foil quill. If you're not familiar with this Silhouette hack, this tutorial will walk you through step by step including creating a spongy mat!
After it's done scoring, unload the mat and carefully remove the cardstock from the craft foam.
Then, cut the score lines in half to create two 2 x 11-inch wide strips.
It's time to assemble your paper medallions.
How to Assemble Rosettes
To create a rosette, alternate folding on the score lines on each cardstock strip.
Glue the two strips together end-to-end to make one long strip. Then, glue the two free ends of this long strip together to create one big loop. You can use either a white glue or double-sided adhesive like Scor Tape.
Put a dab of hot glue on a cardstock circle. I like to work on a non-stick silicone pad just in case I get a little messy with the hot glue.
While the glue is still hot, form and push the rosette together on top of the hot glue. Hold it there until the glue hardens which will keep the rosette together.
Add a tiny bit more glue in the middle of the rosette and put another cardstock circle over the top to finish it off!
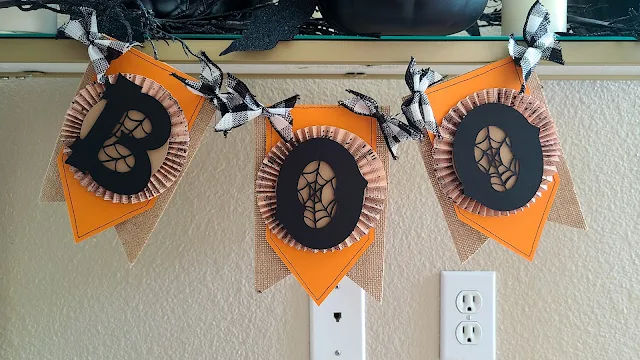
Rosettes look beautiful for any project, like when you layer them on a hanging banner. The letters in this "Boo" banner were cut with the Silhouette Cameo 4 using the Halloweb font from the October SVG and Font Bundle at So Fontsy. This bundle includes 180 SVGS and 15 months at a whopping 91% off!
Note: This post may contain affiliate links. By clicking on them and purchasing products through my links, I receive a small commission. That's what helps fund Silhouette School so I can keep buying new Silhouette-related products to show you how to get the most out of your machine!
Get Silhouette School lessons delivered to your email inbox! Select Once Daily or Weekly.


.png)


No comments
Thanks for leaving a comment! We get several hundred comments a day. While we appreciate every single one of them it's nearly impossible to respond back to all of them, all the time. So... if you could help me by treating these comments like a forum where readers help readers.
In addition, don't forget to look for specific answers by using the Search Box on the blog. If you're still not having any luck, feel free to email me with your question.