From food storage to home décor pieces,
chalkboard vinyl gives you the versatility to decorate and label any flat
surface by turning it into its own chalkboard!
And now with THIS hack, you can turn regular, glossy adhesive vinyl into chalkboard vinyl. It's so simple, and here's how to do it!
And now with THIS hack, you can turn regular, glossy adhesive vinyl into chalkboard vinyl. It's so simple, and here's how to do it!
Cut a piece of permanent glossy adhesive vinyl to the
desired size and shape you want your finished chalkboard to be. I’m using white Oracal 651
cut into a 5-inch by 6-inch oval. Then, if necessary, weed out the excess vinyl.
Now this next part is the simple, yet mind-blowing trick that turns this regular glossy vinyl into a chalkboard – spray it with chalkboard spray paint! We've spray painted vinyl before to get a custom color..but this is a first with chalkboard spray paint!
Now this next part is the simple, yet mind-blowing trick that turns this regular glossy vinyl into a chalkboard – spray it with chalkboard spray paint! We've spray painted vinyl before to get a custom color..but this is a first with chalkboard spray paint!
Yes, that’s right. Spray a piece of glossy adhesive vinyl with a couple coats of chalkboard spray paint like this Krylon Chalkboard spraypaint.
Let the chalkboard paint dry for at least 24 hours.
Next, you're ready to apply your chalkboard vinyl to the desired surface.
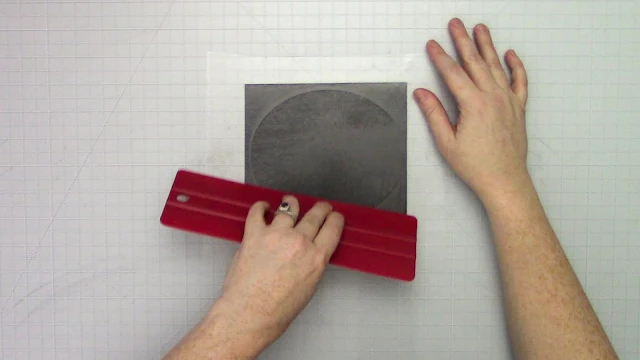
Apply a piece of transfer tape over your DIY chalkboard vinyl to remove it from its backing. Use a scraping tool over the transfer tape to smoothly apply it over the vinyl.
Peel up the transfer tape with the vinyl off the vinyl backing. Chalkboard paint overspray on the vinyl backing may stick to the transfer tape, but that is okay.
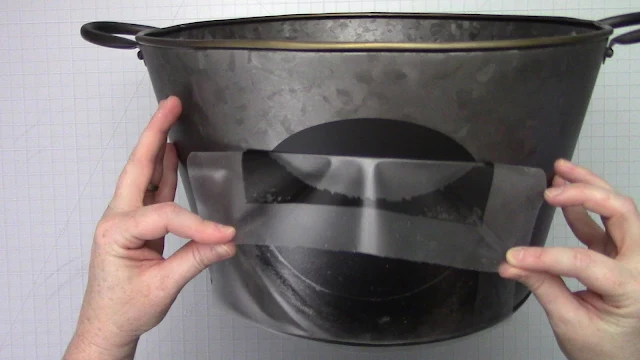
Transfer your chalkboard vinyl to the desired surface, just
like a vinyl decal.
Slide a scraping tool across the top of the transfer tape to press the vinyl firmly onto the desired surface.
Slide a scraping tool across the top of the transfer tape to press the vinyl firmly onto the desired surface.
Remove the transfer tape from the chalkboard vinyl by
rolling it back onto itself. If you’ve let the chalkboard paint thoroughly dry
on the vinyl (at least 24 hours), then the transfer tape should not pull off
the chalkboard paint from the vinyl.
Now this next part, decorating your chalkboard with chalk or chalk markers, is all up to you and your creativity.
If you find yourself with a creative block, or maybe just don’t like your own handwriting, try using a stencil to create a chalkboard sign instead!
In the second part of this tutorial, which I will share tomorrow, I will walk you through exactly how to create your own you stencil with Silhouette.
You'll find that there are so many beautiful sign-worthy designs, like this "Farm Sweet Farm" design, in the Big SVG Sign Bundle
over at So Fontsy. The
bundle includes a little farmhouse, rustic, chic, & holiday style plus 4
wood signs mock ups as well! And the best part is that the Big SVG Sign Bundle
is 89% off! This deal won’t last long though, so hurry over to So Fontsy to pick
it up.
Note: This post may contain affiliate links. By clicking on them and purchasing products through my links, I receive a small commission. That's what helps fund Silhouette School so I can keep buying new Silhouette-related products to show you how to get the most out of your machine!
Get Silhouette School lessons delivered to your email inbox! Select Once Daily or Weekly.


.png)


But why do this if you can buy real chalkboard vinyl?
ReplyDeleteMy thoughts exactly
DeleteSpray entire sheet with chalkboard paint, let dry and then do your cut and no over spray.
ReplyDelete