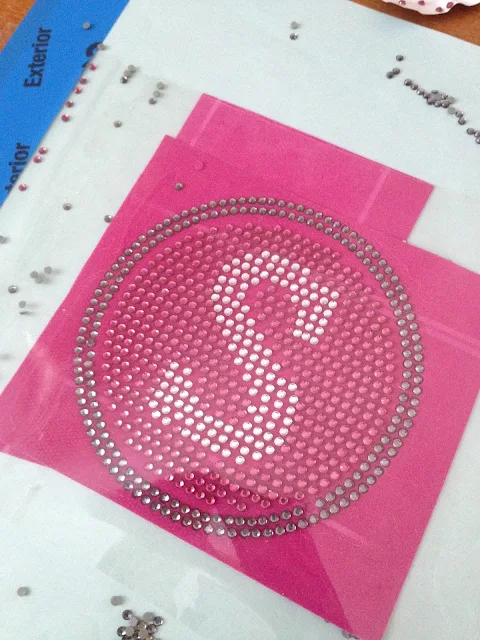
If you're new to working with rhinestones I suggest you start with a simple rhinestone design - and a single color decal. I'm going to assume you know the basics of rhinestones and fly through the details on designing. If you're a newbie, no problem just follow along with my rhinestone 101 tutorials and then pick it up here after you've got all of your rhinestones into the template. And while I'm working with a multi color rhinestone design for this demo (how I created that whole thing is worth a second tutorial...baby steps, people) - I suggest you start with a single color design.
Alright let's get started.
- Create the rhinestone design in Silhouette Studio, sizing it to fit the surface where you plan to place it
- IMPORTANT: Change the spacing of the rhinestones so they are close together...I used .009 spacing.
- Cut the design on rhinestone flock
- 'Weed' the flock and place the template on a backing sheet
- Pour the rhinestones onto the design
- Use the rhinestone brush to easily move the rhinestones into place and right-side-up
Alright now with your design all ready, you want to use the rhinestone transfer material to place over the design to pick it up. This will allow you to then move it onto the special decal material. Slowly pick up the rhinestone design. All the rhinestones should stick to the transfer material.
Now normally you'd place the rhinestones on a shirt or something. But for a decal you will place the rhinestones onto a special material called Bling NE Thing Decal Material available from The Rhinestone World. Cut a piece of the decal material off of the roll that's slightly larger than the decal. Place the transfer design onto the shiny side of the Bling NE Thing material and gently press it down. Keep the transfer material on top of the rhinestones for now.
Don't try to cheat the system here....remember, rhinestones adhere with a heat activated adhesive on the back of each rhinestone so you need to use the special Bling NE Thing decal material from The Rhinestone World. For the love, don't go slapping these on some clear vinyl and heat it up and think it will all be okay. Use the Bling NE Thing material which is heat safe.
Take the whole thing over to your iron or heat press. If you're using a heat press the temperature should be about 325 degrees. You'll use medium pressure for 15-20 seconds. Lay your teflon sheet down on the bottom plate (or ironing board). Then put the rhinestone design on top - with the rhinestones DOWN - then fold the teflon sheet over the top. Pull the top plate down or put the iron on top and apply medium pressure.
After the first 10 seconds flip the rhinestone decal over and over and press again for about 5 seconds. Now you can carefully take the decal away from the heat, but be careful it will be hot, and remove the transfer material leaving the rhinestones on the Bling NE Thing material.
The last step is to remove the backing of the Bling NE Thing material to expose the sticky side so you can place the decal where you want it.
And finally place the design wherever you want...but keep in mind it's removable but not re-usable so find a good spot.
Note: This post may contain affiliate links. By clicking on them and purchasing products through my links, I receive a small commission. That's what helps fund Silhouette School so I can keep buying new Silhouette-related products to show you how to get the most out of your machine!
Thanks for coming to class today at Silhouette School. If you like what you see, I'd love for you to pin it!

Get Silhouette School lessons delivered to your email inbox! Select Once Daily or Weekly.


.png)


Hi- Love your post. My question is if we don't have a heat press, how long should we hold the iron to and what are the best settings (cotton, etc). Thanks!
ReplyDeleteIs there another name for the bling n e thing material here in the uk?
ReplyDeleteWhat the alternative material in the uk to sticky flock rhinestone material ?
ReplyDeleteThank you! I adore the BLING!!! :)
ReplyDelete
ReplyDeleteSuper great. Are you also making a video? Thought it was hard to translate the written one. Much easier with an video. Thank you for your super good guides. I'm so much better now. thanks