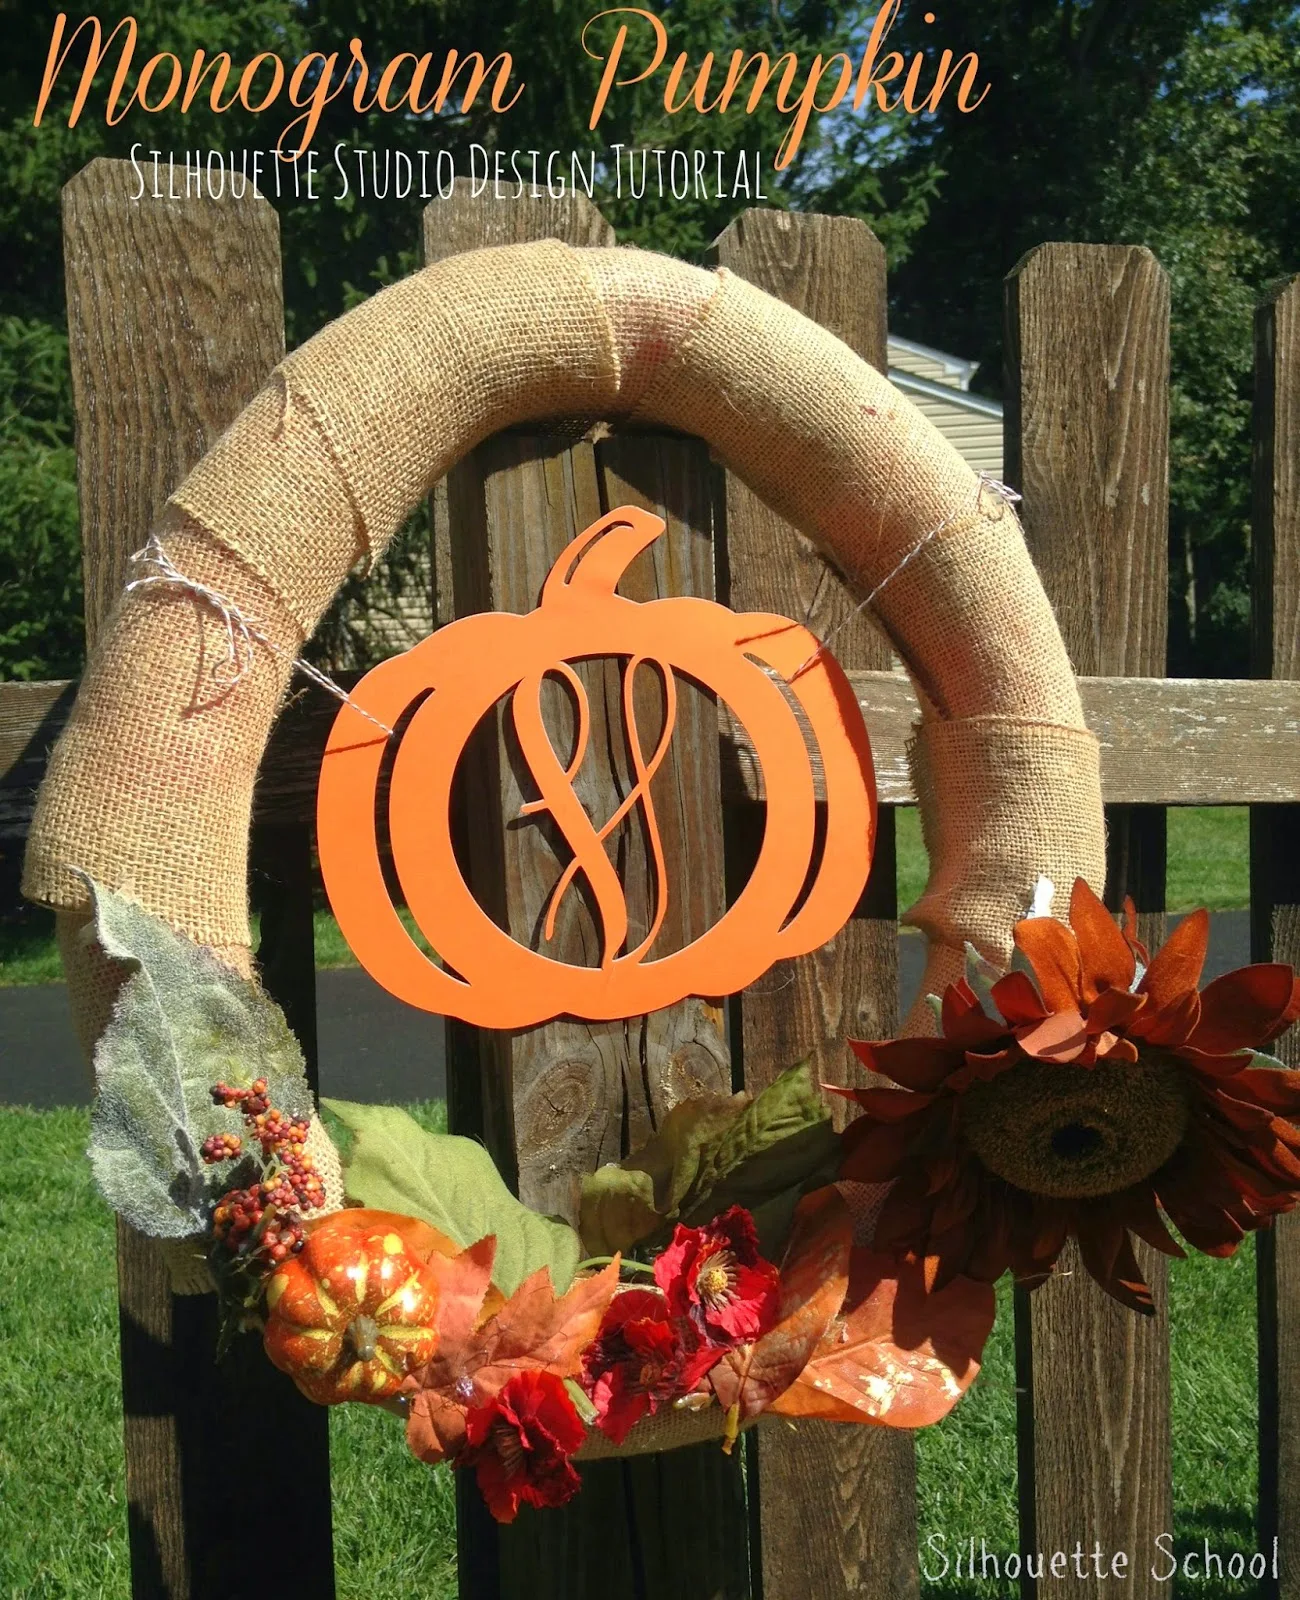
 A few weeks ago a Silhouette School reader posted on our Facebook page asking where to start in making a pumpkin monogram like this one. She had found a door hanger she was going after and it certainly was ADORABLE! I mean, you can't go wrong with a monogram, right?
Designing something like this takes a few steps, but nothing you can't handle...promise!
Of course, I could just give you the design, but honestly what fun is that? I'm trying to help teach you how to use the Silhouette Studio software and your machine and this tutorial is a great example of how learning the basics can really help you. As you'll see this tutorial builds off soooo many previous lessons covered on Silhouette School: tracing, replicating, aligning, edit points, offset, welding, compound paths, PicMonkey designs, thickening fonts, modifying and subtracting...all to achieve the final design! Sound intimidating? It's not...promise!
So here goes!
I started by grabbing a pumpkin shape from PicMonkey. (Don't worry that it's not oval enough yet or that it has a jack o'lantern face.) I saved it and brought it into studio using my easy method for working with PicMonkey designs in Silhouette Studio described here.
Once the design was in Studio, I traced it but instead of tracing the full design (face and all), I selected 'trace outer edge' only.
Now you can delete the jpeg image and just work with the design. The first thing I did was stretch my design slight to make it more oval like the reference and not so round.
Then I used the draw a circle tool to draw out a circle for the center. Selecting both and clicking the align tool > Align Horizontally > Align Center will align these two images. Due to the height of the stem "center" will put the circle too high.
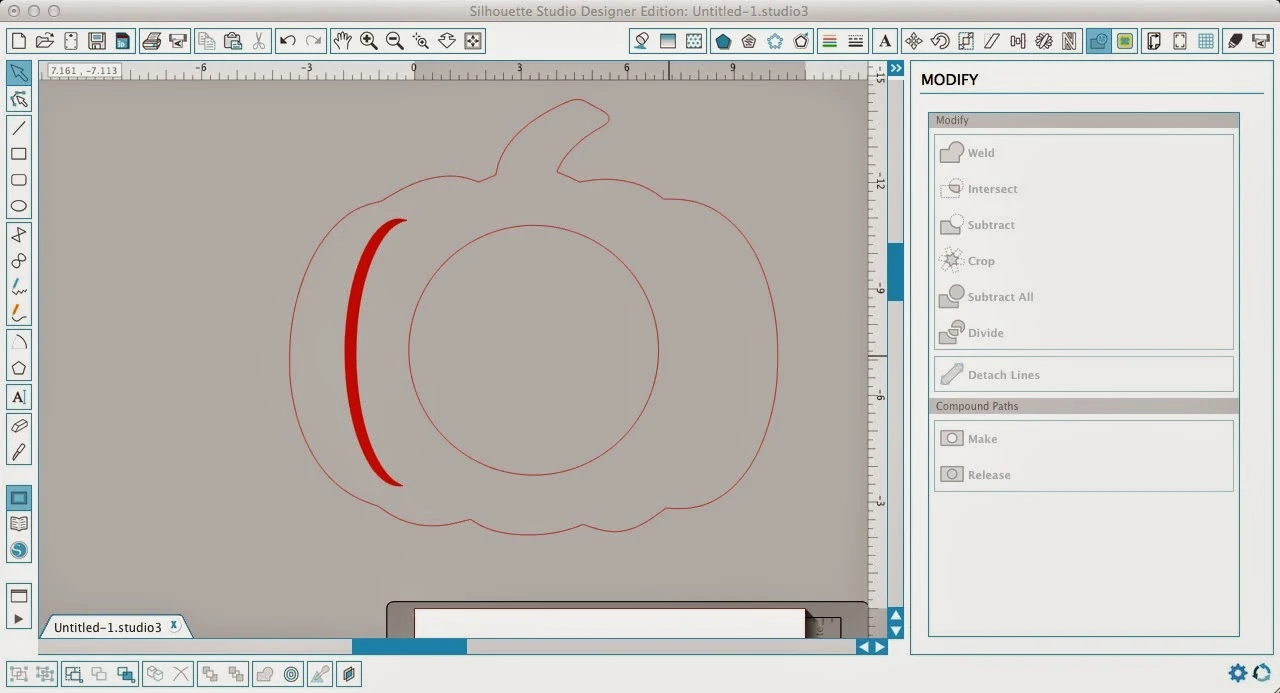
The next step is to make the detailed areas of the pumpkin. What I did was draw out an oval that was the similar in shape to the pumpkin.
That just ensures that the curve is similar. Copy and paste another copy of the same oval and move the second copy over top the original. (I'm filling them in so you can more easily see.) Select both and from the Modify tool click "Subtract".
This is what you're left with.
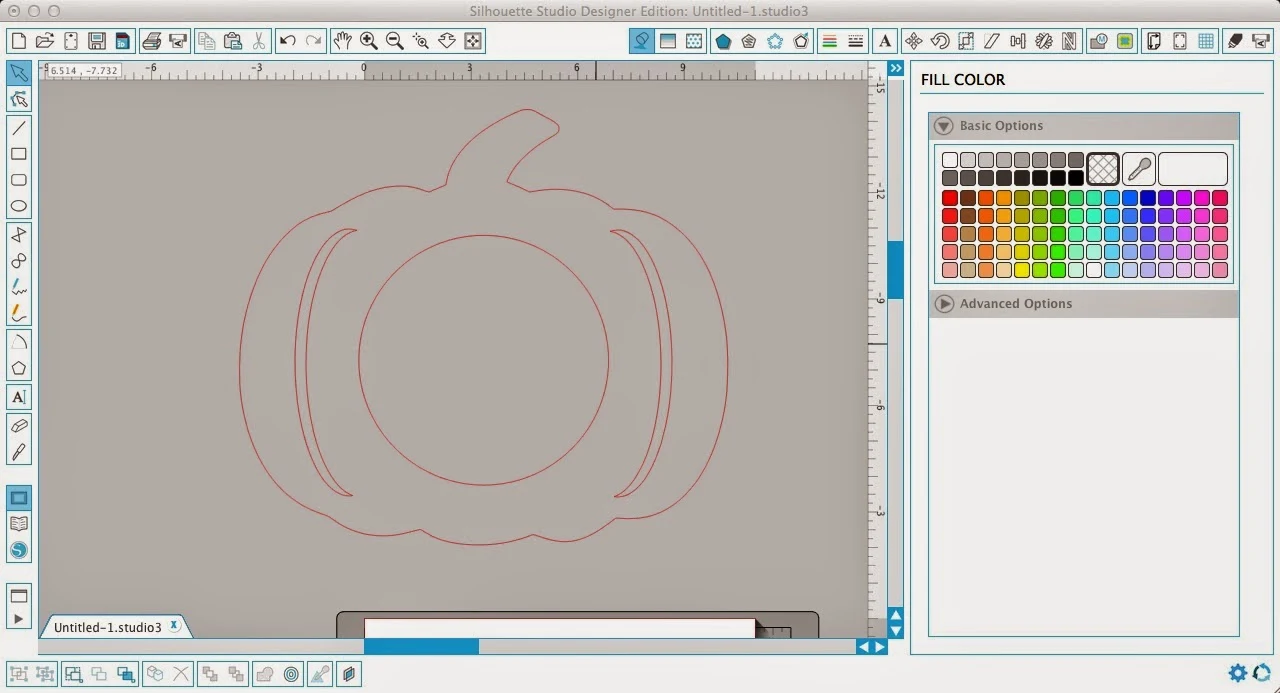
Select the little crescent again and from the Replicate Tool > mirror right so you get the exact same shape for the other side of the pumpkin.
The stem cut out piece is the trickiest part. Select > Copy > Paste JUST the pumpkin outline so you get a duplicate. Then use the eraser tool to erase everything except the stem area. I went back in and deleted just a little bit more as you'll see.
Select what you have left of the stem and click the Offset tool to get an offset. Move the offset into position on the pumpkin.
You may need to make some minor tweaks to the edit points to get that little cut out just right.
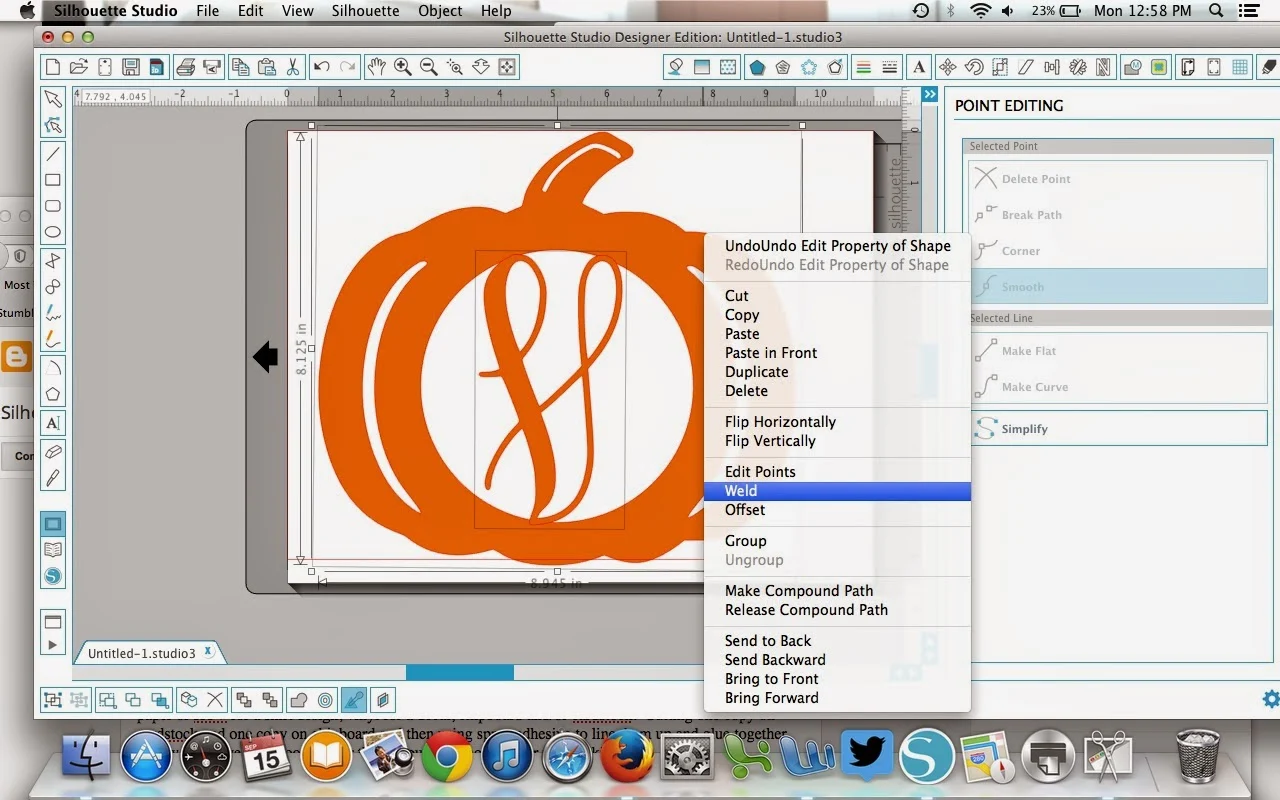
This is the most important step....select your entire design > right click > make compound path. This allows you to be able to weld the monogram into the frame (the pumpkin). If you try to weld the monogram into the pumpkin without making it a compound path, some areas will disappear on you!
Type out your monogram...you can do any style you like...one letter, two letters, three letters. They'll all work.
Size and position the letters. (If they're too thin, put an offset around them to thicken up the font slightly as I showed you how here). Make sure at least part of the top and bottom of the letter(s) is overlapping the circle at the top and bottom, too. Select everything > Right Click > Weld.
And voila..you did it! Aren't you glad you made it on your own instead of me just handing it over...it's always nice to feel accomplished!
Cut this pumpkin on whatever your little heart desires: freezer paper or HTV for a shirt design, vinyl for a decal, chipboard and/or cardstock. Cutting one copy on cardstock and one copy on chipboard and then using spray adhesive to line them up and glue together is how I achieved the door hanger the Silhouette School reader was looking for.
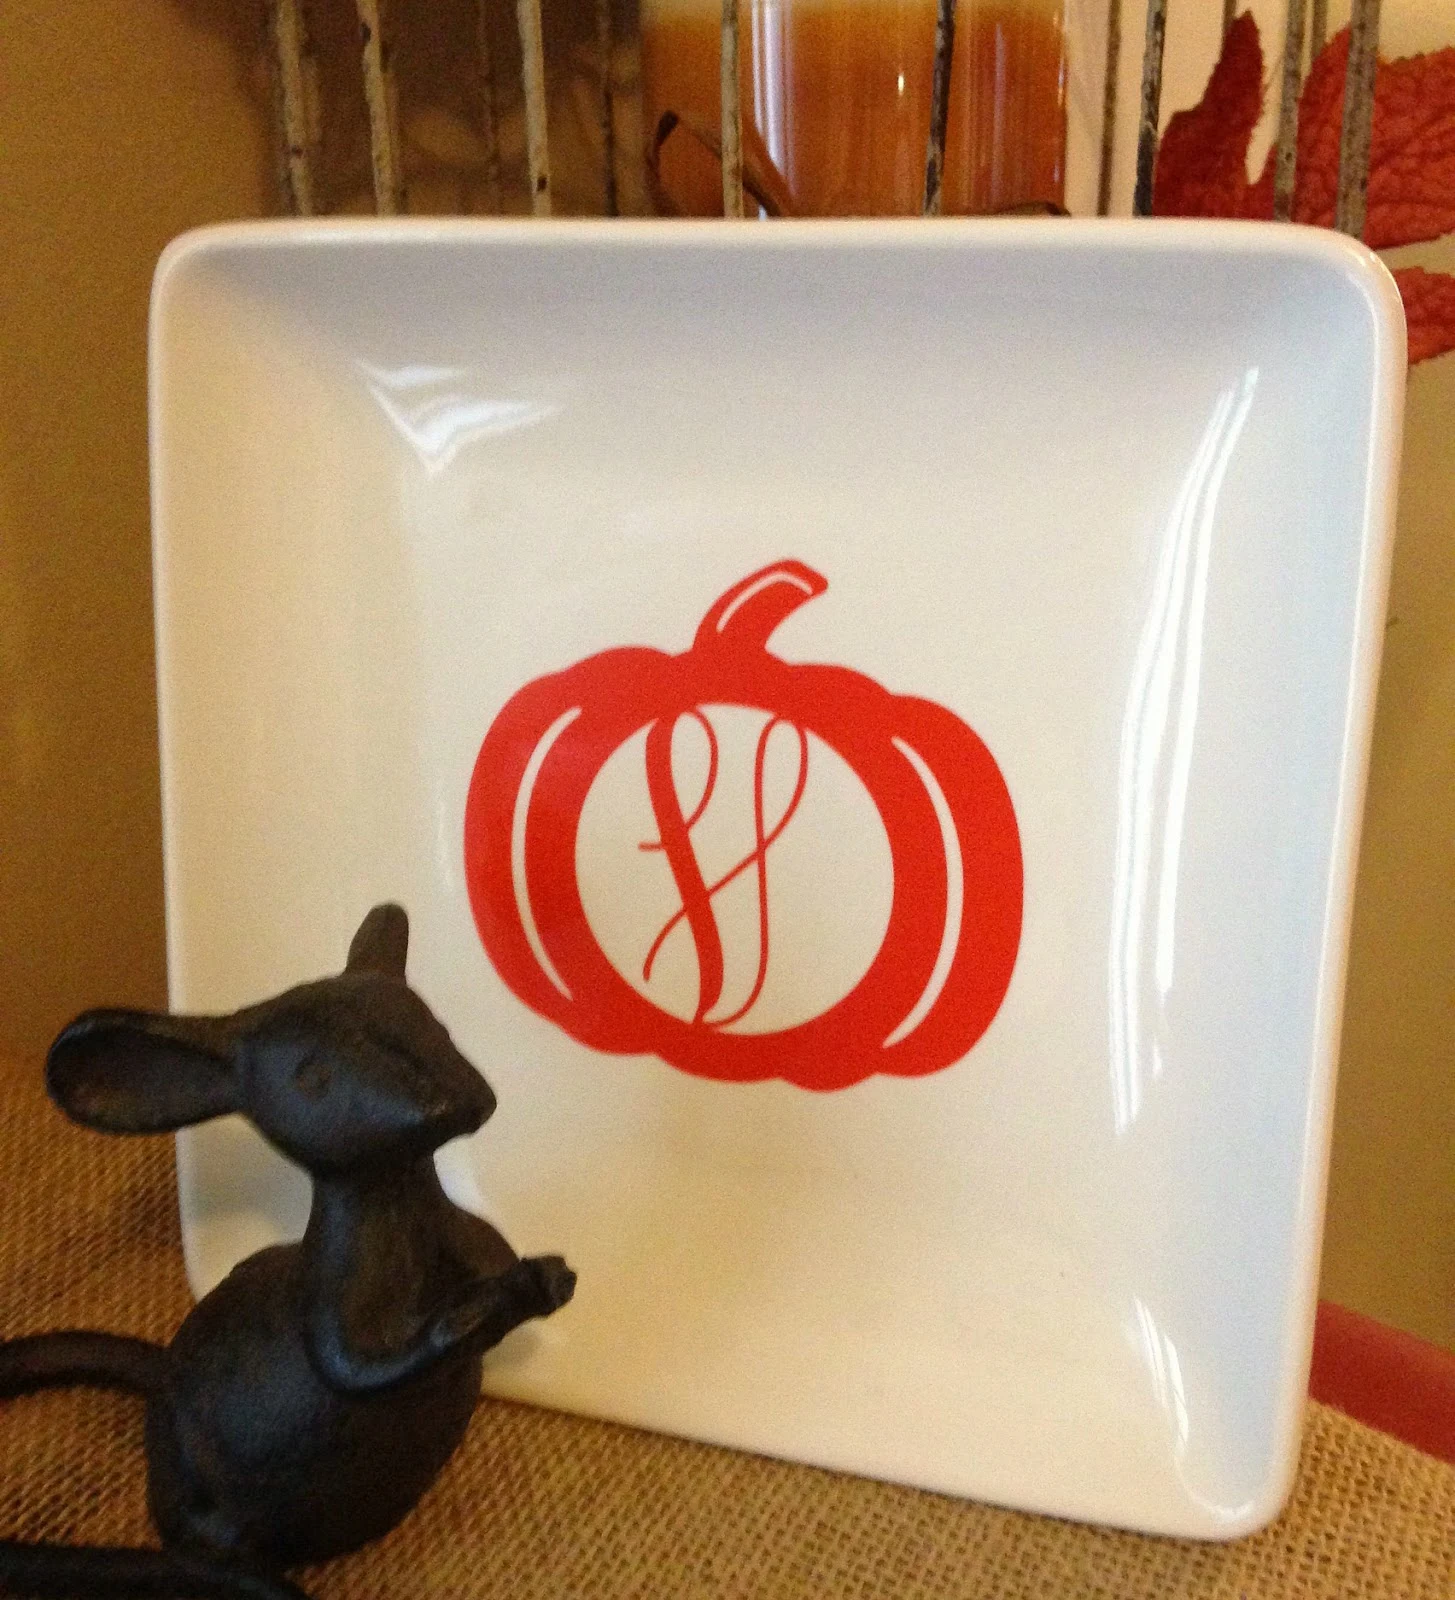
I also made a second cut on vinyl for this cute little decorate plate.
Note: This post may contain affiliate links. By clicking on them and purchasing products through my links, I receive a small commission. That's what helps fund Silhouette School so I can keep buying new Silhouette-related products to show you how to get the most out of your machine!
Thanks for coming to class today at Silhouette School. If you like what you see, I'd love for you to pin it!







.png)


No comments
Thanks for leaving a comment! We get several hundred comments a day. While we appreciate every single one of them it's nearly impossible to respond back to all of them, all the time. So... if you could help me by treating these comments like a forum where readers help readers.
In addition, don't forget to look for specific answers by using the Search Box on the blog. If you're still not having any luck, feel free to email me with your question.