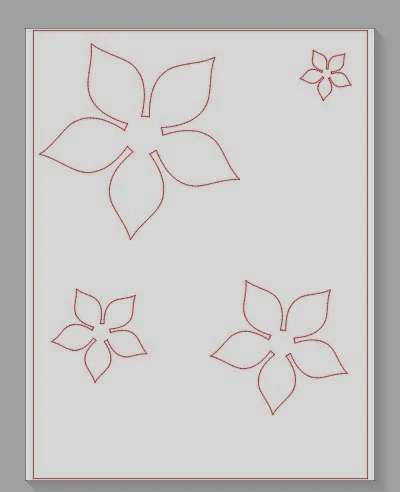
What we're going to do is take one basic flower design and use it to make a 3D flower by cutting it several times in different sizes. But let's not get ahead of ourselves.
First you need to find a flower design to cut. If you have a flower that you like in your library - go ahead and use that. I looked through a few different flower and nature dingbat fonts (You do know my trick on getting free designs from dingbat fonts, don't you? Click here NOW! Go on...I'll wait) and settled on this flower. It's the "P" (capital P) from the Kalocsai Flowers font. More here on how to download and install new fonts into Silhouette Studio.
I changed the design slightly so the petals all touched. In the photo above you can see what the original design looked like. You can see it's actually six different pieces - 5 petals and one center. To make paper flowers, I want just one solid cut line. So I modified the design.
I started by ungrouping (Right Click > Ungroup) and then releasing the compound path (Right Click > Release Compound path). This let me select the small inner circle separate from the petals. Then I was able to enlarge the circle so it overlapped the inner most point of all the petals.
Then I welded the entire design together. You can find a detailed tutorial on welding here.
I wanted my 3D paper flower to be three or four layers (I didn't make my final decision until I put it all together) so I duplicated the design four times and made each flower a different size.
Optional: I used the 'Draw an Ellipse' tool to draw a small circle in the middle of the largest flower. I duplicated it three more times for the remaining flowers to ensure the hole was the same size for all the layers. I attached my flowers with brads so this little hole is for the brad. You could also use a mini hole punch to make the holes after they are cut...but why not let the Silhouette save you the work?
Now I'm ready to cut. I cut on four different contrasting papers at the same time (see the tutorial here).
After the flowers are cut, you can give them more of a 3D layered look by rolling the petals around a pencil. That's what I did with this version of the same flower in purple. I used a very thin paint brush handle to roll the smallest flower.
Then I simply attached my flower layers with a brad starting with the largest flower on the bottom and working up to the smallest flower.
I even added a couple of leaves by using the same original dingbat font "P" I just deleted 3 of the 5 petals...and voila instant leaves.
If you head over to our sister site Two It Yourself, you'll see exactly how I used this flower in my spring decor. It's seriously cute!
Thanks for coming to class today at Silhouette School. If you like what you see, I'd love for you to pin it!


.png)


No comments
Thanks for leaving a comment! We get several hundred comments a day. While we appreciate every single one of them it's nearly impossible to respond back to all of them, all the time. So... if you could help me by treating these comments like a forum where readers help readers.
In addition, don't forget to look for specific answers by using the Search Box on the blog. If you're still not having any luck, feel free to email me with your question.