With the power of Silhouette Studio software, you can accurately place and stitch out your embroidery and applique designs with your embroidery machine.
This trick to add placement lines on your embroidery designs, will take all the guesswork out of lining up your embroidery machine so it stitches the design exactly where you want it!
This is extremely helpful to know for projects where you need/want to embroider a design in a very particular spot - like embroidering on a pieced quilt block.
First, you'll need at least Silhouette Studio Designer Edition Plus to open several formats of embroidery files including PES, DST, EXP, JEF, and XXX embroidery files.
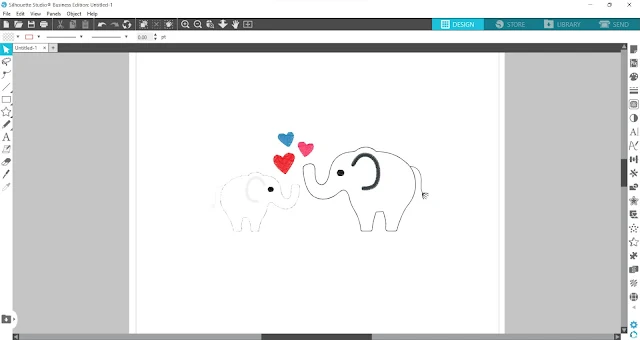
Open the embroidery file in Silhouette Studio - but make sure NOT to resize it at all. You can find this elephant applique file in the Adorable Applique Machine Embroidery Bundle over at So Fontsy. The bundle includes this design file in various other hoop sizes and in several different embroidery file formats.
For this project, we're going to use the the 5 x 7-inch PES file of these adorable elephants.
Group all the elements of the design together, but again - DO NOT resize the file.
How to Mark the Center of Design in Silhouette Studio
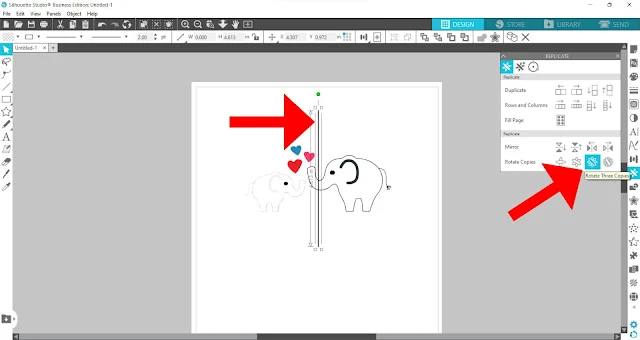
Using the Draw a Line tool from the left menu, draw a vertical line that is longer than the design itself. Hold Shift on your keyboard while drawing the line to keep it perfectly straight.
Give the line a thick line weight, so you can see it well - 2.0 is good.
Select the line and the design, and click Center in the top menu. This will perfectly center the two together.
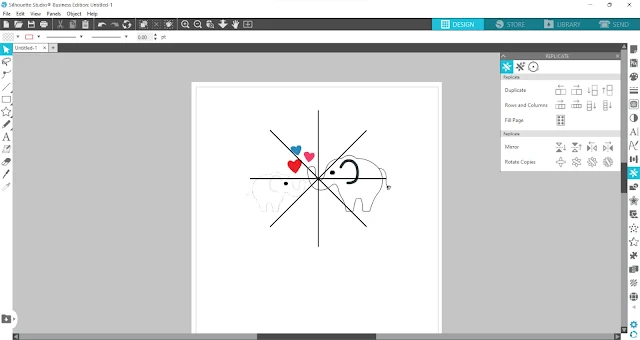
Open the Replicate Panel from the right toolbar. With the line selected, click Rotate Three Copies.
Where these lines intersect marks the exact middle of the design.
Now, print out this design on your printer. Note: it's not necessary to print in color - you're just using this as a placement guide.
Cut around the print out with pair of scissors.
How to Center Embroidery Designs in a Hoop
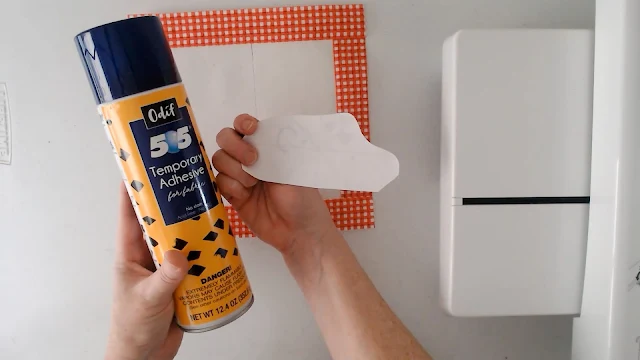
Lightly spray some temporary adhesive on the back of the printout.
Place this printout where you want the applique design to be stitched out on the material you wish to embroider on. Because the adhesive is temporary, you can rearrange the printout and play around with different design placements.
If desired, you can use an erasable fabric pen to mark a line on your material, then align the marking with one of the lines printed on the design. When placed where desired, press the printout onto the fabric to temporarily secure in place.
Now you're ready to hoop or float the material in an appropriately sized embroidery hoop with an appropriate stabilizer and place the hoop into your embroidery machine.
Open the same embroidery file (make sure it's the same size as the design you opened in Silhouette Studio) on your embroidery machine and use the positioning buttons on your machine to move the needle so that it is perfectly centered over the center of the printed embroidery design (where the printed lines intersect is the center of the design).
When the needle is perfectly aligned, carefully remove the print out and then stitch out your embroidery or stitch out the placement stitch for applique.
And finish the project as desired!
With this technique and the Adorable Applique Machine Embroidery Bundle over at So Fontsy you can start embroidering with accuracy!
If you're wondering how to cut fabric applique with your Silhouette CAMEO 4 and rotary blade, this tutorial will walk you through that part of the process.
Get Silhouette School lessons delivered to your email inbox! Select Once Daily or Weekly.


.png)


I tried this. I purchased the Plus edition of Designer, installed the software, and followed these steps. When I try to print the PES design with the centering lines, the Studio software freezes and I have to reboot my PC. I have sent this to chat but have not received an answer. Did I just waste $$ and time?
ReplyDeleteAlthough this works most of the time, I have found that not every design imports cleanly into silhouette. Most do. Once in a while I still have to print it from my embroidery software.
ReplyDelete