You can make not only rhinestone transfers for shirts with your Silhouette CAMEO or Portrait machine, you can also make rhinestone decals!
I've shared tips before on how to make rhinestone decals with a speciality material, but I've been working on a new, lower cost option that I think works just as well! The key is of all things...sticker paper!
This tutorial is going to assume you know the basics of how to create custom rhinestone templates with Silhouette Studio and how to cut the rhinestone template material with your Silhouette CAMEO. If not, you will want to review this beginner rhinestone tutorial before you begin.
You'll also want to make sure you have some clear sticker sheets from Online Labels on hand.
How to Design a Rhinestone Decal in Silhouette Studio
Start in Silhouette Studio with your rhinestone design sized and fill with holes.
Duplicate the design and from the Rhinestone panel change the "Rhinestone Effect" to a cut line.
Select that cut line and open the Offset panel.
Create an offset around the cut line version of the design. This is going to be the piece you cut on Online Labels Clear Sticker Paper.
Move the cut line version of the design off to the side of the work area and move to the Send panel to cut the rhinestone template.
I find the best Silhouette cut settings for Rhinestone flock template material are a blade of 7, force 33 and 2 passes.
Once that's cut, weed out the holes from the template material. This is my least favorite part of the process, but I have found if you roll the template in both directions it helps pop the holes out of the flock a bit.
Then peel up fast like a bandaid and a lot of the holes should stay behind. You can then scrape them away.
Use your scraper tool to encourage any that stayed in the rhinestone material to pop out.
Dump a pile of rhinestones on the rhinestone template and push them into the holes using a rhinestone brush.
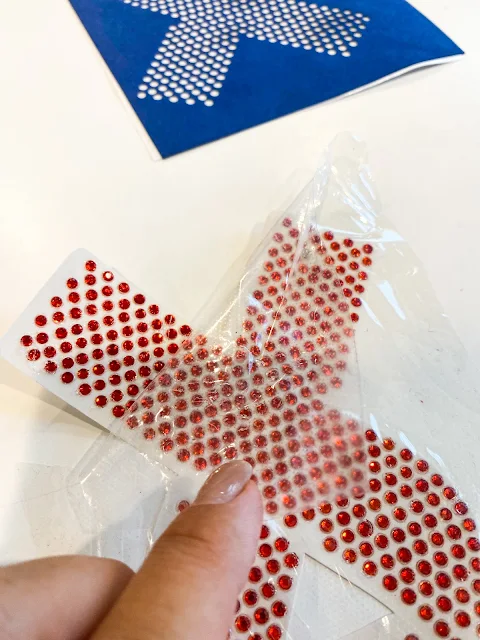
Use a piece of rhinestone transfer tape to pick the rhinestones up. Set the rhinestone transfer safely to the side while you cut the sticker paper.
How to Cut All the Way Through Sticker Paper with Silhouette CAMEO
Return to Silhouette Studio and put the cut line on the design area and remove the rhinestone design. In the Send panel change your cut settings to Blade depth of 6, force 27, 2 passes.
Load a sheet of Online Labels Clear Printable Sticker paper onto your cutting mat.
How to Heat Press Rhinestone Decals
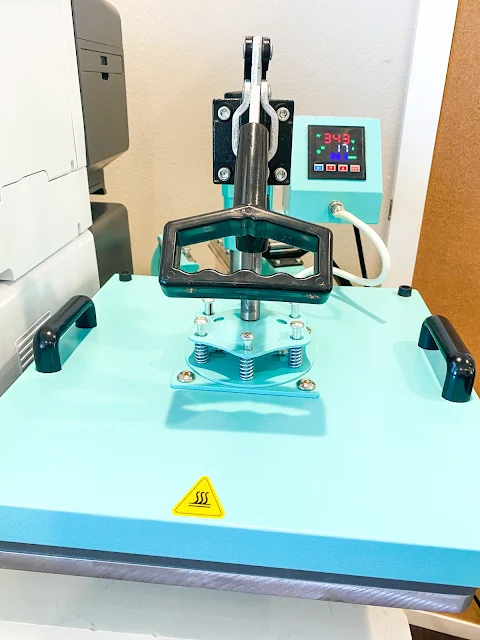
To press rhinestones onto sticker sheets, you want to make sure your heat press is warmed up to 340 degrees with the timer set to about 20 seconds.
Place the rhinestones directly on top of the clear sticker. The backing should still be on the sticker.
When the heat press is up to temperature, lay the rhinestone/sticker combo on the heat press with the rhinestones DOWN. The back of the sticker sheet should be face up.
Press for 20 seconds with firm pressure.
When the time is up, open the heat press and let the decal cool for a few seconds. Cool completely to let the rhinestone glue set and also let the sticker material cool back into shape.
Once cooled, peel off the rhinestone transfer sheet.
Now lay the decal on the heat press with the rhinestones up. They should no longer be covered with the rhinestone transfer at this point.
Place a teflon sheet over the rhinestone decal and press for 10 seconds at 340 degrees.
When the time is up remove your rhinestone decal from heat press and let it cool.
Isn't that cool?! Now you just need to remove the sticker backing.
It's best not handle it too much so if you decide to use the sticker on something like a tumbler you will most likely want to cover with epoxy to protect the stones.
Get Silhouette School lessons delivered to your email inbox! Select Once Daily or Weekly.


.png)


No comments
Thanks for leaving a comment! We get several hundred comments a day. While we appreciate every single one of them it's nearly impossible to respond back to all of them, all the time. So... if you could help me by treating these comments like a forum where readers help readers.
In addition, don't forget to look for specific answers by using the Search Box on the blog. If you're still not having any luck, feel free to email me with your question.