All Silhouette machines can cut rhinestone templates including the Silhouette CAMEO 4.
You can also make your own rhinestone templates in Silhouette Studio if you have Designer Edition or higher. Follow along to learn how to make a rhinestone template with Silhouette CAMEO 4 in just a few easy steps.
Start by opening a new Silhouette Studio work area.
Draw out or open an existing design. If this is the first time you are making a rhinestone template I would suggest starting off with a simple shape - such as one of the designs found in the Flexishape tool.
Draw out the shape like you normally would.
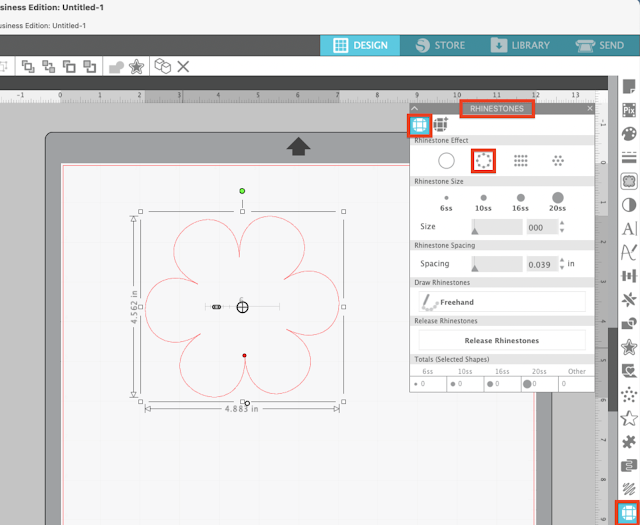
With the design selected, open the Rhinestone tool on the right sidebar.
On the Rhinestone Panel you'll need to decide if you want the border of the design in rhinestones or if you want the design filled with rhinestones. Make your selection.
The next section is really important. This is where you are going to pick the size of the rhinestone holes that are cut. Make sure you select the same size as the actual stones you have. If you pick 6ss and you have 10ss stones, they won't fit in your template.
Finally you can adjust the spacing of the holes by moving the Spacing bar.
The next step is to cut the rhinestone template material on your Silhouette CAMEO 4. (This can also be done with a CAMEO 3, 2, 1 or even a Portrait).
Move into the Send panel and select Rhinestone Template Material. Adjust your blade accordingly if you are using any type of manual blade.
Place the rhinestone flock material on your cutting mat making sure that the design is positioned in the software so it cuts on the rhinestone flock not the margin on either side. (Those margins are so they can run under the rollers.)
Load the mat and material into the Silhouette CAMEO, adjust the blade depth to the recommended cut settings, and then send the rhinestone template to cut.
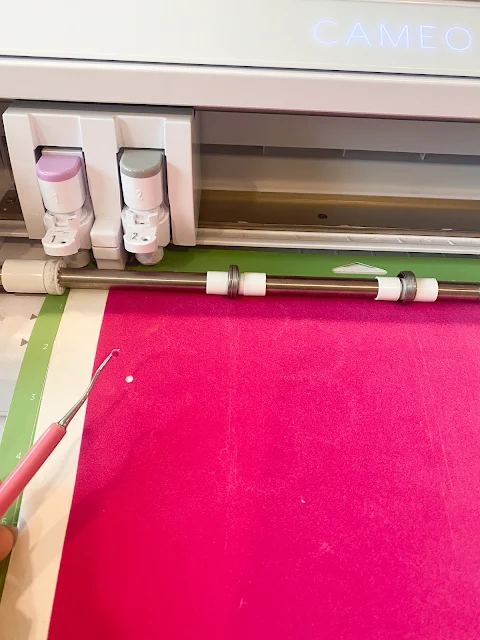
When the cutting is complete, keep the mat and material loaded in the machine and use tweezers or a hook tool to remove one of the holes to ensure you got a good cut.
If the holes are easy to remove you got a good cut and you can remove the entire sheet from the Silhouette CAMEO 4.
Use scissors to trim about an inch or so around the cut design on all sides.
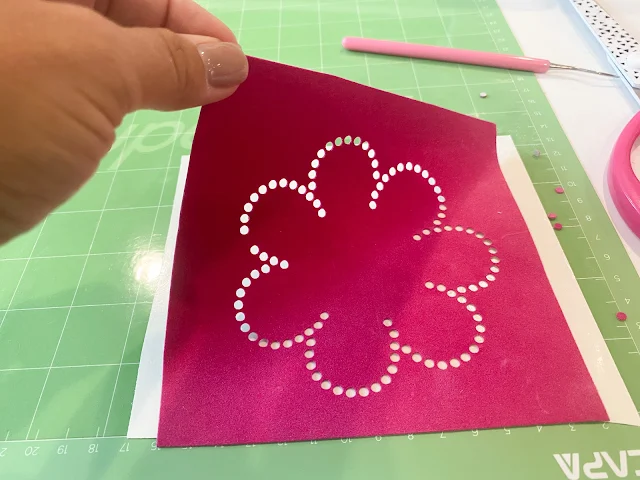
From one of the corners quickly peel up the rhinestone template material. The goal here is to leave as many of those little circles behind.
If any remained in the template, poke them out with a hook or tweezers.
Scrape off the circles from the rhinestone backing material so you can lay the template back down on it until you need it.
How to Use a Silhouette CAMEO 4 Rhinestone Templates
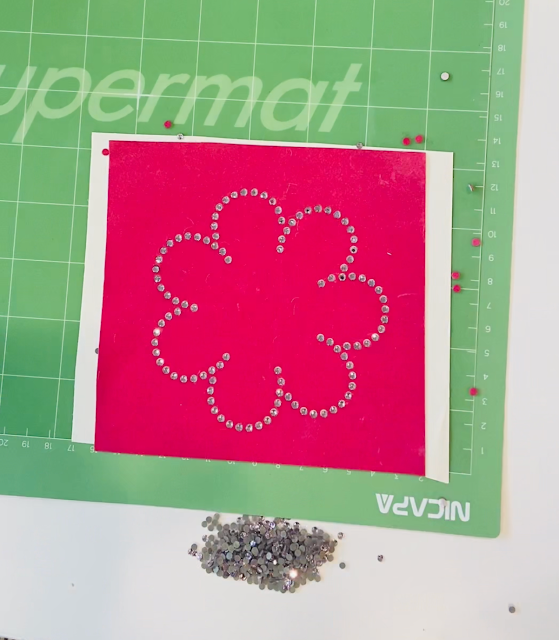
To use the rhinestone template, you can keep it on the backing or place it on another hard surface. Dump...yes dump, a pile of rhinestones on top.
Use this magic rhinestone brush (flat edge paint brush) and go in a circle motion pushing the rhinestones into the template.
Once all the holes are filled, push the rhinestones to another area of your work space and then get them back into the jar or bag.
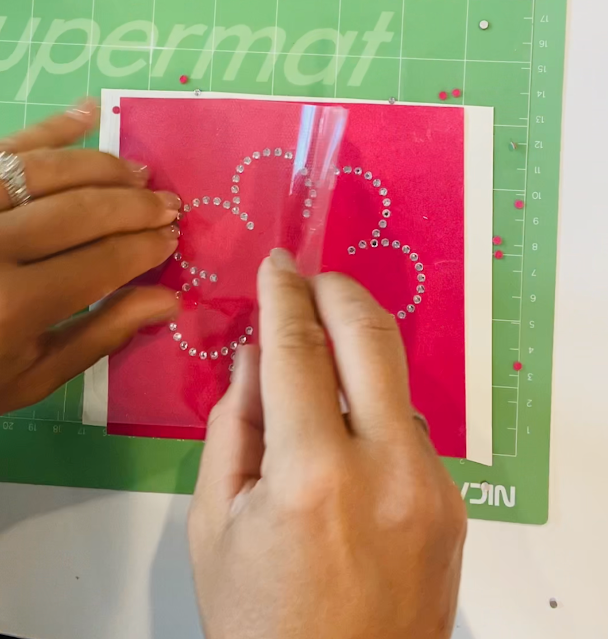
Grab a sheet of rhinestone transfer material and lay it down over the rhinestone template.
Carefully press down so you stick the transfer tape to all of the rhinestone then lift it up bringing the stones with it.
Now you can place this on your shirt or bag (or back on the liner for use later).
Press the custom rhinestone design using your heat press for about 15-20 seconds at 330 degrees.
After pressing, remove the transfers sheet (save it because you can use it again)!
Get Silhouette School lessons delivered to your email inbox! Select Once Daily or Weekly.








.png)


Thank you for doing this tutorial. Very straight forward. I have had the supplies for a couple years but have always been afraid to try it. Now I'm excited to give it a whirl!
ReplyDelete