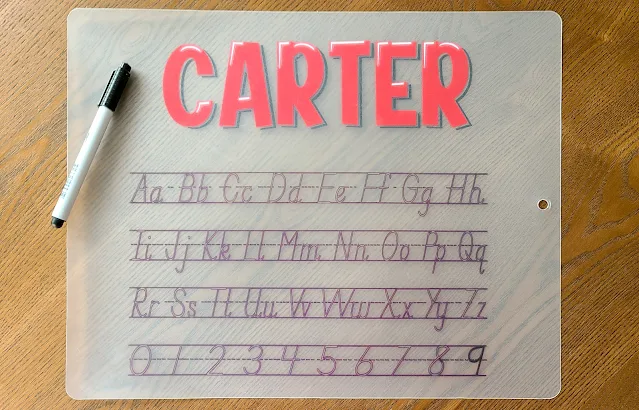
Recently we posted how to create DIY Reusable Tracing and Handwriting Sheets using clear sticker paper. Well, now here are 2 more ways to create them - this time using thin plastic cutting mats!
This tutorial can be done with any of the Silhouette machines but I am using a Silhouette CAMEO 4 in this example.
Plastic Cutting Mats
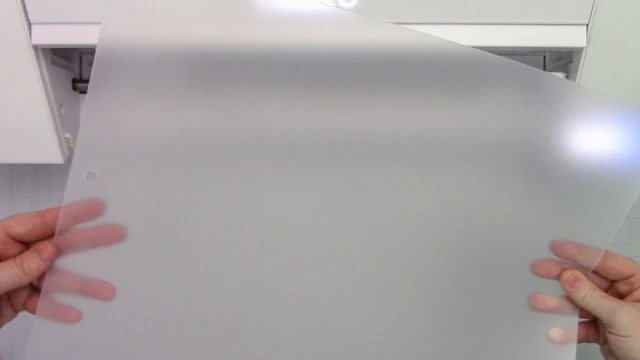
It's very easy to turn these inexpensive chopping mats into a reusable tracing sheet. They work so well because they are thin, flexible, and semi-translucent (which is important).
You can find the cutting mats used in this project on Amazon. You may even be able to similar ones at your local dollar store.
There are two ways to turn these mats into tracing sheets, by either sketching the design with a permanent marker or etching the design in the mat with a cutting blade. Whatever method you choose, both of them start the same way in Silhouette Studio.
Set up Your Design Workspace
Start by opening the Page Setup panel in Silhouette Studio and changing your Cutting Mat settings to None (you won't be using a Silhouette cutting mat for these).
Change the Media Size to Custom and enter the dimensions of the chopping mat - 11.75 inches wide and 15 inches long. You can change the orientation and rotate the page if you like.
Import a handwriting/tracing SVG into this workspace. Check out the SVG designs over at So Fontsy because they have a variety of styles to choose from.
Scale the design to fit the within your project area and place it how you want the sheet to look; you can create these tracing sheets either horizontally or vertically.
On the Page Setup Panel, make sure the Show Cut Border box is checked because you need to arrange the design within the red lines.
This next step is VERY important, you must mirror the design: right click on the design >> Flip Horizontally.
Yes, the text will be sketched or cut backwards, but because these mats are semi-translucent, when you flip them over - the text can be read correctly.
When you sketch/etch the text on the underneath side of the mat, when you flip it over, it can be used to trace directly on the mat itself with a wipeable dry erase marker. This way the original design isn't affected from tracing and you can use the sheet over and over because you can wipe off the dry erase marker.
Setting Up the Silhouette Cameo Machine
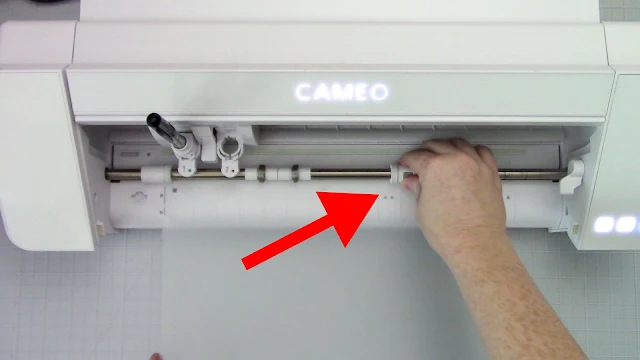
Move the white roller on the right side of the roller bar to the innermost settings. Load the chopping mat into the machine, just as you would a Silhouette cutting mat, by lining up the edge with the guidelines on the machine.
Silhouette Sketch Settings
To sketch the design, choose a dark colored permanent marker like a black Ultra Fine Point Sharpie permanent marker to do your sketching. Place it into the Cameo 4 Pen Holder (the medium colette works well with the Ultra Fine Point Sharpie pens).
Put the pen and pen holder into carriage one of the Cameo 4, just like you would with any other tool - with one difference. Do not push the pen holder down all the way into the carriage.
Leave a very small gap, then lock the pen holder in place. This advice goes against everything we've always said about tools in the Cameo (is the blade pushed all the way down?); however, in this case you are purposefully leaving this tiny gap to avoid pen drag lines.
If you're ever experienced drag lines on your projects with sketch pens and the Cameo 4, you are not alone, and we've written about this before on how to fix pen drag lines with the Cameo 4.
Next, in Silhouette Studio, make some adjustments to the default sketch settings by lowering the force and speed. I opted to stick with one pass which seemed to work fine.
Force: 4
Speed: 4
Passes: 1
Press Send in Silhouette Studio, and it'll sketch away. Now, only the outline of the letters will be traced (there are ways to achieve a solid fill with sketching), but since the letters are thin, just the outline worked well for this type of project. And if you really wanted to, after the Cameo is done sketching, you could color in the letters with the Sharpie.
Flip the mat over to read the text correctly and do your tracing.
Cut Settings to Etch Tracing Mats
The tracing design can also be "cut" into the mat instead of sketched. It's actually more like "etched" into the mat because you don't actually cut all the way through the mat.
Use the same steps in Silhouette Studio to arrange the design and load the chopping mat into the Cameo. Remember, you need to mirror the design before cutting.
Load the Silhouette Cameo 4 Autoblade (or ratchet blade) into carriage one. Because we are "cutting" without a mat, you need to change the default Action setting from Auto (Pop-out Cut) to Cut.
Keep the material settings set at Cardstock, Plain, but make a few adjustments:
Blade: 10
Force: 33
Speed: 3
1 pass
Please note: With the speed set at 3, this entire cutting process took about 45 minutes. You could experiment with higher speed settings.
When the cutting is done, unload the chopping mat. Flip the mat over, place a dark piece of cardstock underneath the mat and your handy work is revealed - a smooth, reusable tracing sheet.
Then, you can customize your tracing mats with vinyl decals. The fonts used for these mats come from the Massive Craft Fonts Bundle available over at So Fontsy. The vinyl was layered on the backside of the mat which also requires mirroring the text before cutting.

To see how the vinyl was applied to this tracing mat, you can check out this Facebook Live video. And for more info about mirroring adhesive vinyl, check out this blog post on how to mirror adhesive vinyl.
Note: This post may contain affiliate links. By clicking on them and purchasing products through my links, I receive a small commission. That's what helps fund Silhouette School so I can keep buying new Silhouette-related products to show you how to get the most out of your machine!
Get Silhouette School lessons delivered to your email inbox! Select Once Daily or Weekly.


.png)


Thank you for this tutorial. My daughter got a sheet of these for my grandson. I can now make more for him. We are so excited!!
ReplyDeleteGood article and most important post for me. i am very happy to see your standard post. we also provide Handwriting practice books for kids. for more information visit on our website.
ReplyDeleteThis comment has been removed by a blog administrator.
ReplyDelete