Did you know you can use etching cream on glass dishes so they're safe for the microwave and oven?
This etching glass tutorial will walk you through exactly how to cut a Silhouette stencil and go about etching pyrex glassware.
A personalized glass dish is a popular housewarming, wedding, or anniversary gift and you can customize however you want.
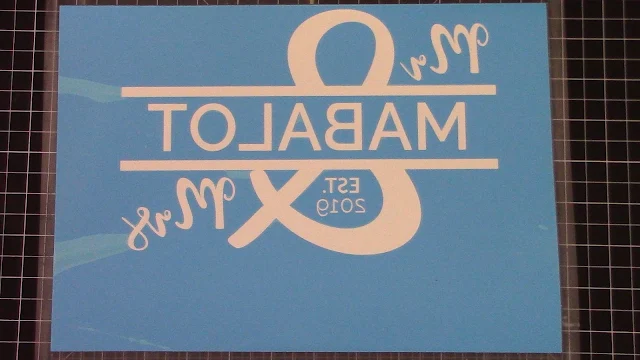
To start you're going to use stencil vinyl (Oramask 813 stencil material) to cut a stencil with your Silhouette machine. I used this Mr and Mrs Split Monogram design from the Big Monogram Design Bundle on So Fontsy.
Etched glass become more porous and stains much more easily, so it's best to etch on the back or bottom of the dish where it won't come in contact with food. Because the stencil vinyl will be on the back/bottom of this glass dish, the design needs to be mirrored before cutting in Silhouette Studio.
This etching glass tutorial will walk you through exactly how to cut a Silhouette stencil and go about etching pyrex glassware.
A personalized glass dish is a popular housewarming, wedding, or anniversary gift and you can customize however you want.
To start you're going to use stencil vinyl (Oramask 813 stencil material) to cut a stencil with your Silhouette machine. I used this Mr and Mrs Split Monogram design from the Big Monogram Design Bundle on So Fontsy.
How to Make a Design into a Stencil in Silhouette Studio
Open the Design in Silhouette Studio and customize with a name, dates, and initials as needed.
For stencils, I always suggest you use the Draw a Rectangle tool to draw a rectangle around your design.
To help when it comes to weeding you can select the design and the rectangle you drew > right click > make compound path. Then fill the design with blue (to match the stencil material). The white areas are the areas you will weed out.
Etched glass become more porous and stains much more easily, so it's best to etch on the back or bottom of the dish where it won't come in contact with food. Because the stencil vinyl will be on the back/bottom of this glass dish, the design needs to be mirrored before cutting in Silhouette Studio.
Select the design > right click > Flip Horizontally.
When you're ready move to the Send panel. Select Stencil Material and send your design to cut.
How to Weed and Transfer a Silhouette Stencil
Remember
when weeding a stencil you want to remove the "positive" pieces so you
create the empty spaces where you will apply the etching cream into. So don't weed away the rectangle you drew, instead weed away the areas inside.
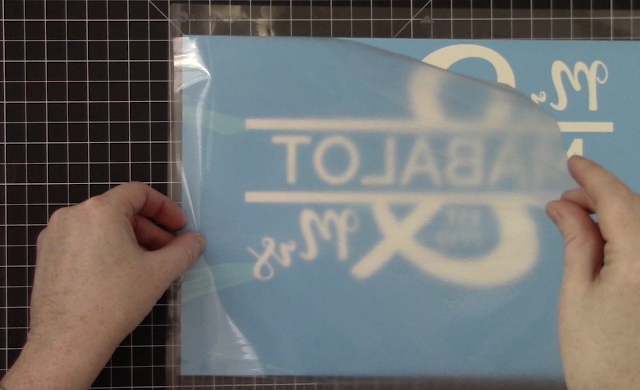
When you are finished weeding, use a piece of transfer tape to cover the entire stencil.
Burnish it really well. Flip the entire piece over and peel away the paper backing leaving the stencil on the transfer tape.
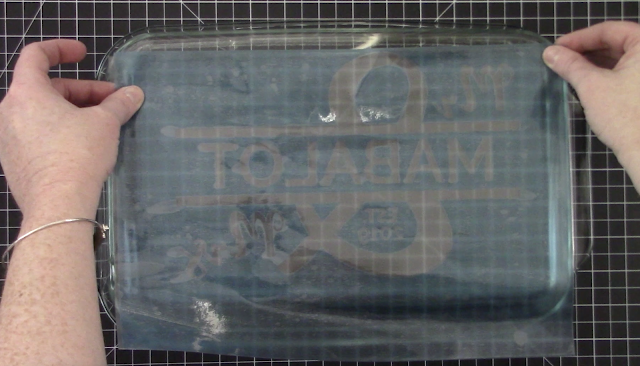
Now you can move the transfer tape, with the stencil material on it, onto the glass surface.
Again, burnish really well.
Starting from one of the corners, peel away the transfer tape leaving the stencil on the glass pyrex dish.
Tape off the outside of the stencil to ensure that etching cream does not accidentally extend beyond the stencil.
Now it's time to etch.
How to Etch Glass with a Silhouette Stencil
I would suggest you wear gloves when working with etching cream as it's pretty strong and can irritate your skin.
Shake the etching cream bottle for a good minute before you begin etching. This will ensure it's all mixed up. We used Armor Etch for this project.
You want it thick so don't be afraid to really gob it on there. Do not paint back and forth as this can push etching cream under the edges of your stencil.
Once your entire design is covered in etching cream, set a timer for 1 minute. You want the etching cream to sit on the glass for at least that long. You can leave it on there longer to get a more intense etch, but the manufacturer (and I) suggest you start with the recommended 1 minute.
When the minute is up, you can carefully scrape up the etching cream and return it to the bottle if you want to stretch it. Then run the glass dish under luke warm water to remove the remaining etching cream or use an old tshirt or towel to wipe up the excess.
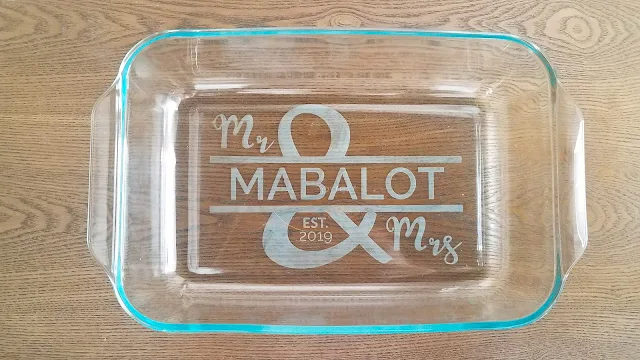
Once all the cream is off, remove the painters tape and the stencil.
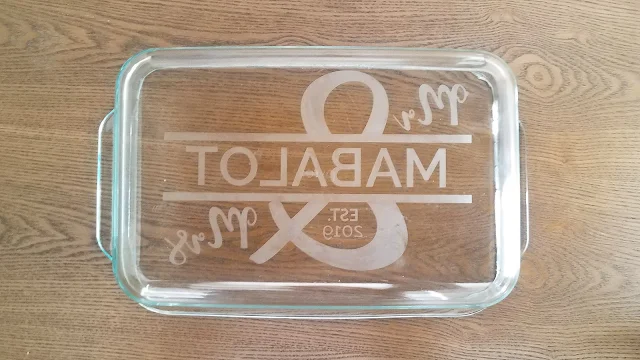
Re-wash and dry your glass really well.
And if you want to check out this quick video of glass etching from start to finish, watch this!
Get Silhouette School lessons delivered to your email inbox! Select Once Daily or Weekly.






.png)


Hello. Do you by chance know if this document is editable? For example, to do Mr. and Mr?
ReplyDeleteThanks!
Whith what can I colour the edging (black)
ReplyDeleteYou would not be able to change the edging color with etching..
Delete