While I was creating some designs to apply to wood ornaments recently, I had an ah-ha moment! I could use this same technique to faux stain the wood craft blank!
Why Make Stained Wood Signs With Printable HTV
Since many wood craft blanks come unfinished, you need paint or stain to "finish" them unless you like the natural wood look. Then you need to apply vinyl, HTV or make a stencil to paint the design. BUT with this hack you skip all of that and just print, press, and peel!I love the look of stained wood, but I hate the time consuming process which is why this faux stain hack is one of my favorites!
Faux Wood Stain Sign Supplies
Here's what you'll need...inkjet printable heat transfer vinyl for lights (I recommend Starcraft or JetPro), a heat press and some unfinished wood blanks. Keep in mind, the craft wood blanks need to be thin enough to fit in the heat press. This 6 pack of quarter inch unfinished wood plaques are EVERYTHING. They're the perfect thickness for fitting in the heat press and also under a single sheet of 8.5 x 11" printable HTV. I've also used this same technique with flat wood ornaments.Designing Wood Grain Designs in Silhouette Studio
Open Silhouette Studio and from the Page Setup Panel change the Page Size to "Printer".Check the box to Show Print Border as well and make sure your design stays within that area or it won't print. TIP: Take advantage of borderless printing if you have it for large prints from Silhouette Studio like the one in this tutorial.
Draw out the shape of your design. I am making a wood sign with a 10.6" x 7" blank wood plaque. I used the Draw a Rectangle tool to draw out a rectangle with slightly larger dimensions to make sure it's fully covered.
If you have an odd-shaped design, you can draw a square or circle that's LARGER than the wood blank. Just make sure the entire blank can be covered by the size square or circle you created and ensure the design fits on the blank.
Next you need to fill the shape with a faux wood grain pattern.
Select the shape you drew and open the Fill tool from the right sidebar. Select the third tab - Patterns.
Silhouette Studio offers a bunch of default Fill Patterns - three of them are various wood grains in different 'stain' colors.
Click one of them to fill the selected shape.
If the "grain" isn't going in the right direction, expand the advanced Fill Pattern tools and rotate the pattern. You can also scale the pattern if you want.
Now it's time to add your design. Find your design and merge it into the same work area.
I am using a few designs from the January 2020 So Fontsy Bundle to make a couple of wood signs.
The design can be any color or combination of colors and patterns you want. But keep in mind, IF you fill your design with white, the natural wood color will show through in those areas. The reason for this is printers don't print white so the white area is just negative space with no ink. The way printable HTV works is it only transfers the areas with ink to the surface.
The final step is to mirror your design by right clicking > Flip Horizontally. You need it to print in reverse so it appears correctly when you flip it onto the surface to apply.
How to Print on Printable HTV with an Inkjet Printer
Place your sheet of printable heat transfer into an inkjet printer. I use an HP Officejet which is just a standard office printer.From Silhouette Studio send the design to print by clicking the Print icon along the top tool bar or from File > Print. Change your print settings to some type of "Glossy" paper. You want to do this so less ink is laid down onto the paper. This helps prevent the ink from bleeding into the natural wood grain.
How to Apply Printable HTV onto Wood with a Heat Press
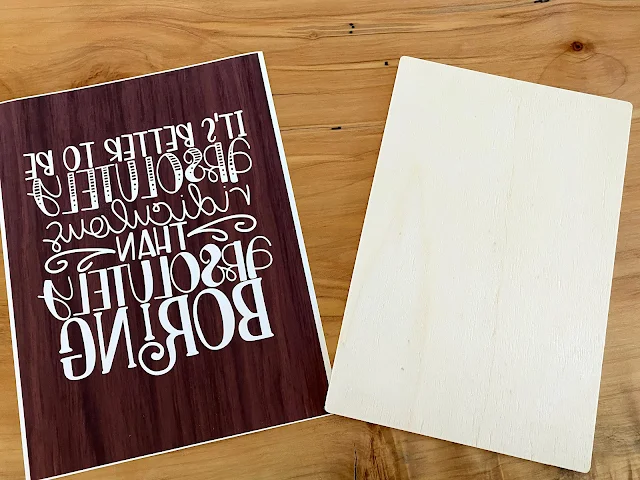
Have your heat press warmed up to 375 degrees and set to 30 seconds. You want to use light to medium pressure - again to help prevent any ink bleeds.Place the printed sheet (left) face down and centered onto your wood blank (right).
You can use a few pieces of heat resistant tape to keep the print from moving.
Place everything onto the heat press. Make sure the printed sheet will be hit by the heat press and NOT the wood. For the ink to transfer onto the wood, it needs to have direct heat.
I would not recommend a pressing pillow as it will create too much pressure between the press and the blank and it may also prevent the press from closing.
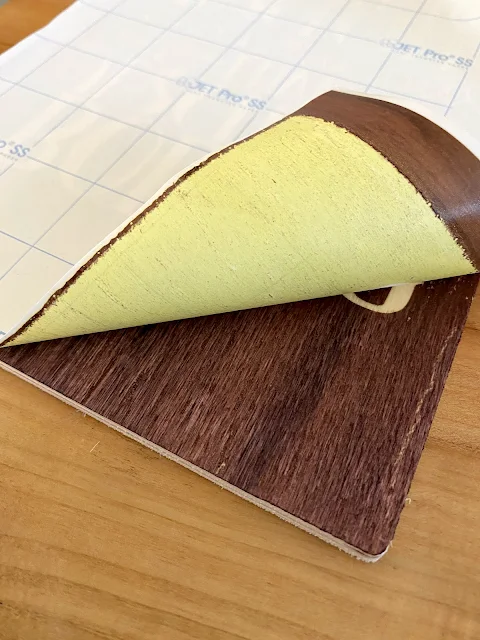
Apply the heat for 30 seconds. As soon as the time is up quickly peel away the printable HTV sheet while it's still warm.
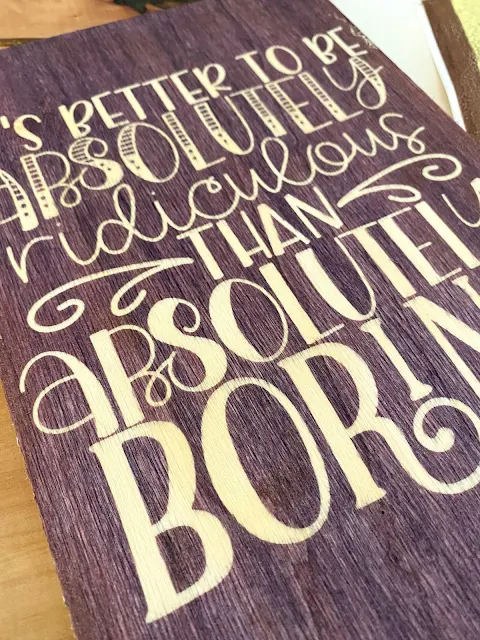
Ta da! You just "stained" the wood and added a design all in one step!
Here's a closer look so you can really see the wood grain pattern!
Look at those really little areas..there's no way you'd be able to get them that crisp when painting or staining use a stencil!
These faux stained wood signs are so fast and easy I made a couple!
The best part is because the unfinished wood plaques are flat, you can make the wood signs reversible!
Note: This post may contain affiliate links. By clicking on them and purchasing products through my links, I receive a small commission. That's what helps fund Silhouette School so I can keep buying new Silhouette-related products to show you how to get the most out of your machine!
Get Silhouette School lessons delivered to your email inbox! Select Once Daily or Weekly.


.png)


Can you do this with an iron instead of a heat press?
ReplyDeleteCan I use and Easy Press instead of a larger, pricier heat press?
ReplyDeleteCan you paint the wood first so the design shows up as the color you painted your wood? White, for instance?
ReplyDeleteGENIUS!!!!!
ReplyDelete