Just like with the single carriage Silhouette machines, it's not possible to do a multi color sketch (with two different color sketch pens), foil and cut, or a sketch and cut in a single pass with CAMEO 4. This is because Carriage 2 is exclusively for the specialty tools. That means sketch pens and the sketch pen holder won't fit. But the good news is, it is still possible and just an extra step or two.
The process for these techniques is actually the same on a Silhouette CAMEO 4 as it is on a single carriage machine like a CAMEO 1 or 2 or Portrait. We're going to take advantage of the cut by line color and the option to add a pause.
Start by powering on and connecting your Silhouette CAMEO 4. Place a Silhouette Sketch pen (in the blue adapter) or a pen or marker of your choice in the Silhouette pen holder into Carriage 1. Lock it into place.
I am using a couple of the WRMK Cutting Machine pens which means I need to use the CAMEO 4 Pen Holder. If you need a refresher on using this tool, check out this Silhouette CAMEO 4 pen holder tutorial.
Launch Silhouette Studio and start in the Send panel by choosing your machine from the machine list. The smart tool system should automatically detect the tool and change the Action and Tool to "Auto Sketch" and "Auto Sketch Pen" respectively. Change the material if necessary.
Move to the Design area and open your design. If the design is grouped you'll want to ungroup it so you can assign different line colors to the cut lines.
I'm working with this set of holiday sketch designs which is from the So Fontsy Single Line Sketch Bundle.
When working with sketch pens, I like to use single line fonts and designs whenever possible because they are meant for drawing! You get the single line, rather than an outline like you would if you used a cut file to sketch.
This set from Crunchy Pickle Designs I really love because you can totally customize it! I deleted the pieces I didn't need...
...then rearranged the pieces I wanted to create a cut little ornament branch.
Decide which areas of your design you want to sketch with which color. In this case I had to ungroup the individual designs further and in some cases release the compound path to gain access to all the individual cut lines.
I like to match the cut line color to the color pen I am going to draw with. Just makes it easier to keep things straight. So since I am going to sketch this in red and green I am going to assign red and green line colors to different past of the design.
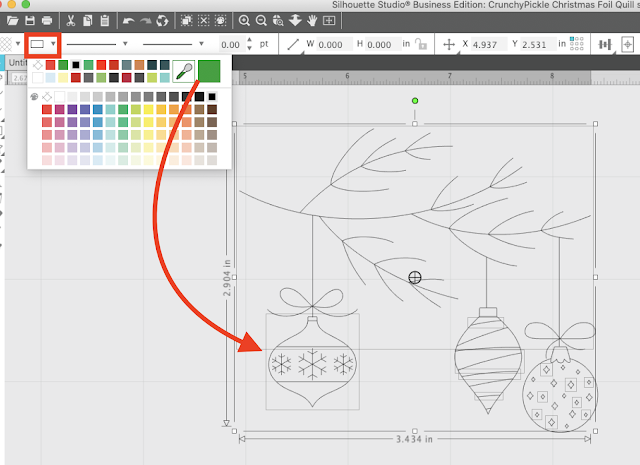
To do this, hold down shift and then use your mouse to select all areas of the design you want to sketch in green (or red). Click the tool icon for line color in the quick access tool bar and then pick green.
Here's what you should have now. Note: I increased the line weight so you could see better in the screenshot, you DO NOT need to increase the line weight for sketching - nor will it change the thickness of the sketch.
Repeat this process for all areas you want to sketch in red.
Your design should now look like this.
Unless you want to add any other colors (which I would not suggest for your first multi color sketch), you're ready to move back to the Send panel.
Just to point out, everything we've done to this point we would have had to do for a multi color sketch on ANY Silhouette machine...even the CAMEO 3 where you can put two sketch pens in at once.
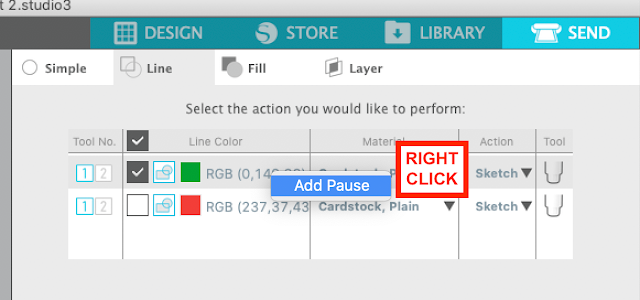
At the top of the Send panel click "Line" rather than Simple. Sketching by LINE color will let us cut based on the color of the cut lines we assigned. You should have two little square colors: green and red each with a check box next to them.
The check box turns those sketch/cut lines on. So uncheck the red box as we ONLY want to sketch the green lines first. You'll notice the red cut lines in the preview area are no longer bold.
Right click on the Green (top) cut line info and then click "Add Pause".
This tells the software and machine to pause after the green cut lines are sketched. That pause will give you the opportunity to swap out the sketch pen..so have your second pen (red in this case) close by.
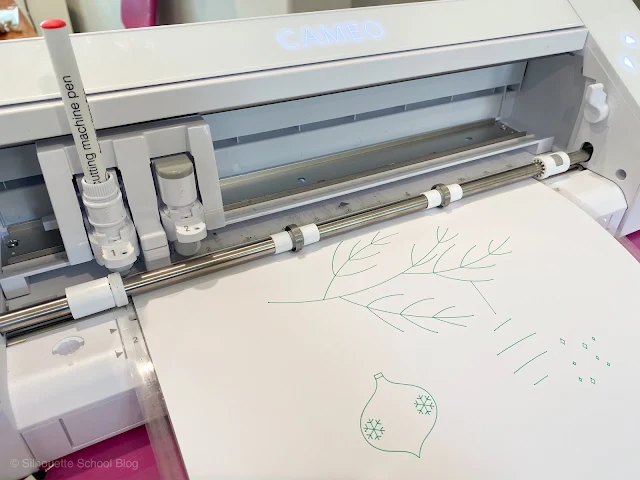
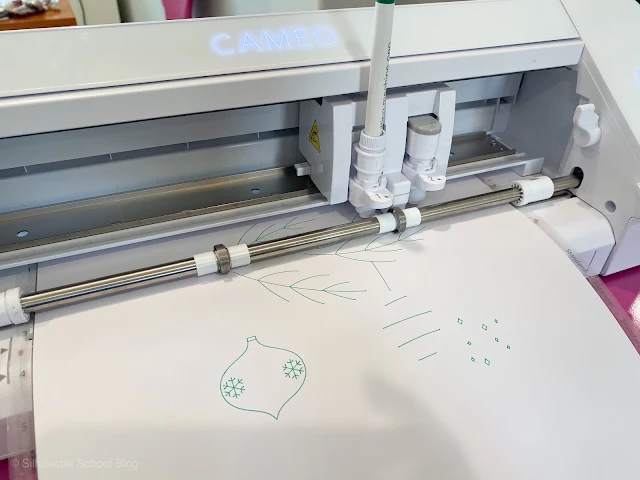
Return to the Send panel in Silhouette Studio and click "Send" so the sketching begins. Again, only the green lines will be sketched in this first pass.
When the green line is done, the Silhouette machine will reset and pause. DO NOT UNLOAD THE CUTTING MAT - we only want to swap tools.
Take the green sketch pen out of Carriage 1 and replace it with the red sketch pen.
Return to the Send panel in Silhouette Studio and this time UNCHECK the box that's associated with green action and CHECK the box for the red cut line.

Click Resume. This time only the red lines will sketch.

When the sketching is finished, you can remove the cutting mat.
That's all there is to using multi color sketch pens in a single carriage Silhouette machine including the Silhouette CAMEO 4.
Note: This post may contain affiliate links. By clicking on them and purchasing products through my links, I receive a small commission. That's what helps fund Silhouette School so I can keep buying new Silhouette-related products to show you how to get the most out of your machine!
Get Silhouette School lessons delivered to your email inbox! Select Once Daily or Weekly.


.png)


If you are adding a pause, couldn't you just click both line colors and change the pens during the pause instead of going back into the software and unchecking the green and checking the red? Just curious.
ReplyDeleteCan this be saved as one object with different colors somehow? I want to put my design on a path to be sketched with different colors, but I'm not able to put in on the path without making compound path -and that removes the colors choosen...
ReplyDeleteHey there! Check out this post about using layers: https://www.silhouetteschoolblog.com/2016/05/how-to-use-layers-tool-in-silhouette.html
Delete