The trick is to use the CAMEO 4 rotary blade - and you can skip the stabilizer.
The rotary blade rolls across the felt rather than dragging the blade through it, which allows both acrylic craft felt and wool felt to cut very easily.
Preparing Felt to Cut on Silhouette
Start by placing a sheet of felt on your Silhouette cutting mat. That's it - you do not need a stabilizer, just put your sheet of felt right on your mat. If you want to make sure you don't leave felt fibers behind, use this contact paper trick to keep your mat clean and sticky!Next you want to roll a brayer over the felt. I suggest you do not skip this step. It will allow you to get the best possible stick and remove any wrinkles in your felt.
Setting Up Your Silhouette CAMEO 4 and Software to Cut Felt
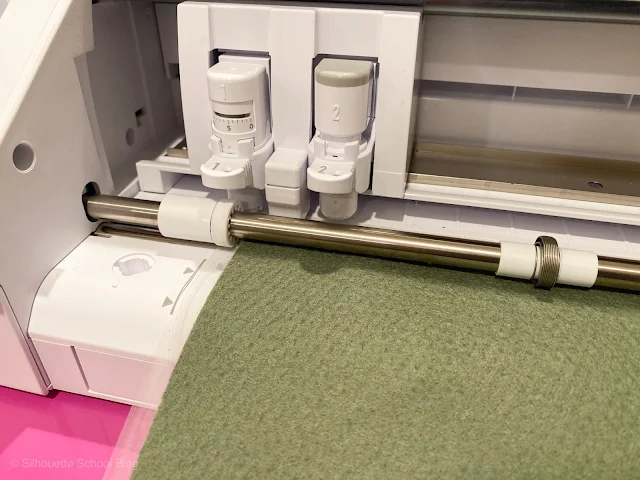
Load the cutting mat into the Silhouette CAMEO 4.Ensure the cap on the rotary blade is twisted all the way up so the rotary wheel is exposed. Place the Silhouette Rotary Blade in the right tool carriage of the CAMEO 4. This is the high pressure, specialty tool carriage - Carriage 2.
Power on and connect the CAMEO 4 to your computer by USB or Bluetooth.
Move into Silhouette Studio. From the Send panel select an available machine from the machine list.
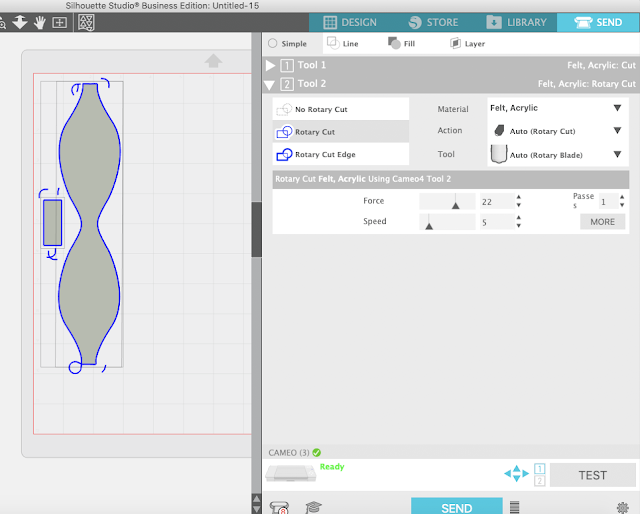
Expand the Carriage/Tool 2 settings. Change the material to Felt, Acrylic. The software should recognize you have a rotary blade in the carriage and auto detect it. The tool should change to "Auto (Rotary)" and the action to "Auto (Rotary Cut)".
Designing for the Rotary Blade
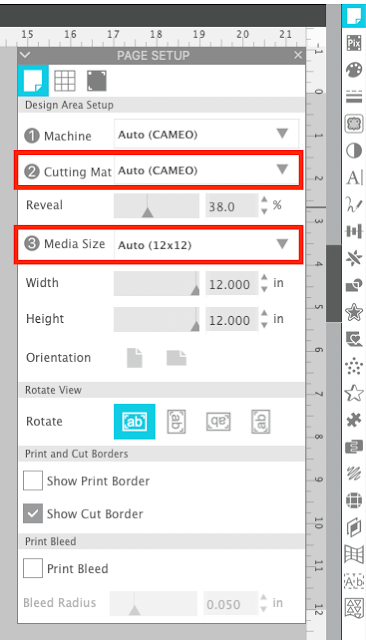
Move to the Design area and open the Page Setup Panel. Select the machine, Mat size, and Material all as Auto.Open your design in the work area.
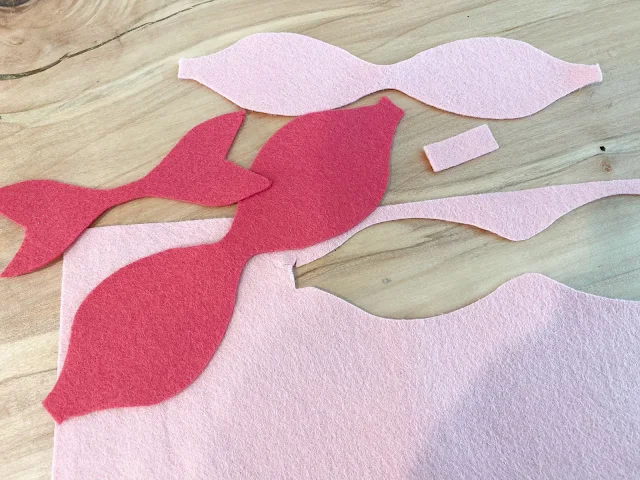
I am using this 3D bow design to make felt bows. The design comes in grouped together so I ungrouped it and deleted the parts I did not want to use.
Keep in mind, the rotary blade will work better on some designs than others. It works best on curves rather than corners. It will still work on corners, but with every corner you will produce another loop which is how the wheel turns. The rotary blade can 'drive' on curves so you get fewer loops. Designs with a lot of loops put more stress on your material on the mat and more wear on your rotary blade.
Once your design is all sized and ready to go, move back to the Send panel.
Cutting Felt with the Silhouette Rotary Blade
The Design should have blue cut lines around it and you'll notice some extra lines in the negative space. These are the loops. Again, the loops are how the Silhouette rotary blade turns and changes direction.I have found the best cut settings for felt are the default cut settings for Felt, Acrylic in Silhouette Studio. I have used these cut settings for multiple types of felt and they work very well.
When you're ready click "Send" to begin cutting.
When the cutting is finished unload your cutting mat and simply peel up the felt pieces. It's amazing how well felt cuts - both acrylic and wool!
If you notice you are getting some pulls increase the force slightly the next time or if it's been awhile your rotary wheel may be getting dull so you may need to replace it.
Now you just need to assemble your felt bows!
And that's it! Attach them to a clip or a headband to make a cute piece for a little girl's hair!
Wondering what else the Silhouette rotary blade can cut? Check out this list of materials you can cut with the CAMEO 4 Rotary Blade.
Note: This post may contain affiliate links. By clicking on them and purchasing products through my links, I receive a small commission. That's what helps fund Silhouette School so I can keep buying new Silhouette-related products to show you how to get the most out of your machine!
Get Silhouette School lessons delivered to your email inbox! Select Once Daily or Weekly.


.png)


why am i getting cut loops inside of my design? I can't cut just the outline. using the rotary blade, cameo 4
ReplyDeleteI'm having the same problem! Ive contacted silhouette and I'm trying to figure this out too. Have you found a solution yet?
DeleteI get wiggly edges when I use the rotary blade. How do I avoid this?
ReplyDeleteYour instructions helped me cut my very first felt bow on my Cameo 4, thank you
ReplyDeleteIm getting cuts on the edges of my designs when using felt. The guide loops the machine cuts end up in spots cutting my design. Im just cutting run of the mill circles in the felt. all items are spaced out a good amount. the guide loops are not showing in my design they are on the outside of it as should be but still when cutting the guid loops its cutting parts of my design. I have force on 22, pass 1, speed 5.
ReplyDeleteHello there, I would try updating your firmware to see if that helps!
DeleteI would love to see the settings for Cameo 3.
ReplyDelete