These changes apply to anyone who is cutting with Silhouette Studio V4.3 (or higher) - regardless of the actual Silhouette cutting machine.
The Page SetUp Panel is where many Silhouette users are used to starting their workflow. But when using Silhouette Studio V4.3 (or higher), I'm going to suggest you NOT start there.
Instead start by powering on your machine and plugging it in (or connecting by Bluetooth).
Next go immediately to the Send panel in Silhouette Studio. From the list of available machines, select a "Ready" machine (one that's powered on and connected!)
NOW move to the Design area of the software and open the Page SetUp Panel.
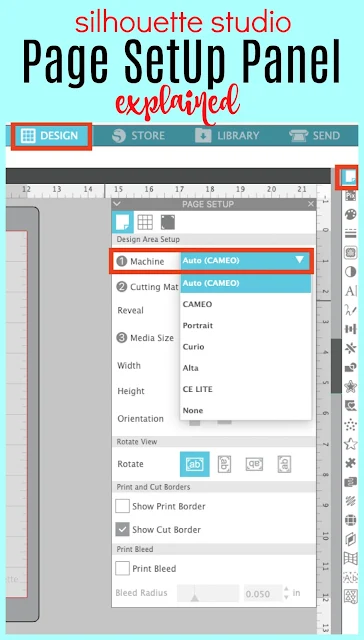
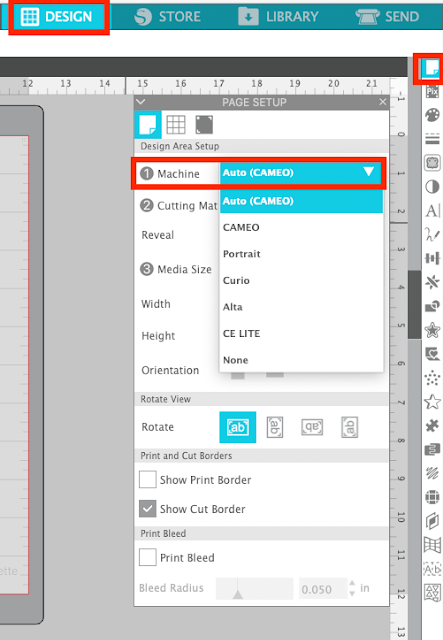
Start at the top by first picking the machine. The machine selected in the Send panel is the "Auto" machine in the Page SetUp panel and that's the one you should pick here. The selection you make here is very important - especially for CAMEO 4 users. Selecting the wrong machine can/will impact what action and tool are (auto) selected in the Send panel.
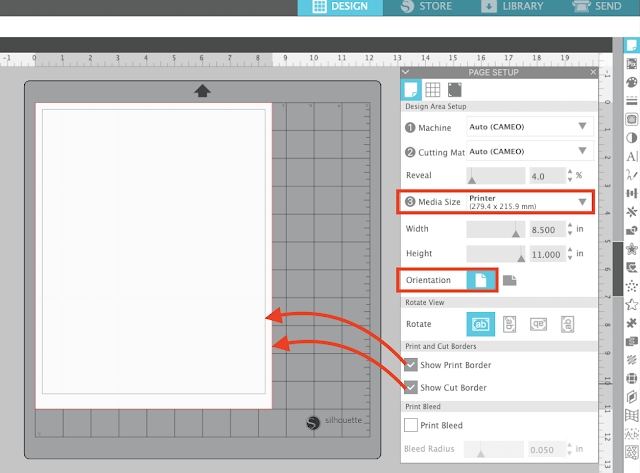
Move down the Page SetUp panel selecting the cutting mat size. The Auto size will be selected based on the machine you pick in the previous step. If you are NOT using a cutting mat select "None." This is the option you would pick for Pixscan, using the roll feeder, and matless cutting with CAMEO 4.
Finally move down to the Material Size area. Use Custom if you are cutting from a roll or have an piece of material that's longer than the mat (or being cut without a mat).
If you are doing a Silhouette print and cut select "Printer" (which has moved towards the bottom of the list and changed from "Current Printer" to simply "Printer"). I would also suggest you change the orientation to Portrait, but this is really personal preference.
Ideally, the "Show Print Border" Box needs to be checked if you are doing print and cut. The gray print border line ensures your design is within the safe print area.
Print bleed is another print and cut only feature. Keep in mind, even when checked you will NOT get a preview of the bleed area with this feature.
Note: This post may contain affiliate links. By clicking on them and purchasing products through my links, I receive a small commission. That's what helps fund Silhouette School so I can keep buying new Silhouette-related products to show you how to get the most out of your machine!
Get Silhouette School lessons delivered to your email inbox! Select Once Daily or Weekly.


.png)


Does anyone know if this has to be done everytime i go into sillhouette studio now to use my cameo 4.
ReplyDeleteI am really disappointed so far as I am having so many problems with this machine. I thought this tute would help with a problem of my machine not being able to read registration marks...but it didnt help. Anyone else having trouble?
hi does this work for the plus also?
ReplyDeleteHello! Yes! you will need to select "Plus" under machine to make sure you get the correct mat size.
Delete