Some people find this helpful when designing so they can see how their design will look on different color backgrounds.
While it's not possible to permanently change the color of the virtual mat in Silhouette Studio, there is an easy work around.
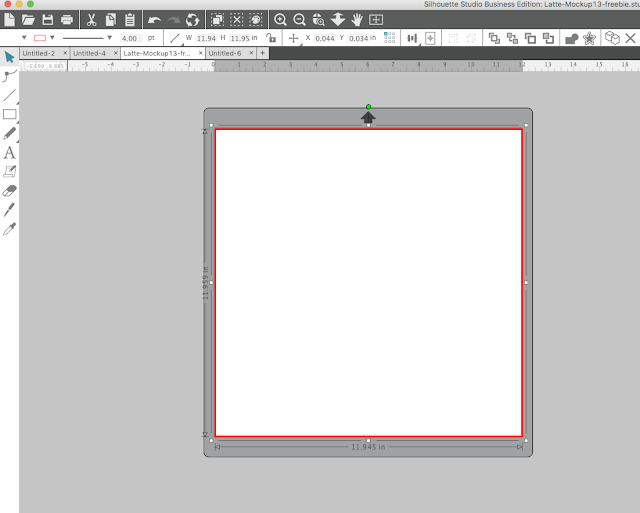
Start by opening a new work area in Silhouette Studio. Use the Draw a Rectangle tool on the left side to draw out a square the size of the mat.
I gave the square a thicker line so you could more easily see it.
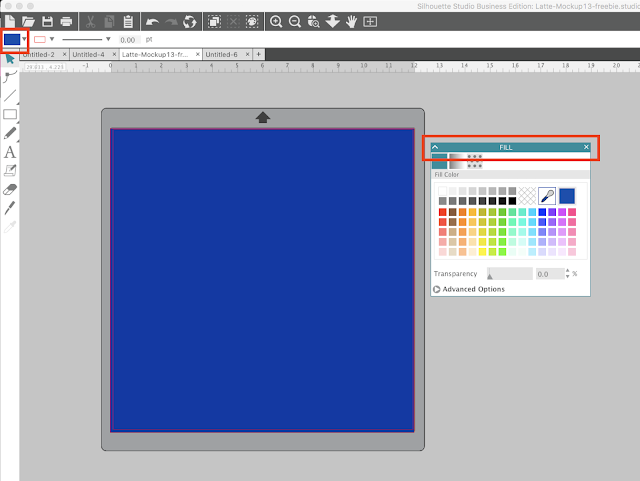
Next use the Fill Color tool from the right sidebar or the Quick Access Tool bar to fill the square with the color you wish your mat background to be.
You could stop here, but if you place designs or other shapes on top of the area you risk accidentally selecting the square rather than the shape. For that reason, it's best to lock the square layer so you can't actually select it.
Do this by opening the Layers tool from along the right sidebar in Silhouette Studio Designer Edition and higher.
When the Layers panel is open, find the shape and click the box to the left of it to put a lock in the box. This makes it so you can't even select the shape.
To add anything else to the work space you'll need to add a second (unlocked) layer.
Click the "+" to add another layer - in this case I added text to this second, unlocked layer. You can see the text layer does not have a lock so I am able to edit it and move it as needed without accidentally selecting the background color.
And that's all there is to changing the mat color in Silhouette Studio.
Note: This post may contain affiliate links. By clicking on them and purchasing products through my links, I receive a small commission. That's what helps fund Silhouette School so I can keep buying new Silhouette-related products to show you how to get the most out of your machine!
Get Silhouette School lessons delivered to your email inbox! Select Once Daily or Weekly.


.png)


No comments
Thanks for leaving a comment! We get several hundred comments a day. While we appreciate every single one of them it's nearly impossible to respond back to all of them, all the time. So... if you could help me by treating these comments like a forum where readers help readers.
In addition, don't forget to look for specific answers by using the Search Box on the blog. If you're still not having any luck, feel free to email me with your question.