


After eight years of writing Silhouette CAMEO tutorials for beginners on up, I admit I sometimes think to myself "Is this information too basic?" Turns out...when it comes to learning Silhouette...usually the answer is no.
So today I'm going to tell you 10 things no one will tell you when you're getting started with Silhouette Studio and your cutting machine.
1. You can download Silhouette Studio free before you get the machine.
That's right, you can actually go to the Silhouette America website and download the Silhouette Studio Software program for either MAC or PC for free and you don't even need to have the machine! While you're waiting for your Silhouette CAMEO or Portrait or Curio to arrive you can start learning to use the software program. Or you can test drive Silhouette Studio before you decide if you want to buy a Silhouette cutting machine...

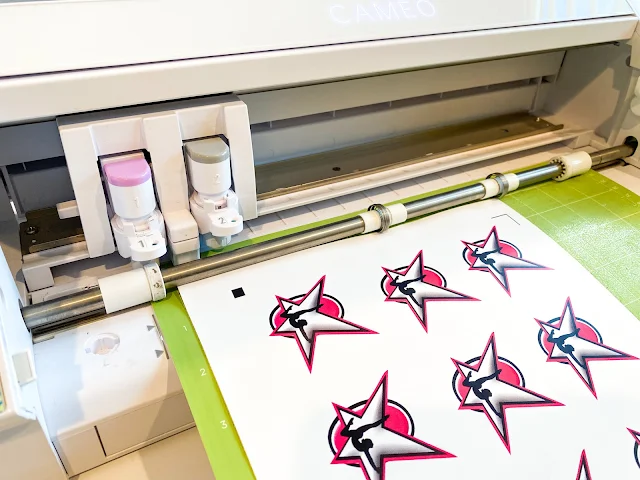
The Silhouette Cutting mat is a gridded mat with a sticky side that allows materials to stay in place on the mat while cutting. In order to expose the sticky area, you need to remove the blue cover sheet from the cutting mat. Re-cover the mat with the cover sheet when it's not in use.

The 12x24" Silhouette cutting mats and the Silhouette Pixscan mat also have a cover sheet on the adhesive area - but the cover sheets are clear.
And while we're on the subject of cutting mats, if your Silhouette cutting mat is too sticky, use a clean cotton t-shirt to de-stick it somewhat before your first time using the Silhouette Cameo cutting machine.
3. Use the Test Cut in Silhouette Studio.
Silhouette Studio gives you the option to test cut the cut settings you have selected in Silhouette Studio before you commit to cutting your full sheet of material.
The test cut is a 0.5" x 0.5" square with a triangle in the middle that will allow you to see if the settings you selected will work correctly for the material you are cutting. The default test cut location is at the top left corner of the mat, but you can move the test cut anywhere by using the directional arrows.

4. Use the built in ratchet to adjust the cutting blade depth.
There's a built in ratchet to adjust the manual cutting blades right on the front of every Silhouette machine..including the Silhouette Curio, Portrait and all the CAMEOs. Just insert the blade and twist.
Note: The autoblade does not need to be adjusted manually at all. The purple 1mm and 2mm Premium blades along with the Kraft blades are adjusted by hand.
5. Lines and unfilled text won't print without a line weight.
If you're printing a design from Silhouette Studio to your printer for print and cut or as a printable, unfilled text and any lines that do not have a line weight (or a line weight of 0) will NOT print.

All lines must have a line weight to print. Change the line weight in the Line Style tool.

6. You can re-use your transfer tape
Don't throw out your transfer tape after you transfer vinyl, you can re-use it. If you're using my favorite Oracal transfer tape, you can stick the piece of clear transfer tape back on the backing and re-use it over and over again.

By the way if you're wondering what transfer tape is used for, it's the adhesive material that will allow you to easily pick up vinyl decals and move them onto another surface without hand placing each piece of vinyl.
7. Check Your Script Fonts are Welded Before Cutting
Silhouette Studio is supposed to automatically weld script fonts, but double check that it's done it correctly! If your script fonts aren't welded (or joined) the individual letters will cut separately instead of as a solid word. To weld, select the text box by clicking it > right click > weld.

8. Use the Silhouette Studio keyboard shortcuts
The last page of the Silhouette Studio manual includes a complete list of Silhouette Studio keyboard shortcuts for MAC and PC.

These are my 7 favorite keyboard shortcuts in Silhouette Studio.

9. Check for updates directly from the website, not through the Silhouette Studio software
Do not check for updates to the software program by using the Check for Updates feature in Silhouette Studio. It's rarely reliable.

Instead, go directly to Silhouette America's website and check to see if the latest version of Silhouette Studio matches the version you are currently running.
This tutorial will walk you through how to check what version of Silhouette Studio you are running.
10. You CAN Bulk Export Your Entire Library
I would highly suggest you back up your Silhouette Studio library monthly and always before you upgrade your software. You can export your entire library - in the fold structure you have in Silhouette Studio - quickly and easily through the File menu. This tutorial will walk you through the steps so you never lose any of your designs.

BONUS #11: And the last thing no one is telling Silhouette CAMEO beginner is..that first project you're trying...it's not beginner level. Sorry to be the bearer of bad news....
There's a reason so many people put the cutting machine back in the box to collect dust. Just like with anything if you try an advanced technique before you know the basics you're setting yourself up for disappointment, frustration and failure!
Honestly it's most often that beginners don't know what's beginner level. Lucky for you, I have collected my beginner Silhouette CAMEO tutorial projects here and invite you to pick one, work through it and learn the basics before you move on. I promise you working through beginner level projects will help shorten the learning curve.

If you're more of a hands on learner and want 1:1 on Silhouette help and support, a growing library of software and machine videos, fast help through email, small group, and chat - consider joining my premier Silhouette membership site: Silhouette U!
If you're more of a hands on learner and want 1:1 on Silhouette help and support, a growing library of software and machine videos, fast help through email, small group, and chat - consider joining my premier Silhouette membership site: Silhouette U!
Note: This post may contain affiliate links. By clicking on them and purchasing products through my links, I receive a small commission. That's what helps fund Silhouette School so I can keep buying new Silhouette-related products to show you how to get the most out of your machine!
Get Silhouette School lessons delivered to your email inbox! Select Once Daily or Weekly.


.png)


This is a great piece, love the heads up on cutting mat cover sheet and program shortcuts. Keep up the great work!
ReplyDeleteI wish I knew to NEVER move the roller too far to the left. (Past the blue arrows on my Cameo). It tooks me two hours to fix it with dental floss!
ReplyDeleteit seems like the matt is too large to go through the rollers. i cant get the roller giude out of the notches to move, however it looks l;ike its as far over as it can go (cane like that, myfirst time cutting here)
ReplyDeleteThank you for the welding tip!
ReplyDeleteThanks for the welding tip!
ReplyDeleteI cannot get the mat to stay straight it cuts good then starts shifting. And it's locked down
ReplyDeleteits the hardest thing to figure out and watching videos dont help either
ReplyDelete