It's easy to make Sticker Sheets with an Easy Peel-back liner using your Silhouette CAMEO.
It's one added step that will make it easier for you or your customers to peel...and if you're selling you can charge a higher price for these premium stickers.
Having an easy peel liner is specifically helpful when you make die cut stickers that can often be challenging to get off the back liner if there's no slit.
Read on for how to add slits to the liner of your stickers.
Since this is a more advanced technique, I'm going to assume you already know the basics of how to print and cut stickers with your Silhouette CAMEO. If you need a refresher, start here with how to make stickers with Silhouette CAMEO for beginners.
NOTE: While you're going through this tutorial keep in mind that Online Labels does sell printable sticker sheets with slits in the back, but this tutorial is helpful if you want to add them yourself to un-slit lined sticker sheets!
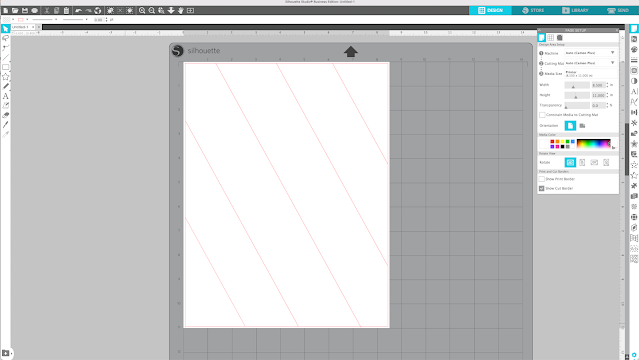
We actually need to set up two work areas. One for the slits and one for the stickers themselves.
How to Make Stickers with Back Slits on Silhouette CAMEO
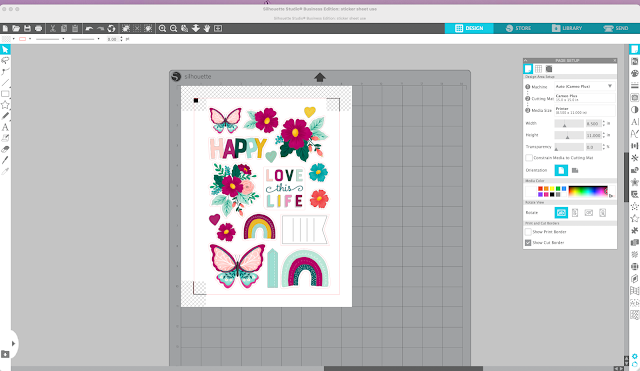
With your Design page open and set up your work area setting the "Media Size" in Page Setup to "printer." I'm using a sheet of 8.5"x11" Online Labels sticker paper.
From the Page Setup panel change the Cutting Mat to "None"
Now open a second work area by clicking the + and repeat the same page set up. This work area is going to be for the stickers themselves.
Click M on your keyboard to add the registration marks in the default position. Then go to File > Merge and add in your stickers.

Printing and Cutting DIY Sticker Sheets with Easy Peel Back Liner
The process we are going to take is: Print > Cut Slits > Die Cut
Printing Stickers from Silhouette Studio
From the work area with the stickers go to File > Print and print the sticker sheet to your printer. I'm using Online Labels white matte sticker sheets.
Once the stickers are printed, move over to the Silhouette CAMEO. On your cutting machine move the right roller in so that both sides of the sheet will be held by the rollers.
Cutting Easy Peel Slits in Sticker Sheet Liner
With the printed side down, load the sticker sheet into the machine. Do not use a cutting mat for this as you do not want the printed side of the sticker sheet getting stuck to the mat.
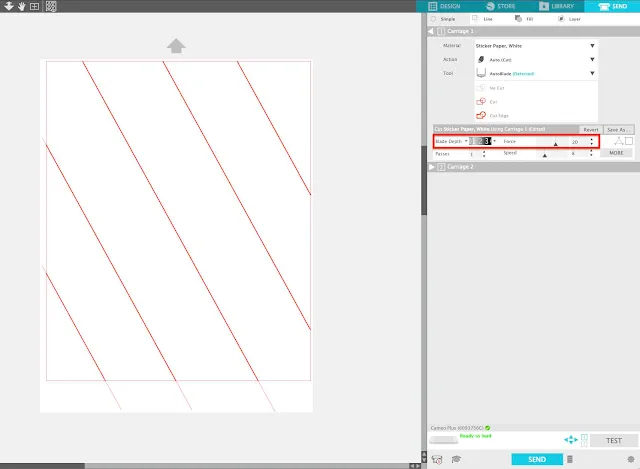
In the Software, move to the Send panel and select Sticker Paper, White as the material. Increase the force to 20 and then send to cut.
Cutting Die Cut Stickers on Easy Peel Lined Stickers
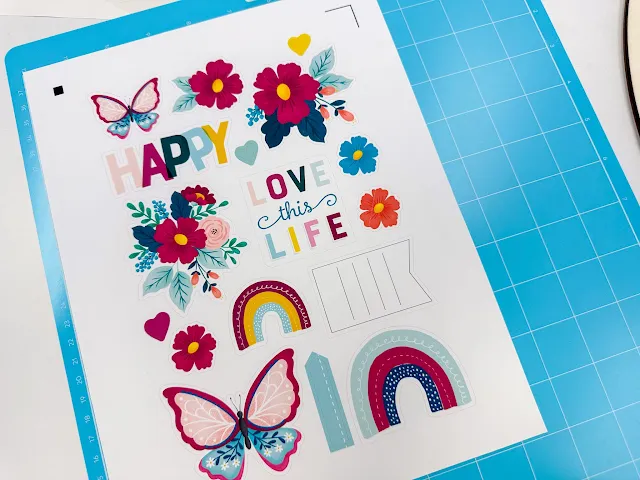
When the slits are finished cutting, flip the sticker sheet back over and place it on a cutting mat. Load it into the cutting machine.
Move back to the design area with the stickers then into the Send panel. Change the material here to Clear Sticker sheets and if needed, change the settings to blade of 3 and force of 20. This should cut through both the sticker sheet and the liner giving you die cut stickers.
Send the stickers to cut. When the stickers are finished cutting, carefully lift the corner of the sticker sheet to make sure they have completely cut through.
As always the Online Labels sticker sheets print and cut beautifully.
Ready to make you own? Grab your favorite sticker sheets from Online Labels - even if they don't have line slits - and lets make stickers!


.png)


No comments
Thanks for leaving a comment! We get several hundred comments a day. While we appreciate every single one of them it's nearly impossible to respond back to all of them, all the time. So... if you could help me by treating these comments like a forum where readers help readers.
In addition, don't forget to look for specific answers by using the Search Box on the blog. If you're still not having any luck, feel free to email me with your question.