

If you are a Silhouette Studio Business Edition user and have a Roland BN-20A or BN-20...this is a game changer.

By combining the power of the one-time paid Silhouette Studio upgrade to Business Edition and the free Roland Versaworks you can create Roland Contour Cut lines without any other software programs including Adobe Illustrator, Affinity Designer, Corel Draw, or Flexi.
This is hands down the cheapest way to create Roland Versaworks Contour Cut Lines and will significantly cut down the learning curve for those already comfortable in Silhouette Studio...and even if you're not a Silhouette user - listen up because you don't even need a Silhouette machine to use the Silhouette Studio software!
This process works for SVG designs as well and PNG and JPEG images. Let's start with how to prepare the various file types.
Open a Silhouette Studio design area and go to File > Merge to open the image in the work area.

If you are using an SVG file - which I am with this Camp Mama design from So Fontsy - you can skip ahead to the section "How to Turn on Contour Cut Lines in Silhouette Studio for Roland Versaworks" section below.
If you are using an PNG or JPEG we need to vectorize the image first by doing a Trace and Detach.
How to Vectorize a PNG or JPEG in Silhouette Studio
Open the file the same way by going to File > Merge.
Open the Trace panel on the right tool bar (in blue below).

Click "Select Trace Area". Increase the Threshold bar so all edges of the design are yellow.
Click "Trace and Detach."

Use your mouse to select the image only and pull it off to the side. Then take your mouse and swipe it across the entire work area to select any "bits" and delete them.

The PNG or JPEG is now vectorized.
How to Turn on Contour Cut Lines in Silhouette Studio for Roland Versaworks
From here both the SVG and vectorized PNG or JPEG are at the same point so move forward the same for both.
This next step is very important. If you skip it you will not get contour cut lines where you hope to get them in Roland Versaworks.
Select the design and change the line color to transparent and change the line weight to at least 0.50.

Both can be done through the Quick Access Tool Bar.
Exporting as a PDF from Silhouette Studio
Now it's time to export the image as a PDF and this is why you need Business Edition.
Select the design and go to File > Save Selection > Save to Hard Drive. Select the file type as PDF.

The PDF will save on your computer.
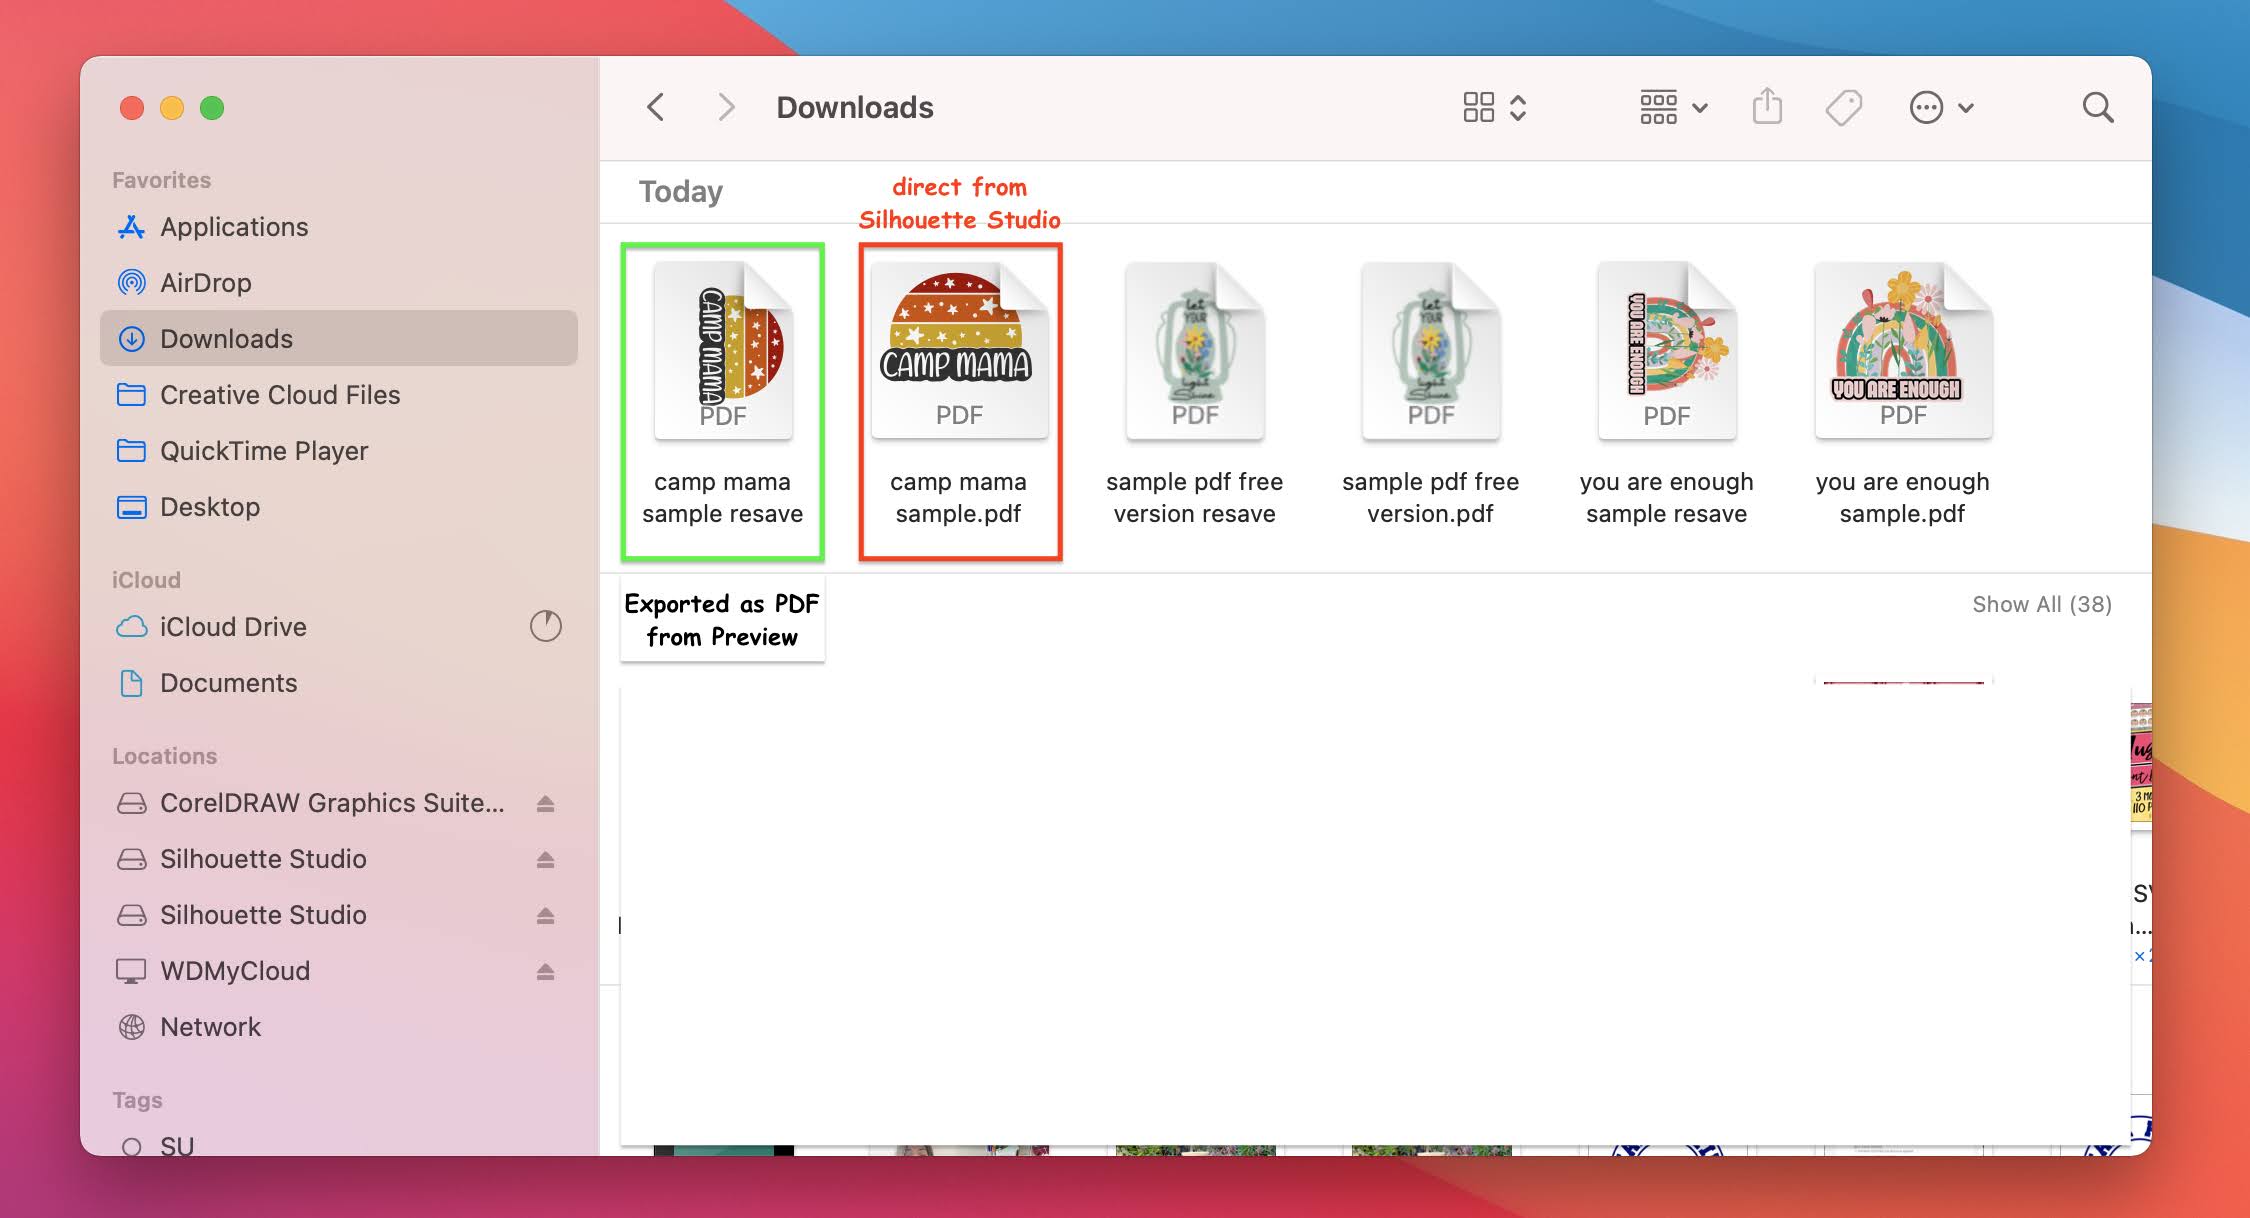
RE-Save as a PDF...
In full disclosure...
This next step is equally crucial as it is head scratching. I literally have no idea why you have to do this but it fixes the way that Silhouette Studio exports PDFs and allows Versaworks to read them correctly - otherwise you will get a blank screen in the Job Assistant window in Versaworks..
It's done slightly differently on a Mac vs PC.
If you are on a Mac - once the PDF is saved to your computer open the PDF preview from your hard drive by double clicking it to preview or right click > Open with > Preview.

This time from the Preview menu go to File > Export as PDF and resave the file as a PDF again.

You may want to rename is to indicate this is the second PDF export and the file you want to import into Roland Versaworks.
If you are using a PC find the PDF in your Downloads or wherever it saved. Double click or right click it and open with your browser.

From the Browser preview click the "Print" button..

and change the printer to "Print to PDF". Click Print and rename the new PDF file to save.

How to Add Contour Cut Lines in Roland Versaworks
Launch Roland Versaworks (Version 6.13 or higher!!) and go to File > Add Job to Queue.
Select a queue and then navigate to the PDF file you just saved.

The file will appear at the bottom of your queue list. Right click on the file name from the queue list and click "Job Assistant".

 "Pin on Pinterest")

Click on the image to select it (or Right Click > Select All) then move to the second tab down - the Cutting Line tab.
In this window you will turn on the Versaworks contour cut lines.
The default settings will show up in blue but you can change them.

If I wanted the cut line on the very edge I would leave "Offset" at 0.00. In order to get a bleed, you can see I put a negative number so my cut line is slightly inside the edge of the design.
After you click "Create" you can preview the position of the contour cut line.
Here's a close up of the cut line I created.
When you're ready for this to be changed in the queue click "Ok".
 "Pin on Pinterest")
The file in the queue will NOT be updated...instead a new file will be created. You'll be able to tell the difference by the "A" indicating contour cut line data in the file's info.

That's how you add Roland Versaworks Cut Lines to SVGs, PNGs, or JPEGs with Silhouette Studio!

Note: This post may contain affiliate links. By clicking on them and purchasing products through my links, I receive a small commission. That's what helps fund Silhouette School so I can keep buying new Silhouette-related products to show you how to get the most out of your machine!


Get Silhouette School lessons delivered to your email inbox! Select Once Daily or Weekly.


.png)


I don't have a Roland printer, but I was looking through this tutorial just out of curiosity. It strikes me that IF the reason to have Business Edition is so you can save as PDF, the upgrade might be redundant. Most, if not all, Windows PCs have an option in the 'print' menu, where you see the drop-down list of your printers, to 'print as pdf'. The wording might vary, but the gist will be the same. Selecting that saves the file to your 'downloads' folder, or any other folder you select, as a PDF. I use that option all the time, and that literally is all there is to it - select 'save as PDF', pick a destination, give the file a name, and done.
ReplyDeleteThe business edition does so much more than being able to save or print as a pdf.
Delete