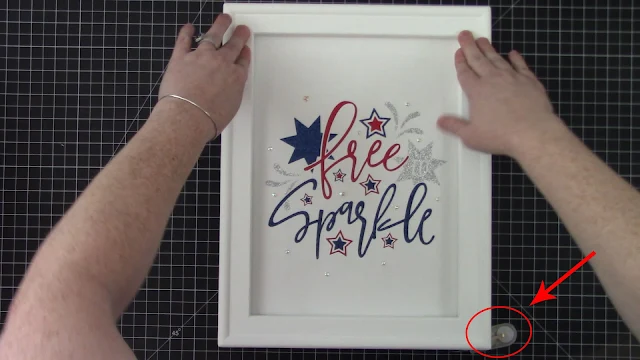
For this reverse canvas I used a mix of smooth Easyweed and Glitter HTV to add the Free To Sparkle SVG from the Must Have Summer Bundle at So Fontsy. This bundle comes with 122 SVGs and 6 fonts in all and is now 92% off!!!
After you're done applying HTV to your canvas you'll add the LED light strand. But first, you have to decide where you want the lights to go.
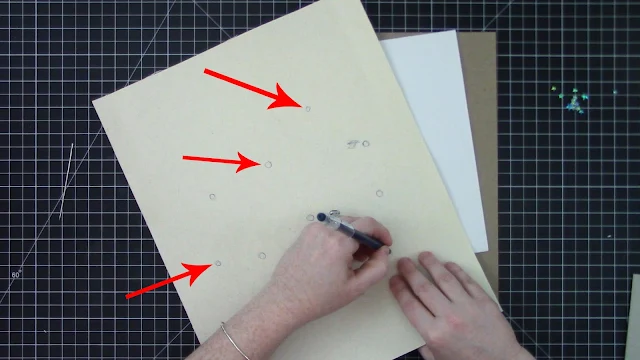
To help visualize where to put the lights, you can use placeholders like flatback gems. This allows you to move them around, see if you like the placement before committing to it. I arranged these iridescent stars on the front of the canvas somewhat randomly interspersed within the design.
Next, take a needle and poke a very small hole through those dots on the canvas. Then, use your pen to circle that hole on the backside of the canvas.
I used a strand of 12 white, mini LED lights from Joann's. It was pretty inexpensive, very lightweight, has an ON/OFF switch, and you can replace the battery when it runs out! Pretty impressive!
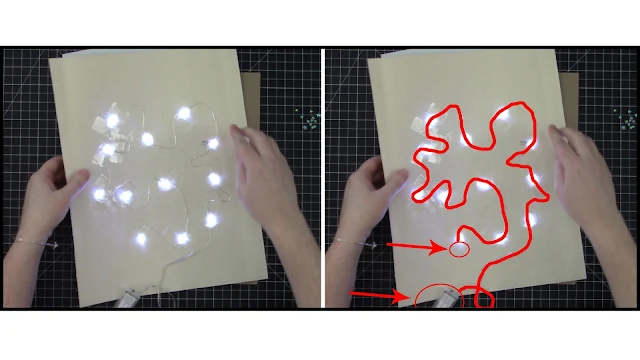
You need to align the strand of lights on the back of the canvas so that each light sits right on top of each little circle mark you made earlier. The wire is very flexible so you can easily make the strand go exactly where you need it.
Just make sure to map out a path for the strand that starts with the battery-end hanging off the bottom of the canvas (it doesn't really matter where the other end of stand ends up). Then, tape the wire with clear tape to the back of the canvas. Use a strip of tape over the wire on either side of each light and it holds it nicely in place.
Now, turn on the lights (if you haven't already), and flip the canvas over to check how it looks. Rearrange any lights that aren't exactly where you want them (you won't be able to change their position later when the project is finished).
If you like the look of the jewels or gems you used as placeholders earlier, adhere them to the front of the canvas now (but this is totally optional). If you do though, make sure to use a glue adhesive that dries clear.
Next, wrap the canvas around a piece of chipboard to give it more stability since there is the addition of the lights.
Cut a piece of chipboard so that it just fits behind the entire frame.
Trim the canvas so that about one inch extends beyond each edge of the chipboard. Then, snip the corners of the canvas with scissors to reduce bulkiness when you fold it over the chipboard.
Apply Scor Tape to the edge of the chipboard. Start at the top or one of the sides of the frame (leave the bottom with the battery for last) and remove the tape backing, fold the canvas over the chipboard and, press it onto the sticky tape.
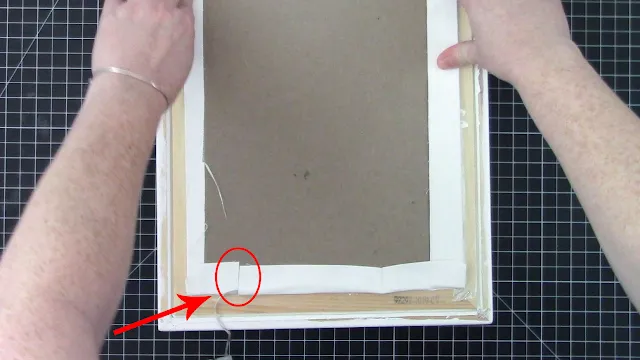
Rotate the chipboard and repeat on the other sides. But, when you get to the bottom edge with the battery, first cut a slit in the canvas from the edge of the canvas to the edge of the chipboard. Then, like the other sides, remove the tape backing and fold the canvas over the chipboard. This slit is for the wire (connected to the battery) to slip through.
Next, apply Scor Tape to the back of the inner edge of the frame. Remove the tape backing, flip the frame over and press it onto the canvas (centering your design). Make sure to press down really well.
At this point the battery is going to be sticking out from the bottom, but that's okay.
All you have to do is flip the entire canvas over and tape the battery to the back of the chipboard.
If you want to finish the back of the canvas with a sheet of kraft paper, just make sure to cut out a rectangle for the battery. Apply Scor Tape to the kraft paper and press to the back of the frame to adhere.
These LED light strands have so many possibilities!

And paired with the designs in the Must Have Summer Bundle, your projects will look so cool (even though the summer may be hot!).
Note: This post may contain affiliate links. By clicking on them and purchasing products through my links, I receive a small commission. That's what helps fund Silhouette School so I can keep buying new Silhouette-related products to show you how to get the most out of your machine!
Get Silhouette School lessons delivered to your email inbox! Select Once Daily or Weekly.


.png)


Just wanted to say I love reading your blog. as we provide Neon Light Melbourne at affordable prices. for more info visit our website.
ReplyDelete