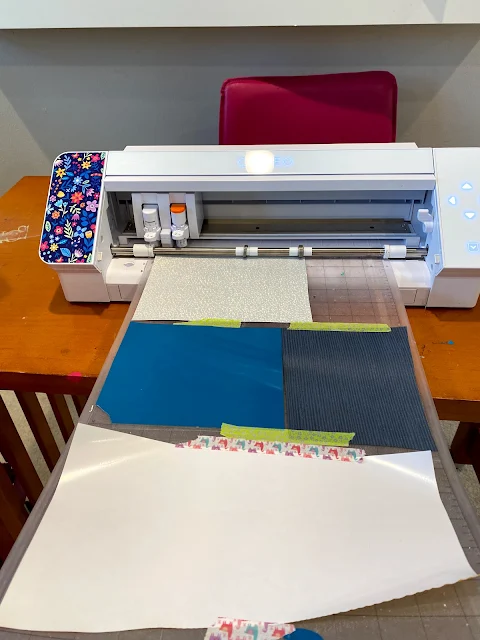
This could be different finishes or thicknesses of the same material like flock HTV and smooth HTV or it could be two totally different types of material such as paper and vinyl.
This is a great technique to use especially with multimedia project. For example if you are creating a scrapbook layout and need to cut various types of paper, you can put them all on the same cutting mat and cut at the same time even if they require different cut settings.
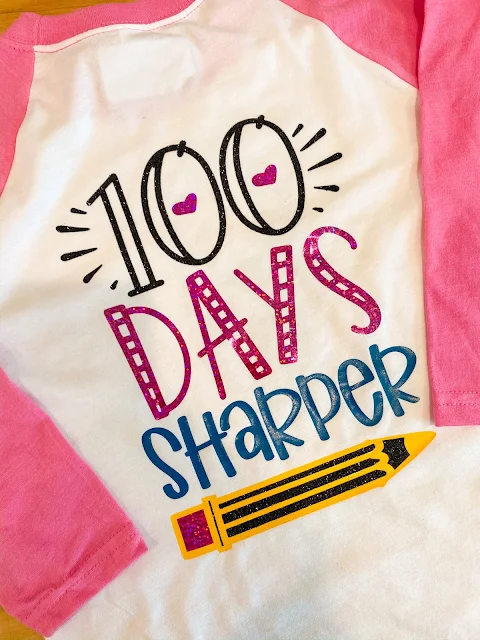
I used this trick for the first time a few weeks ago when I made a shirt with a combination of yellow and blue smooth, pink metallic, and black glitter heat transfer vinyl.
First open you design in Silhouette Studio. This 100 Days of School design is from the Big Craft Starter Bundle on So Fontsy.
The SVG opens in Silhouette Studio solid black. But we're going to change that so each piece of the design is colored the same as the material color it's being cut on.
To do this, ungroup the design.
Select one part of it and pick a new fill color from the Quick Access Toolbar.
To make the pencil multiple colors, we need to Release Compound Path found in the right click menu.
If your design does like mine and fills a solid black, use the fill and line colors tools on the Quick Access Toolbar to change the fill to transparent and the line color to red. Then fill each part of the design by selecting it and picking a new fill color.
Since this is an HTV design I need to mirror it by right click > Flip Horizontally.
TIP: If parts of your design are the same color, and therefore will be cut on the same sheet of material, limit wasted HTV by following this trick for nesting while also lining up the design perfectly.Now I start separating my design and moving each part to a separate area of the mat. Don't put the different colored pieces too close to each other. Remember, they will be cutting on different materials.
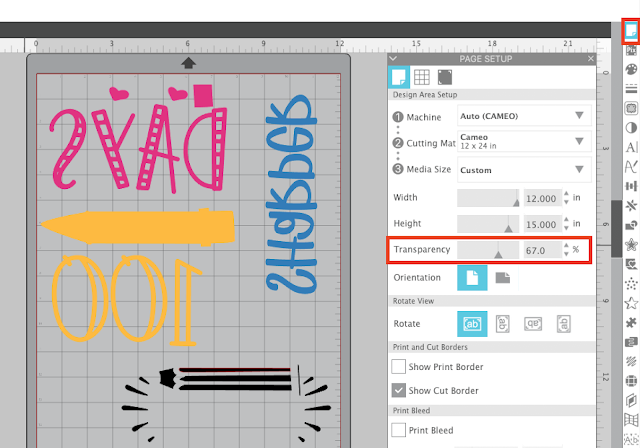
Reveal the grid lines by moving the Transparency bar to the right.
You're going to use those grid lines to match the grid lines on the cutting mat and then placing the different materials within those grids. (Don't be afraid to move your design pieces around on the mat if you want to avoid cutting down your materials or if you find you need more room.)
Move to the Send panel in the Silhouette Studio V4 software. Click on "Fill" toward the top to move from the Simple Send Panel to the Cut By Fill Color panel.
Each color swatch represents a different color section of your design and for you that means a different material.
Under Material select the type of material for each color swatch. In this case I will select HTV, Smooth for the blue and yellow colored pieces because I am cutting Siser Easyweed.
For the pink material select HTV, Metallic and the black HTV, Glitter.
Selecting the different materials means before the cut for each color the software and machine will change the cut settings adjusting the blade, force, and speed automatically. This allows you to cut in one single pass on a variety of cutting material.
Once your machine is powered on and a tool is in the carriage the Action and Tool should automatically populate if you are using a CAMEO 4. If you are using a Silhouette CAMEO 3 or an older machine you will have to select the action and tool.
Load the cutting mat into the Silhouette CAMEO 4 and press Send. (This also works on CAMEO 3, CAMEO 2, 1, and Portrait).
Once everything is cut weed it then apply by tacking each layer for just 1-3 seconds. On the final layer apply the full amount of time.
Note: This post may contain affiliate links. By clicking on them and purchasing products through my links, I receive a small commission. That's what helps fund Silhouette School so I can keep buying new Silhouette-related products to show you how to get the most out of your machine!
Get Silhouette School lessons delivered to your email inbox! Select Once Daily or Weekly.


.png)


What blade do you use? It looks like an autoblade for #1 but what's in #2?
ReplyDeleteThanks!
Hey there! Check out this blog post about Cameo 4 blades: https://www.silhouetteschoolblog.com/2020/09/silhouette-cameo-4-tools-and-blades.html
ReplyDelete