Well, I finally figured it out...and there's no Layering or Draw a Box tool involved!
I previously shared that to change the Silhouette Studio mat color you could use the Draw a Rectangle tool to draw out a box the size of the page area, then fill it with a color, lock it down using the Layers panel and set it to No Cut. BUT this method is even easier.
Changing the background color is particularly useful when you want to 'see' what your design will look like when it's placed on a colored background. Think of it like a half mock up.
To change the Silhouette Studio background color go to the Design area and then open the Page Set Up panel. By default the background is gray..or actually transparent.
With this trick you can make it ANY color!
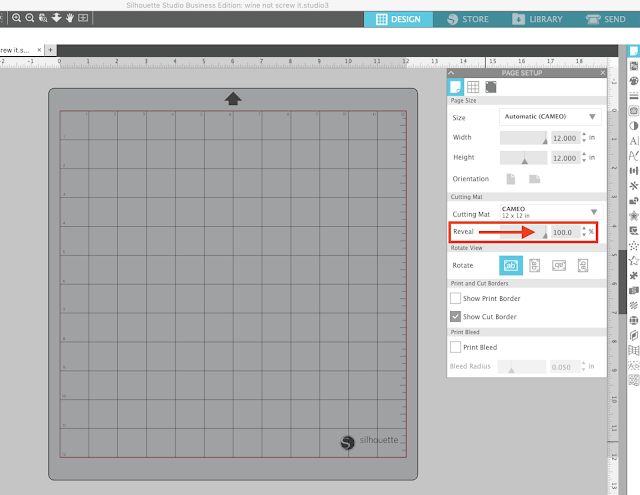
On the Page Set Up panel start by making sure the Reveal bar is all the way to the left so you have a solid white background.
Click the second tab on the Page Set Up panel to open the Grid Settings.
Check the box to Show Grid.
Under the Color area, change the grid color to whatever color you want your background to be.
Now move the Spacing bar all the way to the left. This puts NO spacing between the grid lines which gives you a solid background!
That's it!
Now you can see what your design will look like when it's placed on this color background - before you actually decide on which color material you want to cut on.
By the way how amazing are these mandala animal designs?! I'm obsessed with them right now. They're part of the Mandala Bundle on So Fontsy if you want to grab them before the bundle expires.
Note: This post may contain affiliate links. By clicking on them and purchasing products through my links, I receive a small commission. That's what helps fund Silhouette School so I can keep buying new Silhouette-related products to show you how to get the most out of your machine!
Get Silhouette School lessons delivered to your email inbox! Select Once Daily or Weekly.


.png)


Great idea!
ReplyDeleteIt doesn't work if you've set up your work space using mm/cm, as the lowest setting for the distance is one mm and you end up with a very fine grid. But when you change settings to inches before setting the grid as described above, you can go back to metric afterwards and the grid will remain solid.
there's no reveal section on mine
ReplyDeleteHi there, the alternative is to make a box and color it in.
DeleteIt may be under transparency. I got confused, too.
DeleteThis was a neat trick!
ReplyDelete