But first perhaps your wondering what is an edit point in Silhouette Studio and why do I care about them. Edit points are those little gray or white or sometimes red circles you get all over design if you
Let's start by checking out an example of how edit points can really help you in a real life project. I'm not a designer and I am guessing most of you wouldn't consider yourself designers either, but that doesn't mean we can't totally use edit points to make our creations designer-worthy.
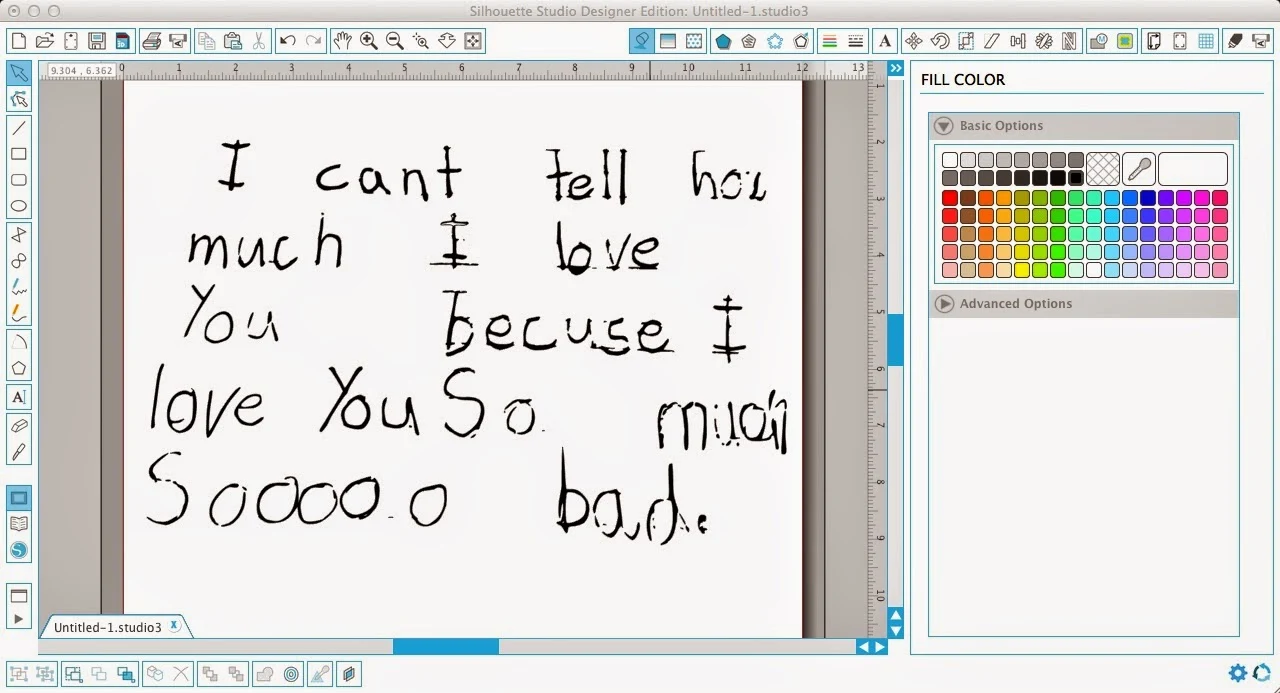
Later this week I'm going to share how I turned a this note from my daughter into a pillow, but before I could do that I had to do some editing to it. The note was written on lined paper and when I traced it in Silhouette Studio, some of the lines were traced as well...and attached to my letters. BOOO!!
When working with edit point you need to ungroup your design and depending on the design you may also need to release the compound path. (Select design > Right click > ungroup and/or right click > release compound path).
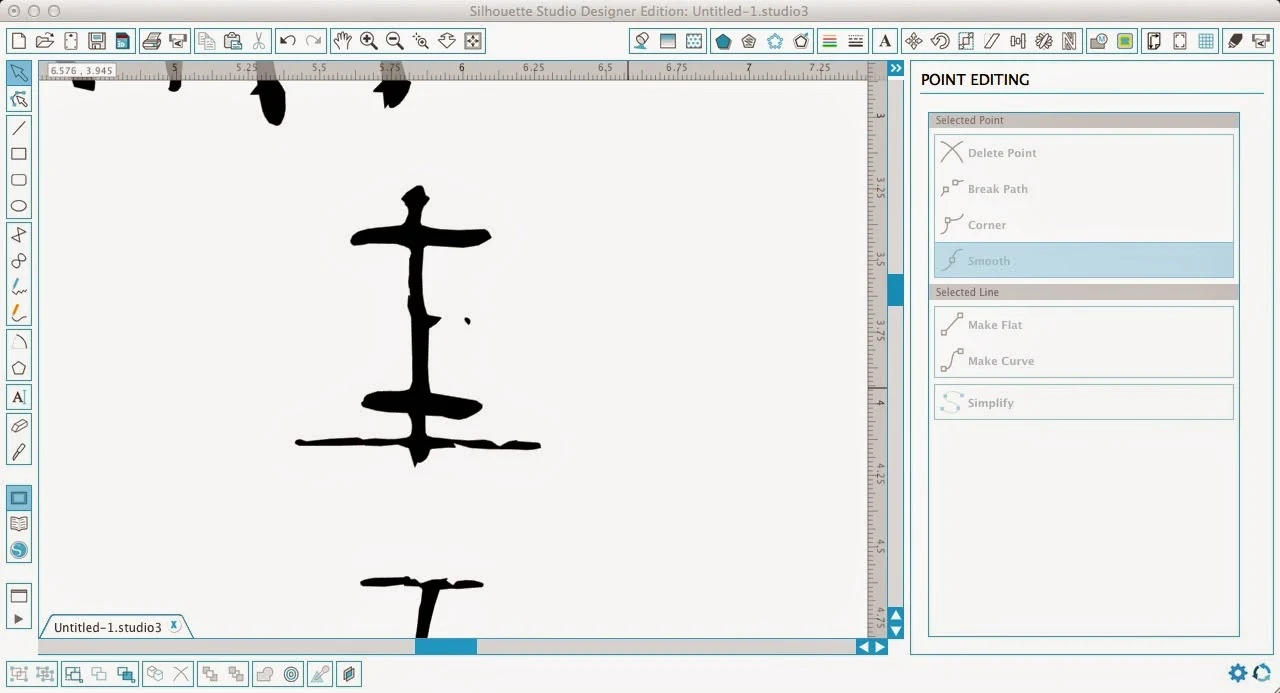
Then zoom in really close on the area that needs some editing. This "I" has the line attached under it and I want to get rid of that line. I could use the knife or eraser tools, but it will be very difficult to get really close to the letter without chopping into it or freezing the software (just bein' real).
Now that I'm zoomed in close I am going to double click on the letter. When I double click on the letter I'll get the edit points. Every single gray dot is an edit point.

When you get the edit points you also get the Point Editing window on the right side. This is one of those 'hidden' windows that you can't just click on from the toolbar.
Now I can click on one of those gray edit points..and if I hold down SHIFT and click I can click on several of them at the same time. When they are selected they'll turn white.
I have about 7 selected on the far left of that line and when I hit "delete point" from the window on the right. The line shrinks to this...
My 'lined paper line' is shrinking but it's still there. I need to delete more edit points. So I continue holding down shift and clicking (and deleting) all of the edit points that are extended out to the left of my letter. Getting there....
Finally I get to this. That last edit point has a rotating bar on it that allows me to move the curve. When I pull the bar down the 'nub' is flattened out.

I repeated this same process for the other side of the I, as well.
And here's a side by side so you can see the results of editing and deleting all of those edit points.
The same process was repeated for every other letter that had a "line" attached to it until I got to this point.
The easiest way to demonstrate this is with just a basic rectangle...made up of just four edit points.
Look what happens when I select the two bottom edit points...and then hit 'smooth.' The line curves and I'm given a lever bar.
Move that lever bar down and can you create a totally new shape as the bottom of the rectangle is curved out.
The design above is still only four edit points. But if I hit "simplify" several more/new edit points are added to my new shape as shown below.
If I were to click one of the edit points along the rounded side and click on "make flat" that line between the edit points goes from slightly curved to a straight line.
"Break Path" will actually create a break in your design. The break - as tiny as it is - is indicated by a red edit point. If you have a break in your design you will not be able to fill it with a color or pattern.
TIP: If you ever have trouble filling a design double click it to see the edit points and then you can find the break by looking for the red edit point.
To repair the break and close it up, double click on the red edit point. The white dot with the gray line indicates the repaired break point.
Thanks for taking today's master class on Silhouette Edit Points! Did I forget anything? How have you found edit points useful when working in Silhouette Studio?
Note: This post may contain affiliate links. By clicking on them and purchasing products through my links, I receive a small commission. That's what helps fund Silhouette School so I can keep buying new Silhouette-related products to show you how to get the most out of your machine!
Thanks for coming to class today at Silhouette School. If you like what you see, I'd love for you to pin it!


.png)


Great job explaining. Mostly tried using edit points through trial and error.
ReplyDeleteIs there a way to select ALL edit points to change them as a whole. For example.... if I wanted all the points to be smooth and curved? Or is it one by one? I've tried Simplify and it seems to help a bit, but when a file has WAY too many unnecessary points and I want to clean it up so it cuts nicer I find it very time consuming, so I was hoping there was an easier way. :)
ReplyDeleteAnd by the way... THANK YOU for your tutorials! Most of my knowledge is learn from doing or Google it and find a great source. Much appreciated!
Deletewhen youre in edit points mode, hold shift and click in emty sapce and drag the selection window where you need it, can select whole shape like this :)
DeleteThis is a great post about the points. I have figured out some of it by trial and error, but I have trouble when I want to connect two lines together to close a shape. What's the easiest way to do this?
ReplyDeleteI replied to Gina the answer to your question if you haven't already figured out your own method. I'm not sure if replying will notify you so I figured I'd try.
Delete-Toebeans
This was a great post about edit points; but I have one question. I have two silhouette designs that I'd like to combine together. I can't seem to figure out how to join the edit points, so it's one design. (think two vines combined). I've tried grouping them together but then I can't see the edit points. I then tried to click on the edit points but I can only see points for one of the vines, not the other. Any help?
ReplyDeleteI’ve honestly tried writing this out several times and I can’t seem to make it sound right. This is the best iteration (in my opinion) that is easiest to understand.
DeleteKnife tool > select outline in options pane
Cut away parts that would overlap when the designs are put together. If there is no overlap, cut it anyways to break the design. A simple small cut on both designs is all you need.
Select designs > Release compound path on both designs > delete unwanted overlap portions
If the unwanted portion won’t release > Modify tab > select designs > click detach lines > delete overlap
Position designs in correct place as if it was a single design > right click > make compound path
Right click > edit points > put red dots together so you design is a single piece
Pro tip: if you only have two red dots great! Your dots are overlapping and all you have to do is double click and the two red dots will become one gray dot making a single outline.
Done! Now you can fuse lots and lots of fun things together! I figured out the knife thing after manually right clicking to break path and having to go through a longer back and forth process of deleting pieces. I hope it makes sense!
-ToeBeans
I forgot to mention, as you go back and forth between make compound path and releasing compound path, you may notice more red dots appearing. I'm not sure why it happens im assuming a glitch? but if you were to try and fill in these designs with color it wont work. You have to close the path by editing the points and double clicking the red dots. (theyre sitting on top of each other normally so double clicking brings them together fast. If not drag them together again and your paths will be while again.
Delete-Toebeans
Great tutorial, thank you! May I ask a question about edit points please. I have been using this function without any trouble for months but suddenly something has changed. I would be so grateful for any help! When I try to move an edit point it shoots a line out in any direction; about an inch long. Since this has happened I am unable to modify shapes, letters etc Looking forward to any suggestions x
ReplyDeleteDid you ever get an answer to this? I am working on this now and am running into the same issue and not sure what the heck is happening!! I'm getting desperate.. i can't find an answer anywhere. Thank you!
Delete