 Several months ago I shared a tutorial on creating mock ups in Silhouette Studio. Mockups make it easy to show clients what a finished project will look like before you make even one cut. I use mockups all the time to show customers what their ideas will look like when they come to life. But I also use mock ups a lot when designing so that my design is perfectly sized and laid out when I go to cut.
For example, I created a pair of Santa sacks for a friend (the full tutorial will be on the blog MONDAY!!!). She was not particular about the design, but for layout and design purposes I went ahead and made mock ups to make sure everything would be sized correctly. In the original mockups tutorial I showed you how to take photos of your 'blanks' and bring them into studio to use for mock ups.
But you can actually cheat for certain items like wood signs, plates, and other objects that are common shapes like circles, shapes and rectangles.
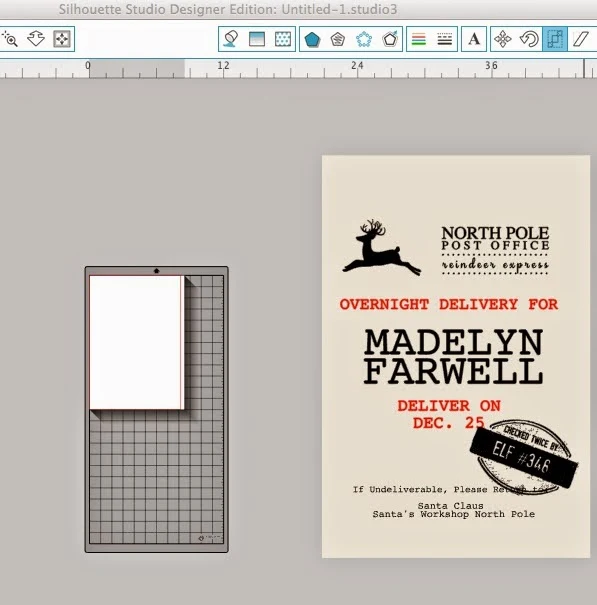
I used the Draw a Rectangle tool to draw out my bag. The Scale tool (in blue along the top tool bar) is where you can specify the exact dimensions of the bag. I even fill it in with a color that's close.
Then I lay out my designs and text over the "bag" that I've drawn. This let me know exactly how big each element should be in relation to each other and to the bag.
If I hadn't done the mockup there's a good chance some of my design elements would be scaled incorrectly, because I hadn't 'seen' what it would look like all together before cutting. Then I take all same color elements and, without resizing them, move them onto the cutting area so they can all cut together.
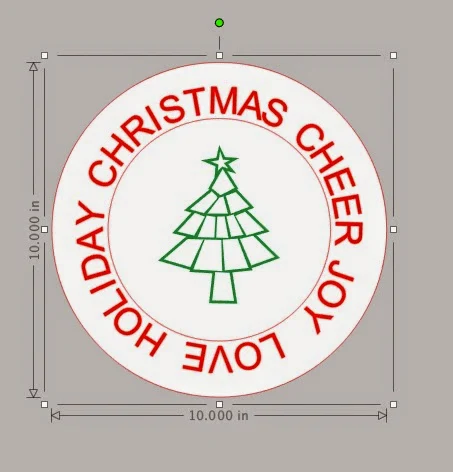
The same would apply for decorating plates....just draw a circle the same size as the plate (say, 10" diameter) and then make a second circle to create the rim.
The Fill Patterns (in blue along the top bar) are even useful in some cases. If you have a wood sign you are making, fill in your 'rectangle sign' with the wood grain and you'll get a great idea of what the finished product will look like with various stain finishes, paint or vinyl colors, texts, and font sizes over it. I do this a lot for people who want a stained ruler growth chart, but can't decide if they want light or dark stain....
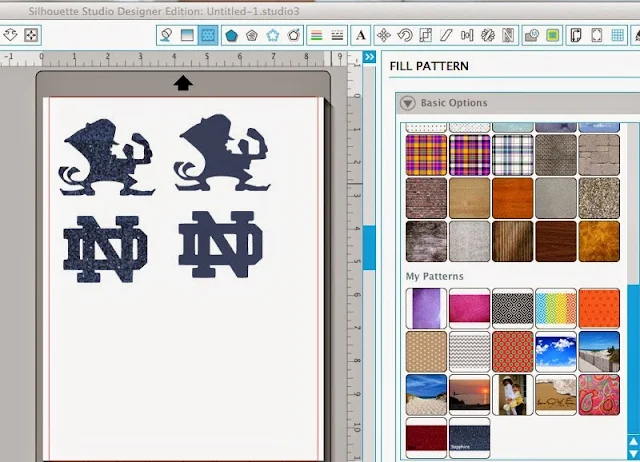
You can also add your own fill patterns to your folder. I like to add glitter patterns so I can get a real sense of what the glitter vinyl or HTV will look like on a design. You can do this a few different ways...you can take a photo of the glitter sheet with your camera or phone and import the photo into the patterns folder. Or you can kind of cheat.....I buy most of my glitter vinyl and glitter HTV form Expressions Vinyl so I grab their sample photo from the listing and save it to my computer and then drag it into my patterns folder. (Remember this is for MOCK UP purposes only..you can't legally sell photos that aren't yours.)
Once you have your glitter background in the patterns folder you can make your design and pick the glitter from your Pattern Fill tool. Patterns you uploaded can be found under the pre-loaded patterns in the "My Patterns" category. Here's an example of how I used this recently with a onesie I was making for my cousin...here's the mock up with the glitter vs just plain blue.
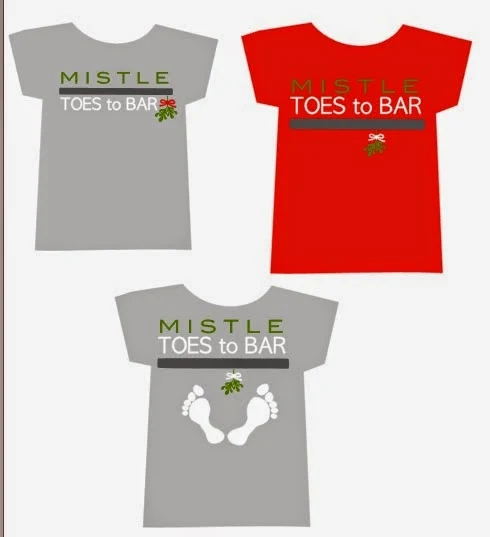
When it comes to designs for a client who has NO idea what they want (ahem...not naming any names, Mr. Silhouette School) I like to offer options by creating various mock ups. Recently my husband and his Crossfit team wanted shirts made for an upcoming competition. They gave me the team name and said "GO"...I was able to quickly and easily come up with a few design options for them. Then they took pieces and elements of what they liked and we created the final design.
How do you use mock ups in Silhouette Studio? Leave a comment below to share.
Note: This post may contain affiliate links. By clicking on them and purchasing products through my links, I receive a small commission. That's what helps fund Silhouette School so I can keep buying new Silhouette-related products to show you how to get the most out of your machine!
Thanks for coming to class today at Silhouette School. If you like what you see, I'd love for you to pin it!







.png)


Love this. I don't do this kind of thing, but I keep forgetting to use my silhouette to layout my scrapbook pages. Need to remember that!
ReplyDeleteI love this idea...just about to upload a picture of the back window of my husband's van to mock-up something he wants. Thanks for the info!
ReplyDeleteIs there a way to remove those pesky thin red cut lines from my mock up? Sometimes it's not an issue but with small text it can take over the fill color and confuses customers.
ReplyDeleteIf they get in my way I make the lines the same color as the fill. This eliminates the red line look and will still cut fine.
DeleteIf they get in my way I make the lines the same color as the fill. This eliminates the red line look and will still cut fine.
DeleteI would like to know how to email these mock-ups to customers for approval.....
ReplyDelete