If you're new to using the Silhouette Heat Pen in the Curio 2, I'll take you through the process to foil step by step.
When using the heat pen in the Curio 2, you can add foil to materials and items that are up to 20mm thick thanks to the high clearance. Read on for how to use the Silhouette foil heat pen.
What Else Do You Need with the Silhouette Heat Pen?
Before you begin you need to make sure you have a few things. The Silhouette heat pen comes in a pack of two with foil and tape. You'll also want a 12x12" Silhouette cutting mat and the Silhouette Curio Debris Tray. Neither of these comes in the box with the Curio although Swing Design does offer bundles.
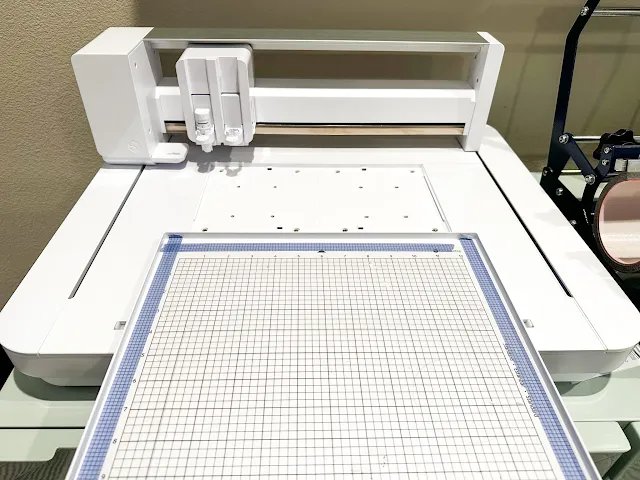
Start by removing the electrostatic base from the Curio. Just push in the tabs on either side and slide out the ES base. You're going to replace it with the Curio 2 debris tray...but before you do, I'd recommend adding a Silhouette CAMEO cutting mat.
Preparing the Debris Tray and Heat Pen
The tray has several notches that are supposed to help with alignment, but honestly without a grid on the tray you really need the cutting mat. The cutting mat, however, slides around so I have found you have to tape it down.
I don't think this should be necessary, but if you want to ensure your mat and material aren't sliding or moving at all during the foiling, cutting, or engraving I'd suggest you designate a 12x12 cutting mat to the Silhouette Curio 2 and tape it onto the debris tray. The corners of the mat should rest just inside the notches.
I used washi tape to secure the mat to the debris tray.
Now you can slide the debris tray into the Curio 2.
Be sure to lock it into place by pushing in the tabs after inserting the debris tray. There's a lock on each side.
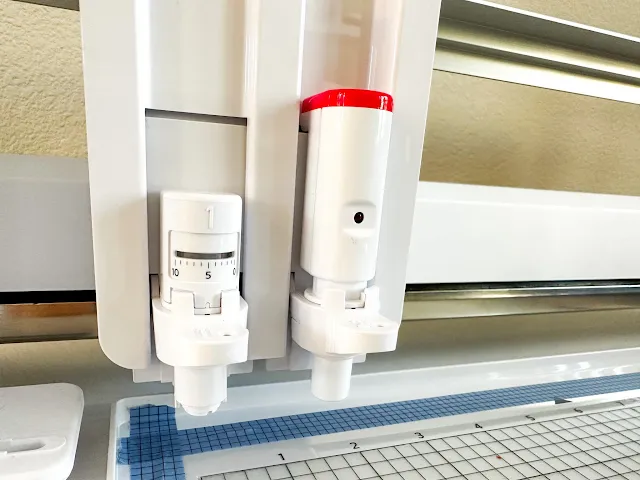
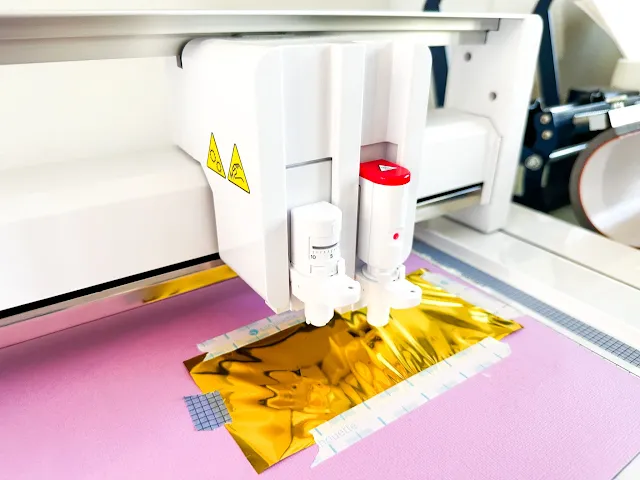
Place the Foil Heat Pen in the right tool carriage, Tool 2. Power on the Curio by holding the power button down for about 3 seconds. The power tool gets power from the Curio 2 machine, but will not start heating up yet so don't worry about that.
First Project with Silhouette Curio Heat Pen
If this is your first time foiling, I would suggest you use a piece of cardstock or another relatively inexpensive material to practice on while you get the hang of using the heat pen. Place the paper directly on the cutting mat.
The foil that comes with the Silhouette heat pen is only 3" wide so you'll need to position it pretty accurately. (You do not have to use the Silhouette brand foil.) I would suggest holding off on adding the foil until you set up your design in Silhouette Studio.
How to Turn On and Heat Up Silhouette Heat Pen
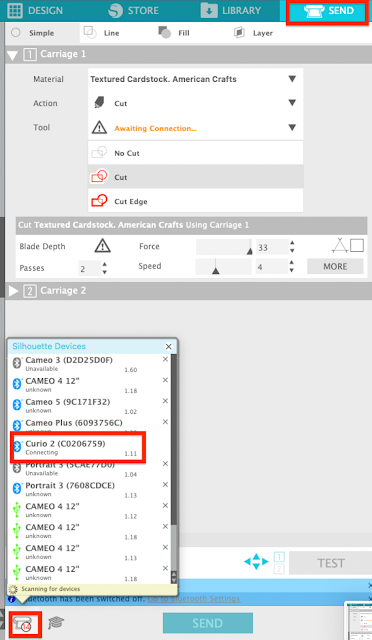
Move over to the Silhouette Studio and start in the Send panel.
If your CURIO 2 is not the connected machine, open the Machine List and select Bluetooth or USB Curio 2 connection based on how your machine is connected to the computer.
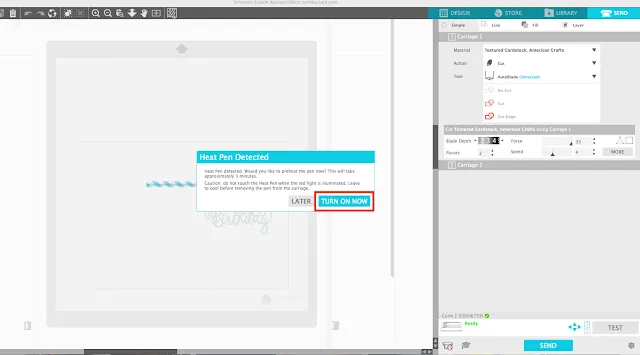
Once connected, the machine should automatically detect you have a heat pen in Tool 2 and prompt you to power it on. Click "Turn On Now" to start heating up the heat pen.
How to Set Silhouette Heat Pen Settings
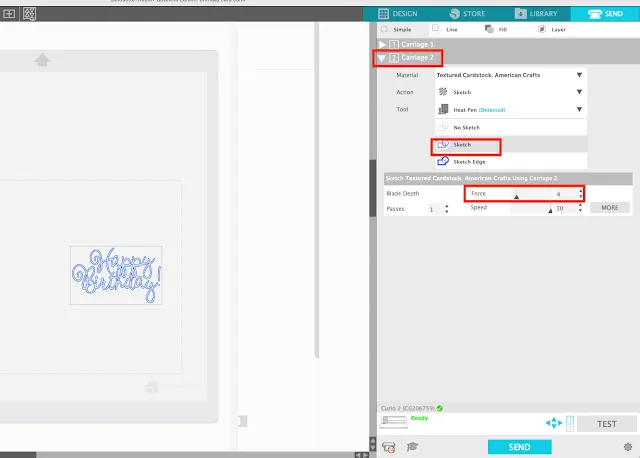
In the Send panel still, expand the Tool 2 settings. Select your material from the drop down list.
The software will automatically default the "Action" to "Foil (Auto)" when the heat pen is in Tool 2. However, this give you a "Settings Not Found" warning and will require you to create a new custom setting - as Silhouette Studio does not have any settings for the new power tools.
You'll need to create your own custom setting..which is not ideal, but necessary. This tutorial will walk you through how to create custom settings for the Heat Pen.
How to Setup Foil Designs in Silhouette Studio
Return to the Design area of the software and open the Page setup panel. Check and change the following settings to:
Machine: Curio 2
Tray: Debris Tray
Cutting Mat: CAMEO
Media Size: Auto (12x12)
Position and scale the design in the software.
I'm going to sketch and cut a foil card which is why you see the card cut line. I will have a separate tutorial on how to sketch and cut with the Silhouette Curio.
Now that you have set the position of the design in Silhouette Studio, you should have a good idea of where you need the foil to be on your material.
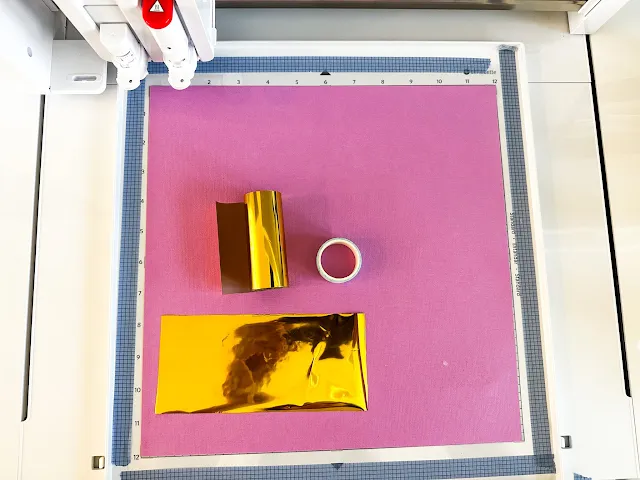
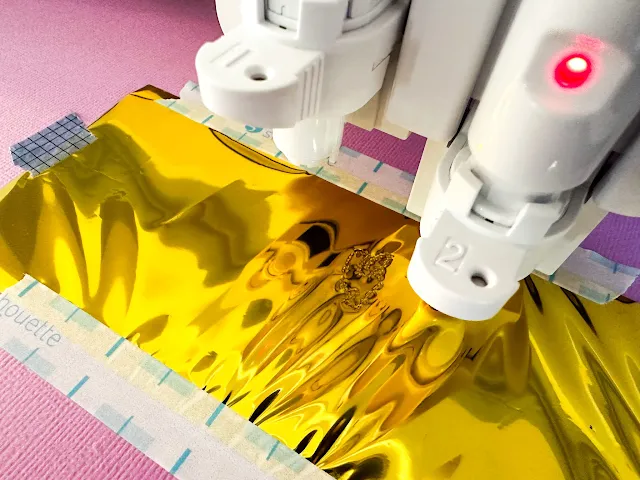
Cut off a small piece of foil and use the provided tape to secure it covering the area where you want to foil the design.
Try to get the foil as flat and smooth as possible. Use the rulers on the side of the cutting mat to help you position the foil.
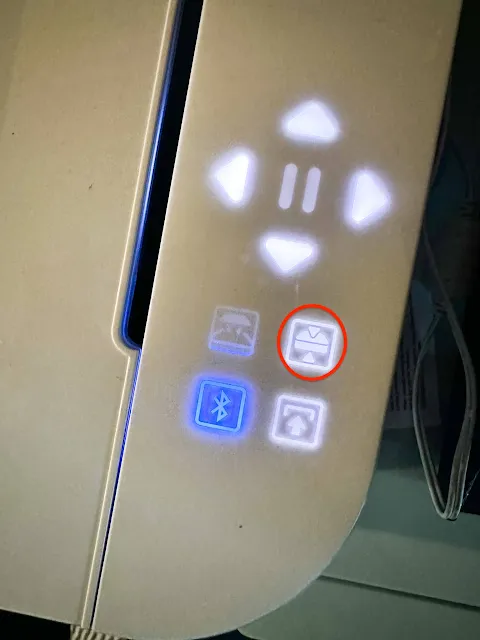
Use the arrow buttons on the Silhouette Curio 2 control panel to move the tool module to hover over the area with the foil. Then press the auto height detection button on the control panel so the machine measures the height in the area where you will be foiling.
How to Foil with the Silhouette Curio and Heat Pen
When you're ready, return to the Silhouette Studio Send panel.
Select the design in the preview panel on the right and select "Foil" under Tool 2 settings to turn the cut lines blue, if they're not already.
I reduced the force a bit and slowed down the speed, but you may need to experiment with the this based on your material. I find a slower speed allows the heated tip to time to lay down the foil nicely as it moves along the path. Too high of speed can result in missed foiled areas.
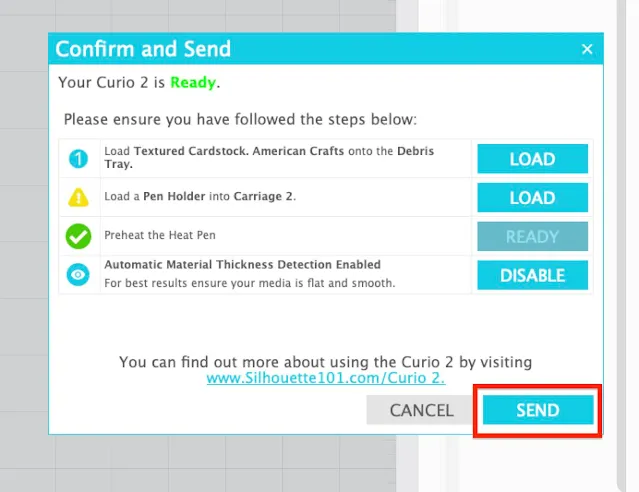
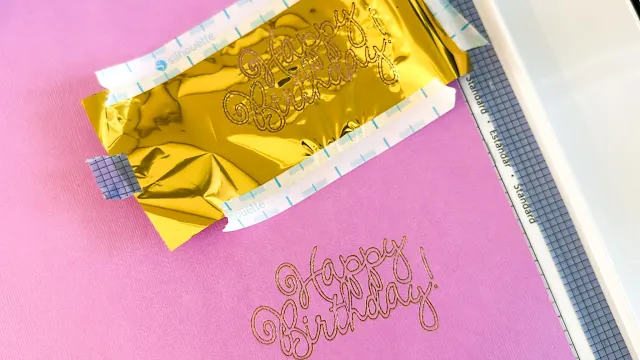
The foiling should now begin with the heat pen moving over the foiled area and then dropping down. The foil will only be applied where heat is applied which is along the design's path or "line".
If you'd like to see the Silhouette Heat Pen in the Curio 2 in action, check out this first look video.










.png)


No comments
Thanks for leaving a comment! We get several hundred comments a day. While we appreciate every single one of them it's nearly impossible to respond back to all of them, all the time. So... if you could help me by treating these comments like a forum where readers help readers.
In addition, don't forget to look for specific answers by using the Search Box on the blog. If you're still not having any luck, feel free to email me with your question.