

If you are running a business using a Roland BN-20 or BN-20A you can of course print and cut with the 20" ecosolvent printer.
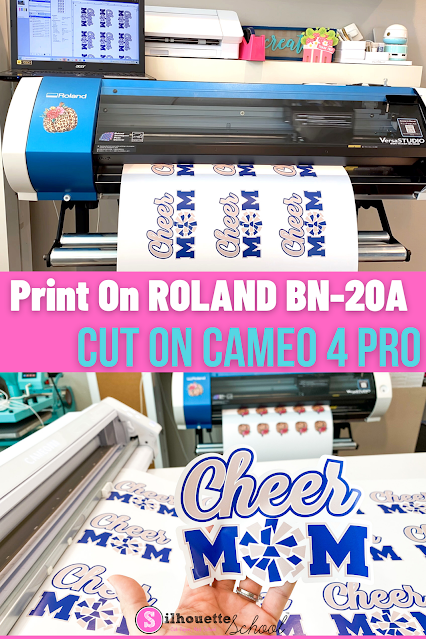
Most Roland BN-20 users will tell you, it's not a fast machine especially when printing. To speed up production on print and cuts however, you can pair the BN-20 or BN-20A with a cutting machine - including the relatively low-cost Silhouette CAMEO 4, Plus or Pro - all desktop cutting machines. This tutorial will explain how to print with Roland BN-20A and cut with the 24" Silhouette CAMEO Pro.
To make this as easy as possible, and avoid common issues due to set up errors, I have setup a Silhouette Studio print and cut template for use with the Roland BN-20A and CAMEO 4 Pro for you.
The 24" Silhouette CAMEO Pro is a relatively low cost wide format desktop cutting machine. One of the most attractive things about it is the ability to use Silhouette Studio which is a powerful software where you can not only add cut line but also print registration marks..and a whole lot more.
What you'll need:
- Roland BN-20 or BN-20A
- 20" Material
- Silhouette CAMEO Pro (Bundles available including CAMEO Pro and Roland BN-20A Bundle)
- Silhouette Studio Software (Free to Download)
- Silhouette Studio Business Edition (One time Paid upgrade $99)
- Free Print and Cut Downloadable Template (Optional)
How to Use the Free Silhouette Pro Print and Cut Template
You can download the free page setup template from So Fontsy and open directly in Silhouette Studio. Unzip the folder on your computer.
Launch Silhouette Studio and go to File > Open. Navigate to the template and open.

The template will open in a new work area. The page template is set to 20" x 36".
If you need to adjust the height of the page, open the Page Setup panel and change the height dimension ONLY. The position of the registration marks will automatically adjust.

Do not change the width dimension or the position of the registration marks.
How to Setup Designs for Printing on Roland BN-20A with VersaWorks
Now all you need to do is add your designs to the work area. You can do this by dragging and dropping the image directly into the work space from your desktop or by going to File > Merge and navigating to the file.
I'm using this Cheer Mom SVG design to make vinyl stickers for cars. I would suggest you use an SVG to start since it has cut lines built in and you don't need to create them by tracing a PNG.

Group the design together and scale/size to your desired size.
- To group select the entire design > right click > Group.
- To scale select the entire design and move one of the corner nodules in or out.
Move the design towards the upper left of the page being sure the design is not touching the registration marks or the hashed area at all.

To fill the page with the same design select the design and open the Replicate panel from the right sidebar. Click "Fill Page."

The software will replicate and possibly rotate the design to fill the page with as many copies as possible while staying in the safe print and cut area.
How to Print Silhouette Registration Marks on Roland BN-20A
Export the file from Silhouette Studio as a PDF. This requires the one-time $99 paid upgrade of Silhouette Studio Business Edition. To save as a PDF from Silhouette Studio go to File > Save As > Save to Hard Drive and choose Portable Document Format (PDF). Click OK.


From here on it's crucial you do not MOVE anything on the page or the print and cut will be off.
NOTE: If you are working on Silhouette Studio on a Mac you'll need to move this file to your PC to open in Versawork. I upload to Google Drive on my Mac then download on my PC from there.
How to Open Silhouette Studio Registration Marks in VersaWorks
Launch Versaworks and go to File > Add Job to Queue. Select a Queue.

When the File is in the Queue right click it and click "Settings".

Go to the Quality tab and make sure "Generic Vinyl 1" is selected as the material. I also like to change the "Color Management" to "Sign and Display". Click Ok.


Move to the Cutting Options Tab and select "Print Only" from the Operation Mode dropdown. Click Ok.

Pull the file name into the Rip Status window to Rip it.

When the rip is done, pull the file into the Print Status window to begin printing.

While the Roland BN-20 is printing the vinyl stickers, return to Silhouette Studio.
How to Cut a Roland BN-20A Print on CAMEO 4 Pro
Now we need to add the contour cut line in Silhouette Studio to tell the CAMEO 4 Pro where to cut the vinyl stickers.
If you go to the Send tab you'll see the designs have bold red cut lines all over them. This is not what we want. We want one contour cut line around the outer edge of the vinyl sticker.

Move back to the Design Area and select all of the designs being very careful not to move any of the designs while selecting them.
Open the Offset panel from the right sidebar. Increase the Offset distance until you have one line around the outer edge of each of the images. For these Cheer Mom stickers I had to increase the offset distance to 0.150". Click Apply.

If you zoom in you'll see the red offset line.

Return to the Send panel and adjust the cutting method to "Cut Edge". Now only the contour cut line will be cut.

When the Roland BN-20A completes the printing, trim the sheet off the roll. Cut the edge as straight as you can.
Move over to your Silhouette CAMEO Pro. I would suggest you move the right roller in towards the middle.
Click the up/load arrow on the Pro's control panel and then load the vinyl into the Pro making sure the square registration mark is in the top left corner.

From Silhouette Studio click "Send". The machine will first find the registration marks and then begin cutting.

If the vinyl slips at all while finding the registration marks remove the vinyl sheet from the machine and re-load.
While the vinyl stickers are cutting on your Silhouette CAMEO 4 Pro, you can be printing and/or printing and cutting more on your Roland BN-20A.

Tag teaming the Roland BN-20A with a cutting machine like the Silhouette CAMEO Pro can speed up your production by what I would estimate to be about 1.5 times.
When the cutting is done on the Silhouette CAMEO 4, weed away the excess vinyl.

Get Silhouette School lessons delivered to your email inbox! Select Once Daily or Weekly.


.png)


No comments
Thanks for leaving a comment! We get several hundred comments a day. While we appreciate every single one of them it's nearly impossible to respond back to all of them, all the time. So... if you could help me by treating these comments like a forum where readers help readers.
In addition, don't forget to look for specific answers by using the Search Box on the blog. If you're still not having any luck, feel free to email me with your question.