You're not stuck cutting those hooks and loops Silhouette Studio adds to cuts with the Rotary (and Kraft) blades. They can be turned off.
When you use the Silhouette CAMEO 4 Rotary Blade, the software adds the extra cut lines to help the Rotary Blade turn. Unfortunately, when cut, those hooks and loops can also almost literally eat up the fabric - which has many users wanting to turn them off completely. Read on for how to turn off the rotary blade extra cut lines.
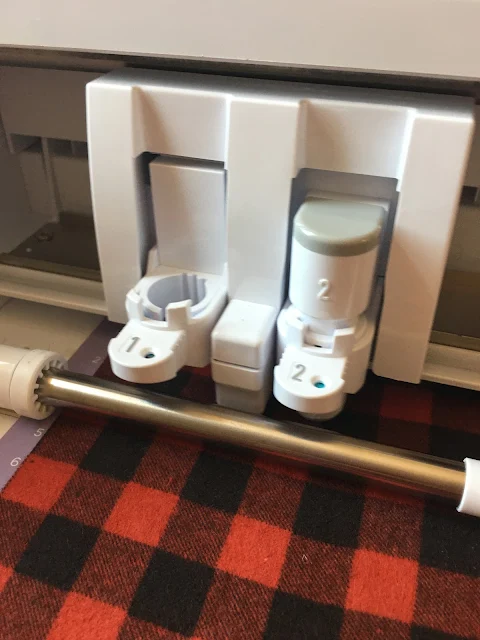
Make sure you have the Rotary Blade in the Tool 2 carriage and your Silhouette CAMEO 4 powered on and connected to your computer.
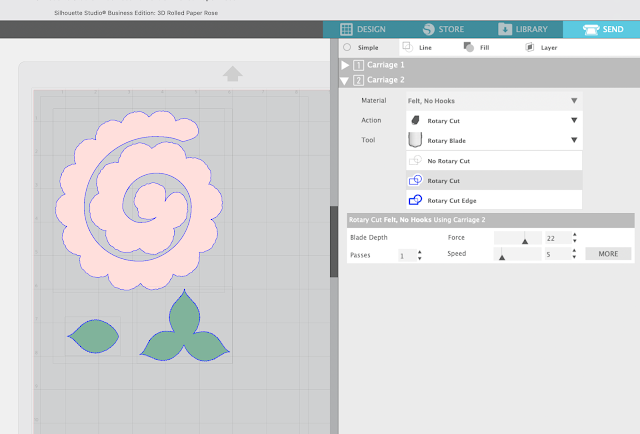
With your design in the Design area of Silhouette Studio and ready to cut, open the Send panel.
Expand the Carriage 2 settings.
If it's not already, select the design in the preview area and click "Rotary Cut." You'll notice that not only does your design have a blue cut lines, but there are also a whole bunch of other smaller, seemingly random cut lines. Those are the hooks and loops aka Smart Cuts.
To turn them off you have to create a custom material cut setting.
In this example we'll make a cut setting to cut felt without the hooks and loops.
How to Turn Off Extra Rotary Cut Lines in Silhouette Studio
From the Material List take note of the default cut settings for the material you want to cut. We are going to make a duplicate of this cut setting but without the Smart Cuts. For felt the cut settings are: force of 22, speed 5, 1 pass.
To make the duplicate material setting click "More".
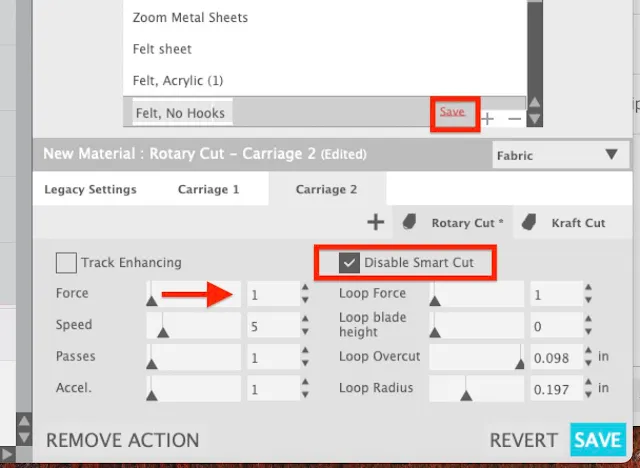
We have a few things we need to change in here so scroll down to the bottom of the listed materials and click the + to add a New Material setting.
If a Carriage 2 tab is not displayed next to Legacy and Carriage 1, click the + and select "Carriage 2"
Now adjust the settings manually based off the default settings. You'll need to increase the Force only in this example.
Check the box to Disable Smart Cut.
Finally, click "Save" to save the new material. You can click the name and type whatever you want to change the name if you'd like.
Don't worry that your design still has hooks and loops on it. Close out of the Advanced settings to return to the Send panel.
From the Material list change the material to the new material you just created.
The hooks and loops should now be removed.
You will not need to do this every time you cut felt (just each time you cut a new material where you want to turn off the Smart Cuts). The next time you cut felt, you'll be able to simply select the material you created from the Material list and no hooks and loops will be added.
Get Silhouette School lessons delivered to your email inbox! Select Once Daily or Weekly.


.png)


I tried this and all it did was create a cutting mess. I am so frustrated with this thing. I only bought it to cut felt and it hasn't done a good cut yet. With the rotary blade all my straight lines are cutting with a curve. It cuts the same image just fine in cardstock, but when switching to rotary and felt, it's a squiggly mess.
ReplyDeleteHey there! I would start with the basics here to see if you can get some good cuts: https://www.silhouetteschoolblog.com/2019/11/how-to-use-silhouette-cameo-4-rotary.html
Delete