Perhaps the single best piece of Silhouette advice is to always do a test cut, yet the Silhouette advice most likely to be ignored is performing a test cut!
Though it may seem like an unnecessary step, it's actually very important! Here's how to do it the right way so you'll save time, money, and material.
Select Silhouette Studio Cut Settings
Open Silhouette Studio and go to the Send Panel. Select a material that most closely describes that material you are test cutting. I'm test cutting Siser Easyweed Heat Transfer Vinyl so the material selection I chose was Heat Transfer, Smooth.
If you're completely unsure of where to start with cut settings, check out this blog post about how to estimate cut settings for materials not in the material list.
Load Silhouette Cutting Mat with Material
Whether you are testing on cardstock or vinyl or any other material, perform a test cut on a scrap of the exact material you will be using for your project.
Secure it anywhere on your mat - it doesn't need to be in the top left corner. Then, load the cutting mat into the machine.
Arrange Blade over Material
Use the arrow keys on the machine...
or the arrow keys in the Send panel...
... to move the carriage over the material on your cutting mat and set the test cut location.
Test Cut with Silhouette CAMEO 4
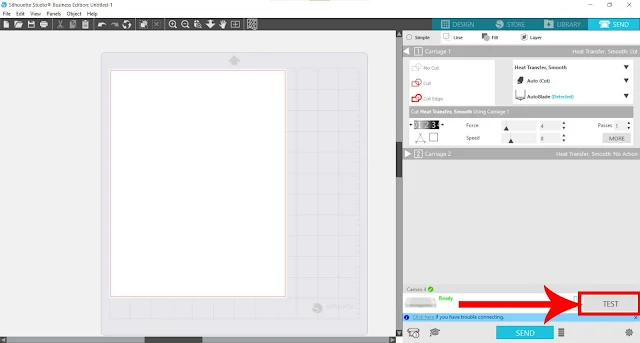
Click the Test button in Silhouette Studio.
The Silhouette CAMEO 4 will then perform a test cut using the cut settings of the material you selected. The shape of the test cut is a triangle surrounded by a square.
Check Results
When the machine is done, unload the mat and check the results.
With vinyl, either HTV or adhesive vinyl, use a weeding tool to remove just the outer square shape. You are checking to see that only the square peels off and that the triangle stays down. If the square vinyl cut comes up easily, this is considered a good cut!
If you cannot remove the vinyl square cut or it is difficult to remove, then an increase to the blade force and/or blade depth is necessary.
With vinyl, you are also checking to see that the blade did not cut through the backing of the vinyl. Remove the scrap vinyl from the mat to check that the blade did not cut all the way through. If it did, then a decrease in force and/or blade depth is necessary.
For cardstock, use your fingers or a tool to lift the test cut shapes off the mat to see if the blade cut all the way through the cardstock. If it did, then this is a good cut! If not, then an increase to the force and or blade depth is necessary.
Make Adjustments
Return the scrap material to the mat, provided there is enough room on the scrap to make another test cut, otherwise put a new scrap material piece on mat. Then, like before, arrange the cutting blade carriage over a different spot on the scrap material.
Return to the Send panel in Silhouette Studio to make adjustments to the force and/or blade depth. A good rule of thumb is to always make adjustments to the force first before making adjustments to the blade depth.
For example, if the test cut wasn't deep enough, increase the force settings but keep the blade depth the same. Then, perform another test cut (click the Test button) and check to see how that worked.
If you reach the highest force settings (33) and that is still not cutting deep enough, then increase the blade depth by 1 and decrease the force setting to 0 and then resume test cutting.
Find the Sweet Spot
Don't cut deeper than you have to. Cutting too deep will dull the blade faster and reduce the life of and/or damage your cutting mat. The ideal cut settings for any material is deep enough to achieve the desired cut without it being overkill!
Repeat these steps as necessary until you reach the desired cut settings.
Cut and Finish Your Project
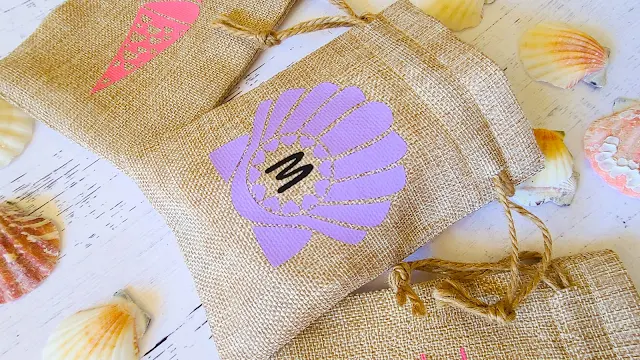
Once your test cut produces the cut you want, go back to Silhouette Studio to import your design. The beach designs and fonts for these monogrammed burlap bags comes from the June Fonts and SVG Design Bundle from So Fontsy.
Size the design appropriately for your project and load your cutting mat with an appropriately sized piece of material. If you're using HTV, don't forget to mirror the design.
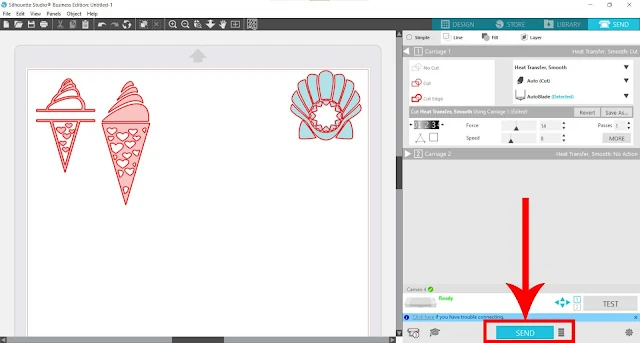
Then, in the Send panel, keep the settings exactly as they were for the perfect test cut, then just hit Send!
Even with a successful test cut on vinyl, it's still a good idea to perform a "test weed" on part of design while it's still loaded in the machine - just in case you did have to make cut setting adjustments and cut again.
Then, assemble your project - like pressing these cut and weeded HTV monograms onto burlap bags. The Cricut Mini Easy Press is perfect for small HTV projects like these.
Press using medium heat for about 10-15 seconds with medium pressure. Then, remove the HTV carrier sheet.
You'll find that test cutting gets faster as you become more experienced with your Silhouette and specific materials. You can also save custom material cut settings to use in the future!
Find the SVGs and fonts used in these adorable monogrammed bags in So Fontsy's June Fonts and SVG Design Bundle.
Get Silhouette School lessons delivered to your email inbox! Select Once Daily or Weekly.


.png)


What I find practical (not only at testing) is to cut on the lower side of the ma, so I can "test" the cut easier and send it back to a repeated cut-on the upper side it would still be under the machine and hard to reach without releasing the mat.
ReplyDelete