Sublimation is great for colorful designs that would otherwise require a lot of cutting and layering - but it's not great on cotton or darks.
There are a few work-arounds to sublimate on cotton - my favorite being using white glitter heat transfer vinyl! This Silhouette tutorial will take you from start to finish so you can get a vibrant and sparkly sublimation design on any fabric in just a few steps.
Before we start let's talk about the best glitter HTV to use for sublimation! One of the benefits of sublimation is there no hand - in other words you can't 'feel' sublimation once it's on the substrate. But if you sublimation on glitter HTV you will feel the glitter heat transfer vinyl on the surface - for this reason I like to use the absolute thinnest glitter HTV to avoid a rigid design. I have found Glitter Flex from Speciality Materials (the same manufacture of Thermoflex) is perfect for this!!
Oka now that you know what material you're going to use..let's walk through how to sublimation on white glitter HTV.
How to Set Up a Design in Silhouette Studio to Sublimation on HTV
I'm using this adorable Tropical Toucan design from So Fontsy's April SVG & Font Bundle.
The adorable design includes the assembled and disassembled SVG along with PNG and several other file formats. Because are not cutting individual pieces here, it's really helpful for us to use the fully assembled design.
Import the design into Silhouette Studio. Size the design.
Once you have it sized for your surface, make a second copy (right click > Duplicate). One copy will be for the sublimation print and the other we'll use to "Cut Edge" on white glitter HTV. It's really important not to change the size of your design now unless you scale both at the same time. Both copies need to be the exact same size.
Move one copy to the side - we'll work with that one in a minute.
How to Cut Glitter HTV for Sublimation Prints
Select the design that remains on your virtual cutting mat and fill it with white - change the line color to black or another high contrast color so you can easily see the design in Studio. You can fill with white using the color selecting on the far left of the Quick Access Toolbar.
Both sublimation and HTV designs need to be cut in reverse, so mirror both copies of the design. Do this by selecting both > right click > Flip Horizontally.
With the white copy on the virtual cutting mat, move to the Send panel and with the white copy selected, change from Cut to Cut Edge.
The design should now ONLY have cut lines around the every outer edge. Make sure Heat Transfer, Glitter is selected as the material. Click Send (and if the prompt pops up click Send As Is).
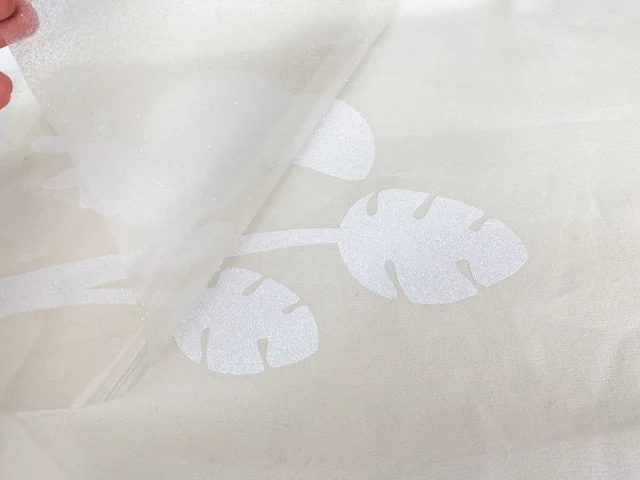
Now you're ready to cut the glitter piece with the Silhouette CAMEO. I am using Speciality Material's White Glitter Flex. Like I said, I love this glitter htv line because it's thin and easy to cut and weed. This HTV has polyester glitter in it which allows it to be used for sublimation.
After the glitter is cut, weed it, and press it on the surface at 330 degrees for just three seconds.
I am applying to a cotton tote bag. Without this white glitter HTV layer I would not be able to sublimate on this bag because polyester is required for sublimation. The Speciality Materials glitter HTV has polyester in it making it able to be sublimated on.
Set your bag or shirt aside for a few minutes while you prepare the sublimation print. Increase the temperature of your heat press to 400 and set the timer to 60 seconds.
Sublimating on Glitter HTV
Return to Silhouette Studio and print out the sublimation design by sending to your sublimation printer.
If you are on a MAC, I recommend you export the design first, then open and print through Sawgrass Print Manager.
Once you have the sublimation print out, you need to flip it over - printed side down - and place it exactly over the glitter layer.
The great thing about sublimation is you don't need to cut it - since only the areas with ink will transfer. BUT when applying to glitter HTV like we are here, I would suggest you trim close to the design in a few areas so you can make sure the print lines up with the glitter htv design.
Use a few pieces of high temperature tape to keep the print in place while you press.
Use your heat press to press the design for 60 seconds at 400 degrees.
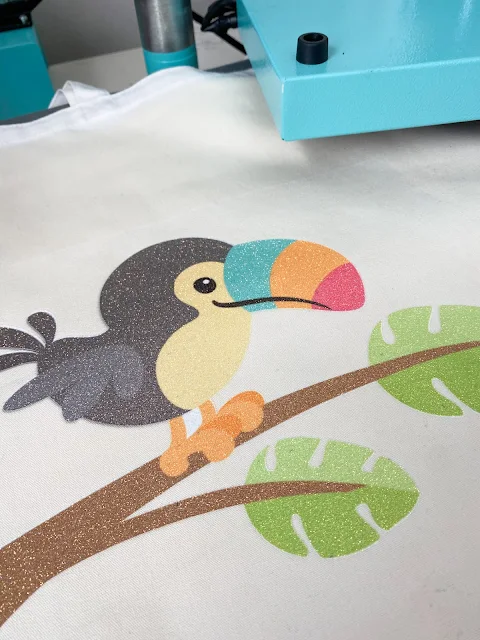
Carefully remove the tape and you'll see the beautiful, vibrant colors have been transferred to the Glitter Flex HTV.
Isn't this just adorable!! I would have needed at least 11 different color HTV sheets if I had cut this all on HTV. But using sublimation on the Glitter Flex White really saved me a lot of time AND materials!
Get Silhouette School lessons delivered to your email inbox! Select Once Daily or Weekly.


.png)


It is adorable indeed and very interesting to know, thank you!
ReplyDeleteWhen exporting the design (from a Mac)and printing in Sawgrass, the design does not transfer at the exact same size. This has been an on going issue with Sawgrass software unless remedied very recently.
ReplyDeleteI use the Draw a Box tool and create a box that's the exact same size as the page size. Then I select the box and the design and go to File > Save selection. This way it exports at the exact size.
DeleteDo you have to use glitter white? Can you use plain white vinyl and get the same effect?
ReplyDeleteThe porosity of the glitter is what you need. So unfortunately, you would not be able to do smooth white vinyl.
DeleteHow long and what temperature do I use?
ReplyDeleteHi there! There are a few different steps where you apply heat with different temps. After the glitter is cut, weed it, and press it on the surface at 330 degrees for just three seconds. > Set your bag or shirt aside for a few minutes while you prepare the sublimation print. Increase the temperature of your heat press to 400 and set the timer to 60 seconds.
DeleteI tried this on a white cotton shirt. The sublimation turned out great, but the cotton around the image, slightly scorched. It had a yellowish tint. Is there a way to prevent this? Is there a way to correct the issue? It's a wonderful process, but I don't want my name attached to something that has something that looks like a stain. LOL. I appreciate your input. Your posts have been a phenomenal tool for me!
ReplyDeleteHi there! It sounds like your temperature was too high. I have heard of taking a white cloth and wetting it with hydrogen peroxide and lightly ironing the scorched parts. However you'd want to be very careful with the design. It may be easier to redo unfortunately.
DeleteI bought the Glitter Flex 11, but I'm having a heck of a time cutting it. After a couple of tries, I see there is a carrier that you're supposed to remove. I did that, and put the glitter side face down on my cutting mat. The back side is super shiny and slippy and it got all balled up. I put it on a brand new sticky mat. So I'm wondering exactly how I should cut this material? Thanks for any help :)
ReplyDeleteExcellent tutorial for using white glitter HTV to sublimate cotton! To create colorful and sparkling designs on any cloth, step-by-step directions and product suggestions are useful. For a thin, simple-to-cut glitter HTV, using Glitter Flex from Speciality Materials sounds like a wonderful option. Comparing the method demonstrated here to cutting many HTV sheets can save you time and materials. Impressive outcomes
ReplyDelete