While there is no magic button in the Silhouette software to do this, it is pretty easy to do and you can do it in the free version of the software. This step by step Silhouette tutorial will explain exactly how to remove a photo background.
Whether you are using Silhouette Studio as a photo editor, want to turn part of a picture into a cut file or need to remove a photo background for some other reason like creating mockups - the process is the same. If you have an iPhone you can also remove the background of the photo there before bringing it into Studio.
The trick is to drop edit points around the area of the image you want to keep then crop out everything else.
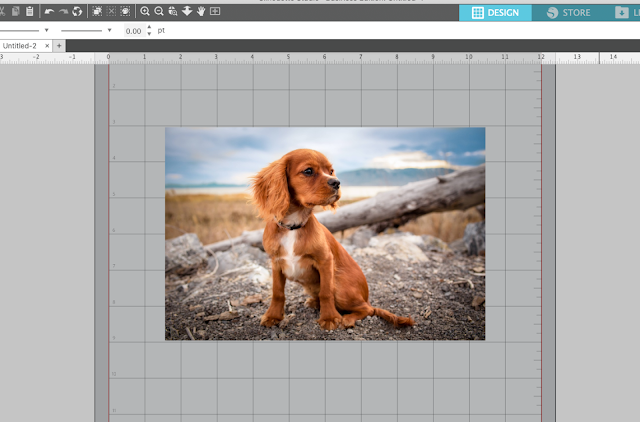
To start, open the image in Silhouette Studio.
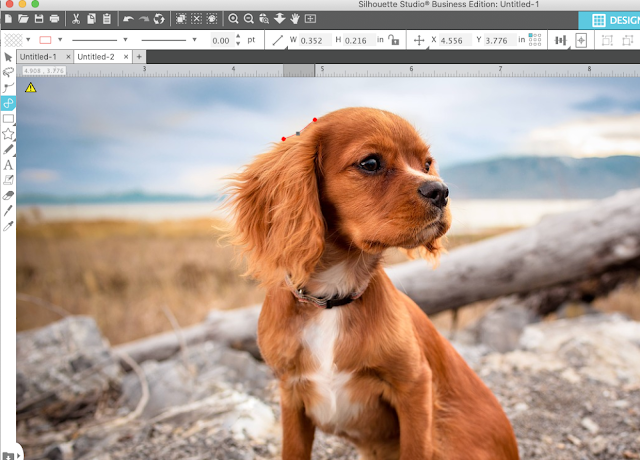
From the left toolbar select the Draw a Curve Shape tool. This will allow you to create edit points wherever you want.
Start by dropping one point around the area of the image you want to keep - in this case we are going to keep the dog.
Now slowly move around the area dropping edit points directly on the edge. Once you get all the way around the two red end points will snap together. You have basically created a cut line that we are going to use to crop out the background.
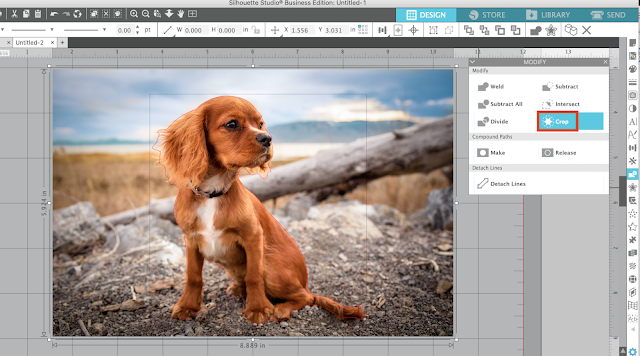
Open the Modify panel from the right sidebar.
Select both the image and the cut line you created then click Crop.
The background is removed.
If you need to adjust any areas to remove more background or reveal more of the image you have left you can click the edge and pull in or out.
Note: This post may contain affiliate links. By clicking on them and purchasing products through my links, I receive a small commission. That's what helps fund Silhouette School so I can keep buying new Silhouette-related products to show you how to get the most out of your machine!
Get Silhouette School lessons delivered to your email inbox! Select Once Daily or Weekly.


.png)


Melissa, You are straight up awesome! Every tip you share is like a little piece of gold in my day. Thanks for what you do!
ReplyDeleteThank you so much!! Your directions were so clear and easy to follow! This was a lot of fun. I always learn so much from you!
ReplyDeleteThis comment has been removed by the author.
ReplyDeleteFantastic photography, and I enjoy reading your blog. I appreciate you sharing your photography-related experiences.
ReplyDeleteChristmas Photography