 |
| This is a sponsored post but all opinions are my own. |
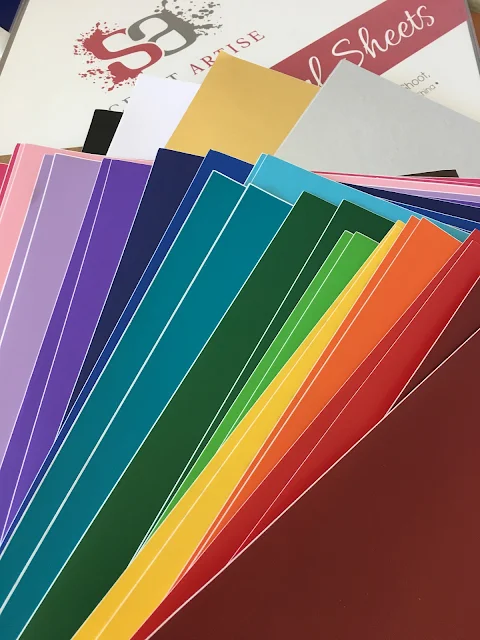
You guys know I love the Scraft Artise Permanent Matte Vinyl because unlike traditional permanent vinyl it does not have that glossy finish - it's matte and it comes in lots of fun colors. You can get a multi color pack of the matte vinyl sheets or packs of single colors like all matte blue vinyl or all matte black vinyl.
The thing is because it's a specialty vinyl, it's slightly more expensive per sheet and it only comes in 12x12 sheets. (I did a review of the Scraft Artiste Permanent Matte Vinyl here if you're interested in seeing how it cut, applies, and holds up.) That's really what got me thinking about ways I could use every little piece of it when cutting with my Silhouette CAMEO. And that's when it hit me!
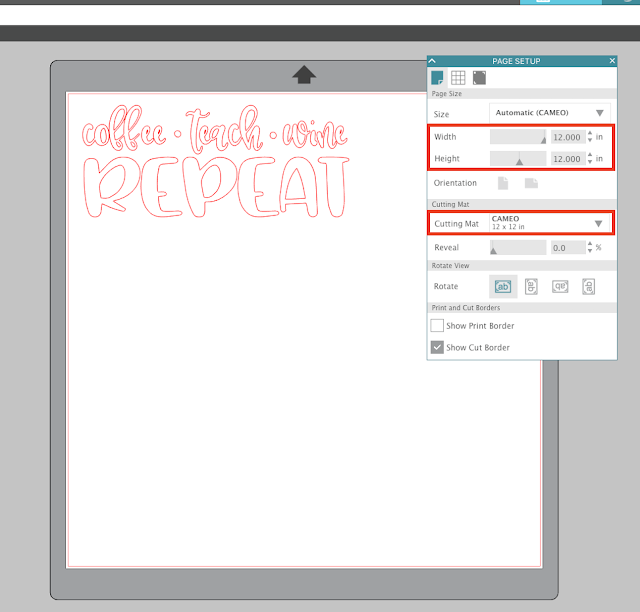
I started by adding my design to the Silhouette Studio work space and then setting up my page size so it's the same size as my piece of vinyl. In this case I have 12x12 sheet of Scraft Artise vinyl. I'm using a piece of the navy matte permanent vinyl to cut a decal for a teacher clipboard.
After the design was sized, I used the Draw a Rectangle tool to create a weeding box around the design. Don't draw the weeding box too tight to your design or you won't have room to lay down the transfer tape. Give yourself a half inch or so on all sides of the design.
The weeding boxes are important because they do two things: 1) they make weeding easier and 2) they cut the vinyl down, but only right around your design allowing you to keep the full vinyl sheet in tact rather than cutting off a corner to weed around your design.
Place a sheet of the Scraft Artise permanent matte vinyl on the Silhouette cutting mat so the top left corner is in the top left corner of the mat. Did I mention this stuff is really easy to get to stick to the mat - thanks to the paper backing and the fact that it's always shipped flat (aka no curling).
The recommended Silhouette CAMEO/Portrait Cut Settings for Matte Vinyl are Blade 1, Speed 5, Force/Thickness 10. However, as I explained when I first introduced you to the Scraft Artise permanent matte vinyl, it's a little thicker which means I would recommend cutting this vinyl on the settings: Blade Depth 2, Speed 5, Thickness/Force: 13.
Once the vinyl is finished cutting, weed out the weeding boxes leaving the vinyl decal designs behind. At this point you should still have a full 12x12 sheet of vinyl.
A piece of clear transfer tape - high tack is recommended to help pick up permanent matte vinyl - can be used to pick up the permanent matte vinyl and apply the designs to the clear clipboard This is my preferred high tack tape clear transfer tape.
Now you can see that what I have left is my full 12x12 sheet - the backing remains intact - with just the area of vinyl gone where my first vinyl decal was created.
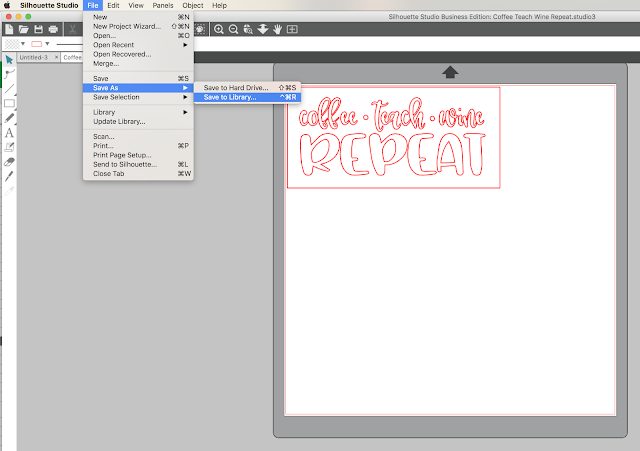
For example name the file "Navy Permanent Matte Vinyl" instead of "Teach Repeat."
A month from now when you want to cut another design on this same piece of Scraft Artise permanent matte vinyl, grab the full sheet and place it on your mat...with that same top left corner on the top left of the mat.
From your Silhouette Studio library, open up the file called "Navy Permanent Matte Vinyl" and add your new design in a place where it efficiently utilizes the open space on your vinyl sheet. Add another weeding box around your new design.
It's very important that from the Send panel you turn OFF the cut lines for the original designs so you only cut the new design.
Go ahead and cut the new design.
When it's done cutting, weed away the weeding box and use high tack transfer tape to move the matte permanent vinyl decal.
Your piece of matte vinyl will now look something like this...
Two vinyl decals cut, but with minimum waste and still a full 12x12 backing sheet! I love that I can efficiently cut this permanent matte vinyl with limited waste which means I can get more vinyl decals out of each sheet of Scraft Artise.
Don't forget to go back into Silhouette Studio and save the changes to the file so the file updates with the new design you just cut.
This time you want to click the "Save" icon along the top tool bar to update the existing file or go to File > Save (not Save As). The saved design has been update so the next time you want to cut on the navy matte vinyl you can open up the file again and add yet another design.
Note: This post may contain affiliate links. By clicking on them and purchasing products through my links, I receive a small commission. That's what helps fund Silhouette School so I can keep buying new Silhouette-related products to show you how to get the most out of your machine!
Get Silhouette School lessons delivered to your email inbox! Select Once Daily or Weekly.


.png)


Thanks, great tip
ReplyDeleteGENIUS!!
ReplyDeleteThanks
Great idea. But way too organized for me. I would loose the file or the vinyl and just grab another sheet. I like it though.
ReplyDeleteKnowing my luck I would end up laying my transfer tape on part of my vinyl that I am trying to save! THANK YOU! for thhis great idea and I am going to try it for sure!!!!
ReplyDeleteDo you have trouble with the remaining vinyl "wrinkling" when you pull it off the mat after you finish your cut?
ReplyDeleteBrilliant!! Thanks for sharing this wonderful tip!!
ReplyDeleteGenius! Thank you!
ReplyDeleteI’m ever so great full for all your tips and tricks!
ReplyDeleteCan you please address how you were able to get the design all the way up in the corner to begin with? That's where my waste currently comes from!
ReplyDeleteIf you look, there's still a verrry small remnant at the top. Turn on cut border in your media panel and align the box to the red line.
Deletedo you hold down shift key when making boxes(rectangle) weed boxes?
ReplyDeleteHey there, I don't, no.
Delete