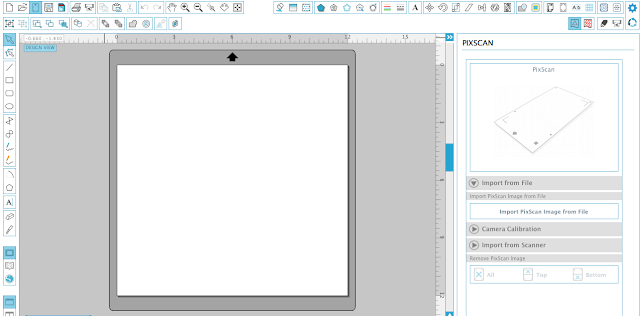
Calibrating your camera for Silhouette Pixscan is a multi step process.
Do I need to Calibrate my Camera for Silhouette Pixscan?
You should first know that you may not even need to do calibrate your phone. With my original iPhone 5 I did not need to calibrate. I simply opened Silhouette Studio clicked "Import Pixscan Image from File" found my file and la-te-da everything worked as it should....
But then I got an iPhone 6 Plus (big girl status) and when I went to import the image of my Pixscan mat into Silhouette Studio I got the dreaded calibration error. This is when you know you need to calibrate.
Using the Silhouette Pixscan Camera Calibration Test Card
In order to calibrate your camera you need to print out the calibration test card. To find the calibration test card, click the down arrow next to "Camera Calibration" in the Pixscan window.
You'll notice your phone is not listed there.
Click "Show Calibration Test Card."
This will bring up a white rectangle in the work area with black dots all over it.
Click the "Print" icon along the top tool bar and print out the sheet on your printer.
Once it's printed, use your phone to take a picture of the test card. You want dots going all the way to the edge of the image you take. Do not get any background or even the edge of the sheet. This is the exact picture I took of my sheet.
Email the image to yourself and download it onto your computer.
Go back into Silhouette Studio. From the Pixscan window click the + sign under the Camera Calibration pane. This will bring up a pop up window where you can navigate to the image of your dotted test card.
Click 'Open'.
That's all there is to fixing the Silhouette Pixscan registration error and calibrating the camera or phone.
Note: This post may contain affiliate links. By clicking on them and purchasing products through my links, I receive a small commission. That's what helps fund Silhouette School so I can keep buying new Silhouette-related products to show you how to get the most out of your machine!
Get Silhouette School lessons delivered to your email inbox! Select Once Daily or Weekly.


.png)


Thanks so much for this!! I just tried using my Pix Scan for the first time after I got it a year ago with my Cameo and couldn't figure out why the calibration kept failing. I was taking a picture of the calibration sheet ON the Pix Scan mat. *shrug* Made sense at the time. LOL
ReplyDeleteThank you! I got the PixScan mat but it came with very few instructions, and I wasn't sure how to get it calibrated. I'm glad to have it all set up!
ReplyDeleteI found using the camera flash was super helpful in dealing with shadows!
ReplyDeleteThis was very helpful. I had to be sure not to cover any markings on the mat and not edit the image. After that the most time consuming part was matching cut lines for exiting images (trace).
ReplyDelete