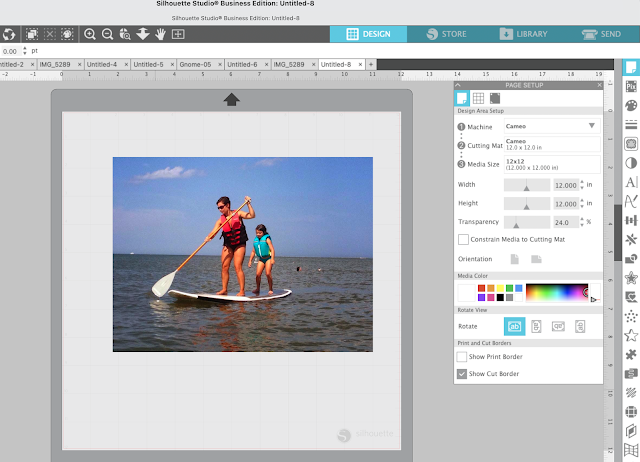
The first thing you want to do is find a photo. It's best to pick a photo that doesn't have a ton of background. I went with this picture of me and my daughter paddle boarding. It's obviously a color photo and while you can trace a color photo I find it easier to trace a black and white image since the trace feature works on finding contrast. Never did I think I'd share a picture of me in a bathing suit on this blog....but...
Open the photo in Silhouette Studio by going to File > Open or dragging and dropping the photo.
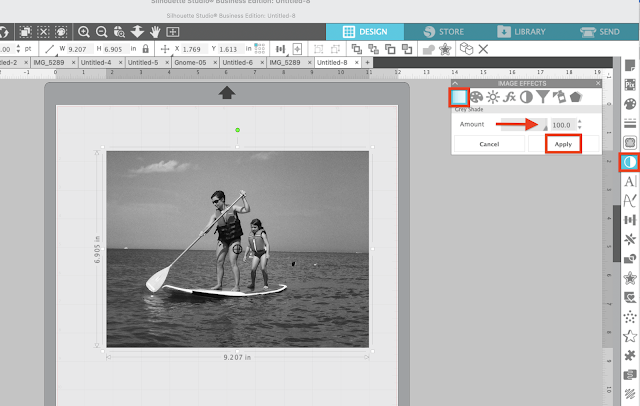
Open the Image Effects tool on the right sidebar. With the image selected, from the Gray Shade tab slide the bar toward 100 until you photo changes to black and white.
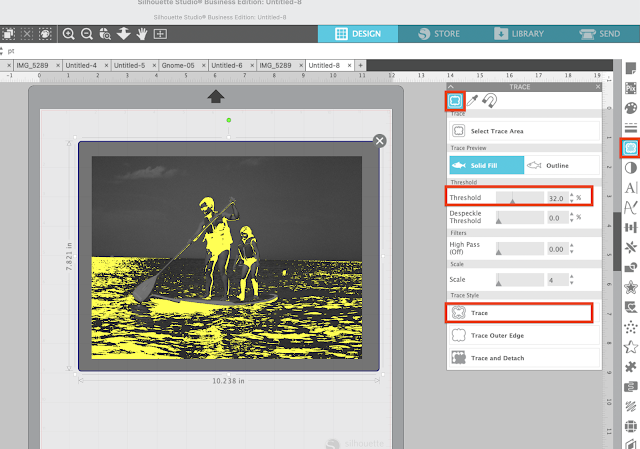
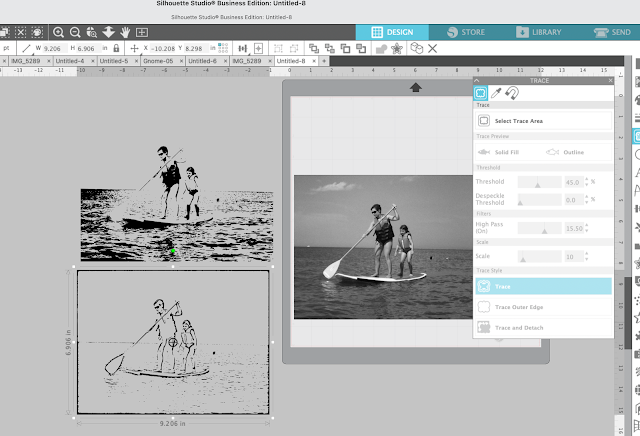
Click the Trace tool on the right sidebar. Move the threshold bar until you get some yellow shading, but not too much. Click "Trace."
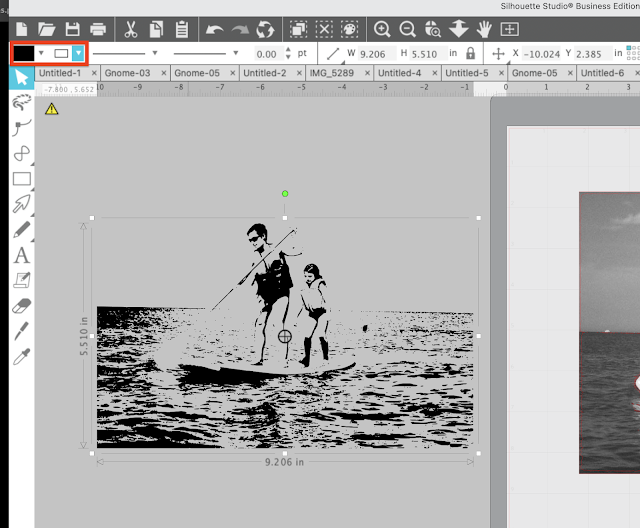
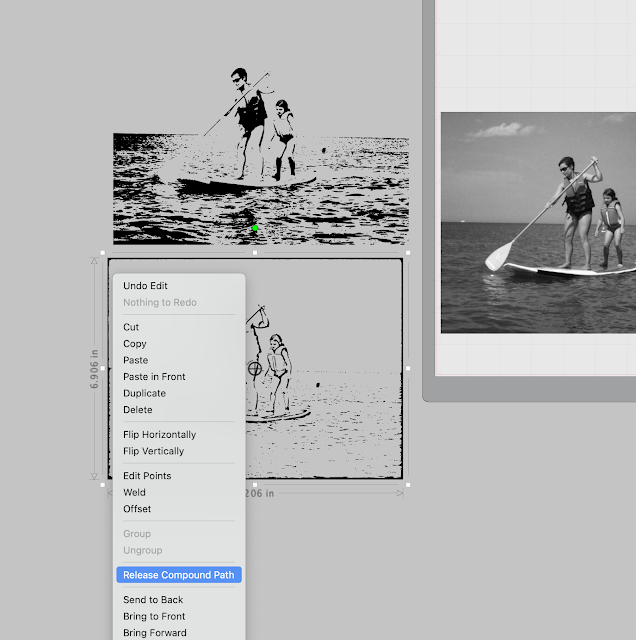
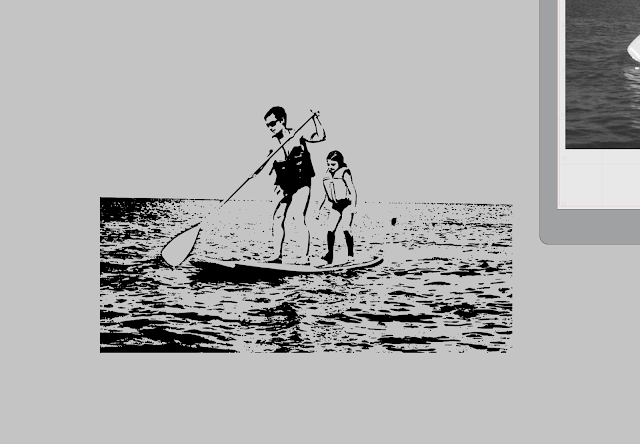
Finish your trace by clicking 'TRACE' and again fill in the red cut lines with black fill and black lines. These are what your two traces look like.
Now you can print, print and cut, cut on vinyl, black cardstock, sketch...there are so many options. I decided to print mine on printable Silhouette cotton canvas (because can you honestly imagine me trying to weed that water?!) and it turned out beautifully!
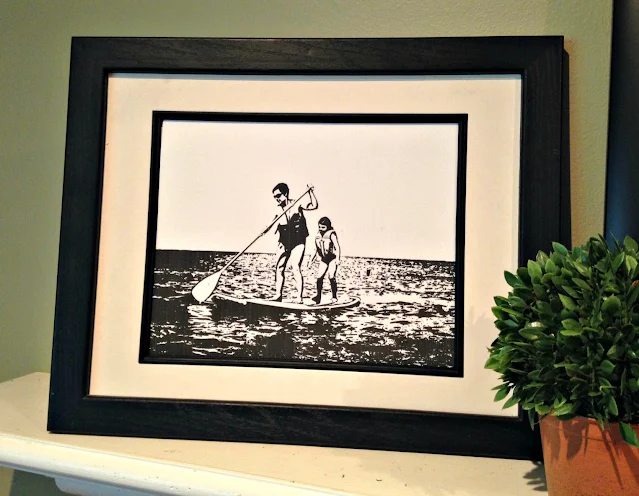
Here's a close up so you can see the texture of the canvas sheets material.
 Looking for more ideas for this << printable canvas sheet? Check this out.
Note: This post may contain affiliate links. By clicking on them and purchasing products through my links, I received a small commission. That's what helps fund Silhouette School so I can keep buying new Silhouette-related products to show you how to get the most out of your machine!
Thanks for coming to class today at Silhouette School. If you like what you see, I'd love for you to pin it!







.png)


This is the best tracing tutorial, I've seen. I struggled with other ones, but I was able to actually do this. I'm still working with the threshold and what it does and what's a good number (though, I'm sure it's picture dependent), but even with that, the tracing's came out well.
ReplyDeleteWhat is the process if you do not have PicMonkey?
ReplyDeleteI know this was asked nearly two years ago but... You can go to objects->effects in the old version or panels->image effects and change the grey shade or scale. You can also adjust the contrast in the effects/image effects area as well.
Deleteugh.... where are the "fill and line tools"????
ReplyDeleteLooking forward to next weeks add-on!
ReplyDeleteI finally decided to try tracing a picture. Of course, I came here first to figure out how to do it. You made it so easy. Thank You!!!
ReplyDeleteWhat do you adjust to the Threshold to?
ReplyDeleteCan you make a video?? I'm more of a visual learner.
ReplyDeleteJust a perfect tutorial, I've been working with Silhouette tracing tool for decades and have never had the idea to turn the white pictures into black to make easier the tracing effect. Just loved it, thank you!
ReplyDelete