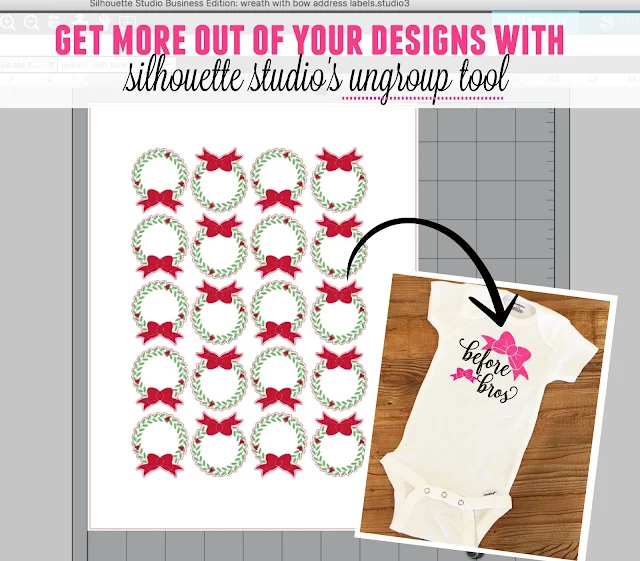
The ungroup and release compound path tools are two that will let you get more out of your designs!
When you're shopping for designs...or when you're just looking in your library for a design - look at designs that include multiple elements because you can very likely ungroup or release the compound path and use elements separately! This gives you more bang for your buck.
I originally created this wreath with bow design as a Freebie Friday and used it to return address labels for Christmas. Later I needed a bow for a little onesie I was making for my new niece. I searched my library and didn't have any single bows...but I did have this design that included a bow which I could easily use and adapt.
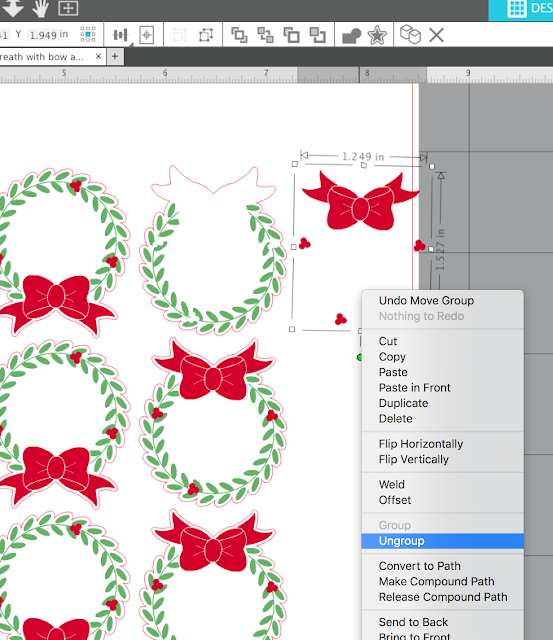
Select the design. Always start by trying to ungroup which can be done by right clicking or using the Ungroup tool on the Quick Access Tool Bar up top.
Now you can select the element that you want - in this case the bow - and copy it to your clipboard > right click > Copy.
Open a new work area in Silhouette Studio and then paste the design: Right click > Paste.
And then you can use that design as part of a new design!
Note: This post may contain affiliate links. By clicking on them and purchasing products through my links, I received a small commission. That's what helps fund Silhouette School so I can keep buying new Silhouette-related products to show you how to get the most out of your machine!
Get Silhouette School lessons delivered to your email inbox! Select Once Daily or Weekly.


.png)


No comments
Thanks for leaving a comment! We get several hundred comments a day. While we appreciate every single one of them it's nearly impossible to respond back to all of them, all the time. So... if you could help me by treating these comments like a forum where readers help readers.
In addition, don't forget to look for specific answers by using the Search Box on the blog. If you're still not having any luck, feel free to email me with your question.