 DXF files open in standard Silhouette Studio with cut lines, which means they don't need to be traced - like JPEG and PNG files. Silhouette School contributor Kati from Houseful of Handmade is here today to share the details!
Before I upgraded my Silhouette Design Studio to the Designer Edition, I used DXF files all the time to convert my Illustrator designs to Silhouette cuttable designs. But everyone is talking about SVG files for the Silhouette and there is very little information about how to use DXF files so I am here to hopefully answer all your questions!
What is a DXF File?
A DXF file is a Drawing Exchange Format file developed as a universal file format for CAD models. Yes, your Silhouette Design Studio is a type of CAD program. It reads those 2D drawings and translates them for the Silhouette to be able to cut, sketch, score and more.The DXF file is great for Silhouette Studio because you can open it in the basic free version of the software. SVG files can only be opened in Designer Edition and up. However there are some limitations to the DXF format which are mostly apparent in print & cut designs.
How to Open a DXF File in Silhouette Studio
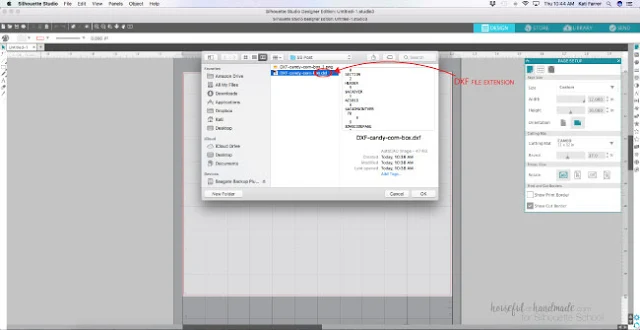
Open Silhouette Studio and then select File > Open. Find your DXF file on your computer and click "OK". You will see that it is an accepted format and is clickable. Non-accepted formats are grayed out and you cannot click on them.You will see that when you open the file you only have lines. They are all ungrouped and any Compound Paths have been released. You can group them back together and make any Compound Paths you need (for more information on Compound Paths read this post).
Then you are ready to use your DXF file as normal. It's that easy!
How to use Print & Cut DXF Files
Because DXF files only read the lines (aka, vectors) of a design, you will loose all the colors, patterns and printable parts of the design. However, you can still use the Print & Cut feature with a DXF file, it just takes a little know-how.To share a little about Print & Cut DXF files we are going to look at this candy corn treat box. I designed this in Illustrator and it has a fun Ikat pattern to it. The pattern is just a design and not made for Print & Cut. Before saving, I rasterized the design part so it would not get in the way of the lines.
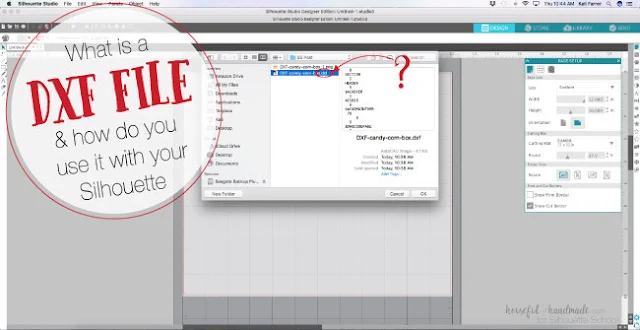
After exporting the design as a DXF, I opened it in Silhouette Design Studio (for more information on saving Illustrator designs for use with the Silhouette read this post). You can see there are actually 2 files with the same name. One is a DXF file and one is PNG file. The non-vector design was saved as a PNG when I exported it.
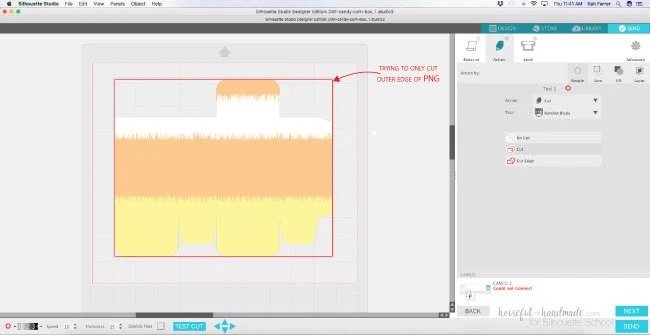
When you open the PNG file you see the printable design. But if you try to cut it out, you will see just the outline of the PNG is cuttable, not the actual design of the box. That is because PNG files are just picture files (like a JPEG) but with a transparent background so you don't see anything behind it. But this is not a vector that your Silhouette can cut.
To make the design cuttable, we need to combine both the PNG and DXF files together. Copy and paste the PNG behind the lines in the DXF file and resize to the same size if needed (I found the PNG opened slightly smaller than the DXF file).
Once they are lined up, you need to make sure that you only have the cut lines selected and change those to Cut in the Send screen.
Add your Registration Marks and now you can complete your Print & Cut design as normal (for more Print & Cut tips read this post).
Where to Find DXF Files?
One of the reasons I wanted to talk about DXF files is because the new So Fontsy design marketplace has DXF files. Most designs sold there include an SVG, DXF and PNG of the design. This is great because you can use these purchased designs even if you do not upgrade to Silhouette Studio Designer edition.Now that you are armed with all the information about DXF files, when you see your favorite blogger or designer sharing a cuttable file in this format you can jump on that! And don't forget I love sharing lots of Silhouette freebies for the home on my blog Houseful of Handmade.
Note: This post may contain affiliate links. By clicking on them and purchasing products through my links, I receive a small commission. That's what helps fund Silhouette School so I can keep buying new Silhouette-related products to show you how to get the most out of your machine!
Get Silhouette School lessons delivered to your email inbox! Select Once Daily or Weekly.


.png)


I made new lettering out of 3M outdoor grade vinyl for a railroad caboose I was restoring about 9 years ago. It has been in the weather and full sun and is holding up perfectly. I drew the lettering from photos and measurements of the original in Autocad and saved them in DXF format which went over to the Silhouette easily. The only slight problem I had was getting the size of the characters accurate. I had to manually scale it up and down. Is there a way to get the DXF artwork to come in at the right size automatically?
ReplyDelete