Engraving tumblers with the XTool M1 Craft Laser Engraver is NOT a good first laser project.
However, once you get comfortable using the XTool M1 laser, making your first engraved tumbler is not something to avoid. In this tutorial I'll take you step by step on how to engrave a stainless steel tumbler with a laser engraver.
What Is Needed to Engrave Tumblers with XTool M1 Laser Engraver?
In order to engrave tumblers with the XTool M1 Laser Engraver you'll need the 4-in-1 rotary attachment and I would suggest the riser base - however the riser is not absolutely necessary if you decide to skip it. The Rotary attachment for tumblers for the M1 includes four wooden blocks that can also be used to lift up the craft laser engraver. Keep in mind though, there's no shield for the laser using this method.
Unboxing the Rotary attachment can honestly be overwhelming. There are what feels like 100 parts and few clear instructions...but I got you!!
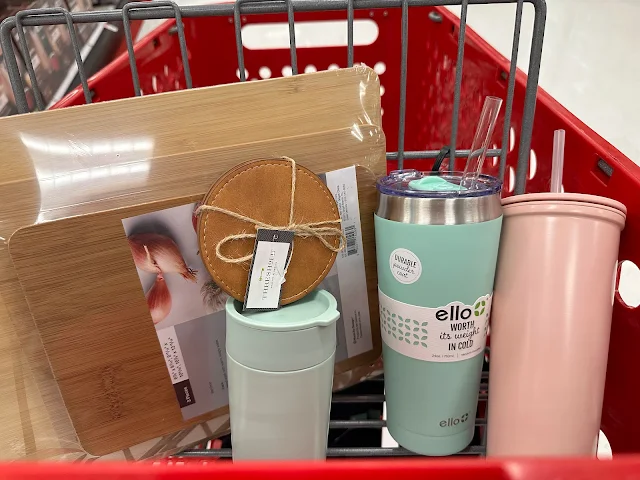
My best piece of advice is to get a few practice tumblers and be ok with sacrificing one or two as you learn the process. (HINT: Tumblers without any branding or logos on them will make your life a lot easier!)
My second best piece of advice is - of ALL those pieces and parts that are included with the XTool 4-in-1 rotary attachment, you want to focus on these six for engraving tumblers.
All of the others are parts are literally for other options or methods of engraving and are not needed for your first tumblers project so you can set them aside.
Start by using the tumbler measuring tape to measure around your tumbler.
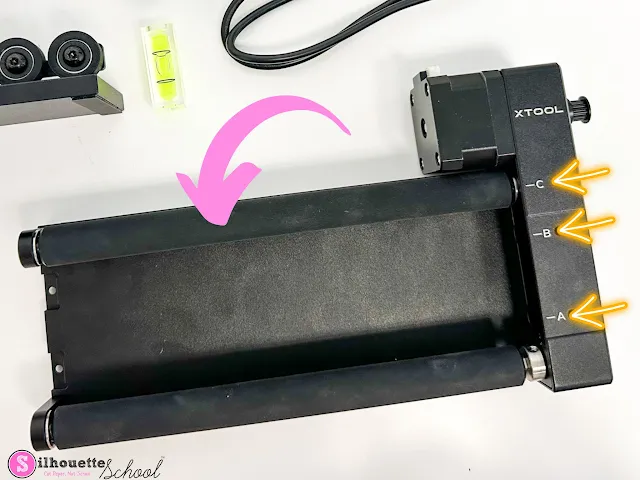
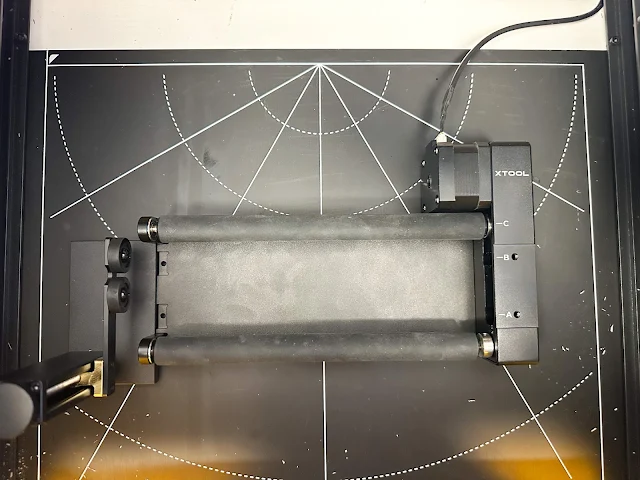
The tape will give you a number read out but also a letter. The letter correlates to the position of this moveable roller.
If you need to move the roller bar to a different position (B or C), use the hex tool to unscrew the screw holding it in place on the bottom of the rotary base.
Setting Up the XTool M1 Rotary with Risers and Leveling Extension
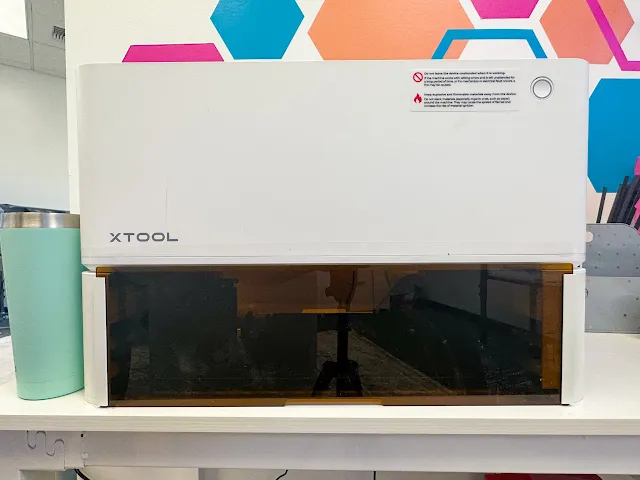
The XTool M1 will need to be raised up to accommodate the rotary tool. You can use the four wooden legs that came with the rotary attachment and position them each under one corner of the laser. My recommendation, however, if you're going to be using the rotary regularly, is to get the more permanent and stable XTool M1 riser base.
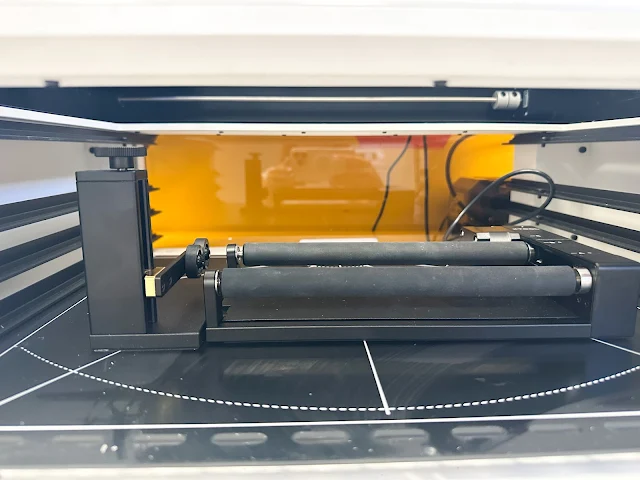
Plug the power supply into the rotary attachment and place in the XTool M1.
Fish the power cord from the rotary out the back of the XTool M1 and plug the other end into the input on the back of the laser engraver.
The rotary should be placed at desktop level - ideally with the XTool tray under it. Position the rotary in the middle and towards the back (closest to the frame-mounted stationary camera) if possible. This will give you the most accurate camera view (which can get skewed the closer to the front of the M1 you go).
How to Level a Tapered Tumblers for Engraving
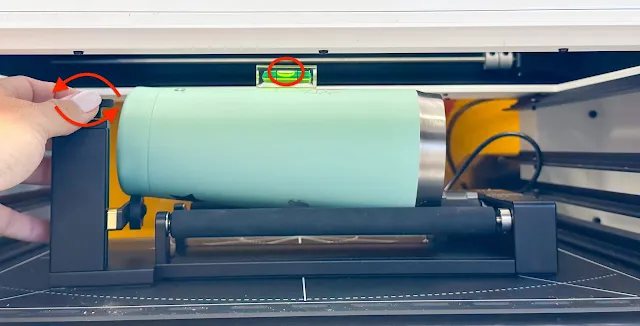
If your tumbler is not straight and has any type of taper to it you will need to use the leveling extension. Place the leveling extension on the left side of the rotary with the roller wheels centered on the rotary rollers.
Place your tumbler on top so that the top of the tumbler is on the rollers and the bottom is seated on the leveling extension.
Place the level on your tumbler.
Turn the knob on the leveling extension so it adjusts the height of the bottom of your tumbler until the level shows the tumbler is level. This will help avoid your engraving from being distorted.
XTool M1 Laser Engraving Settings for Stainless Steel Tumblers
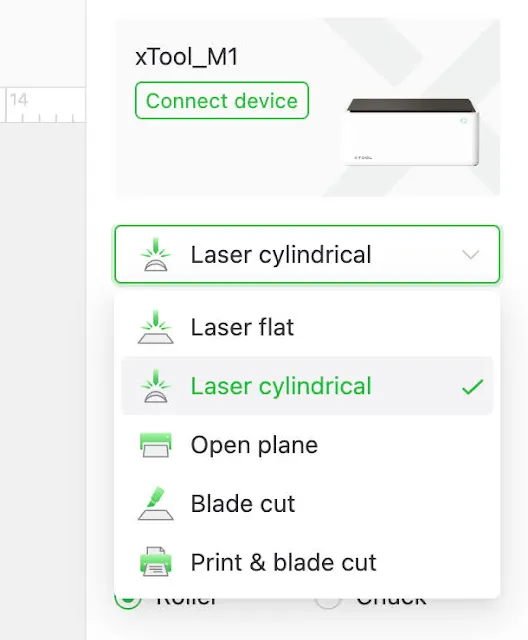
With the XTool M1 connected to your computer either by USB or Wifi refresh the camera view so you can see your tumbler.
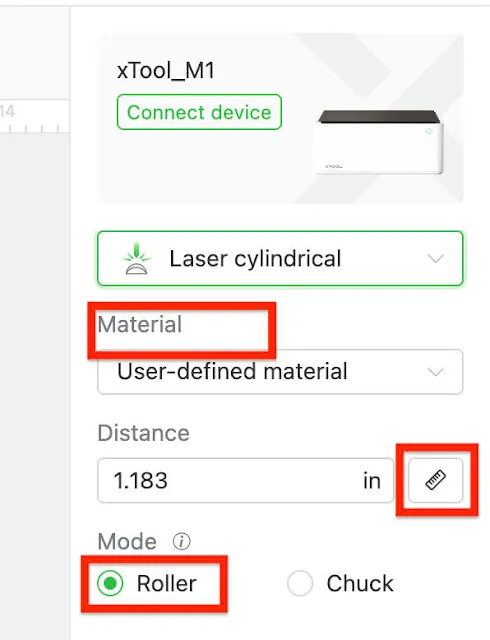
From the dropdown, change the set up type to "Laser Cylindrical".
Change the Material to User Defined and be sure "Roller" is selected as the type of rotary.
Make sure the highest part of your tumbler is under the red light (reposition it and then "refresh" if you need to) and then click the ruler button in the software to auto measure.
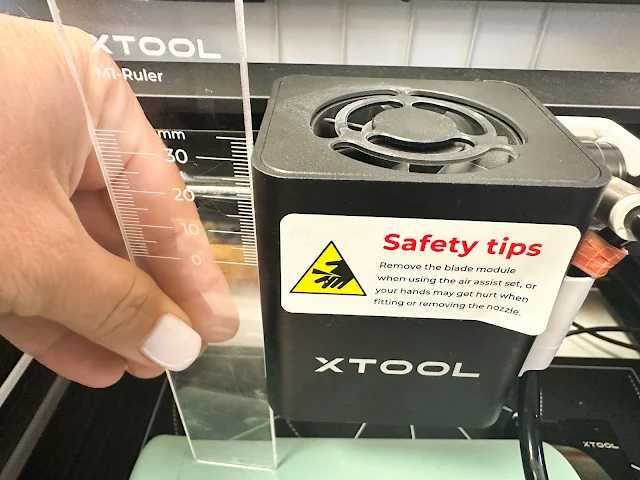
If the Auto Measuring fails, use the ruler that was included with your XTool M1. Place the bottom of the ruler on your tumbler and note the distance to the top of the laser module. Enter that number in manually in mm (you can change from inches to mm by clicking the Settings button at the top left).
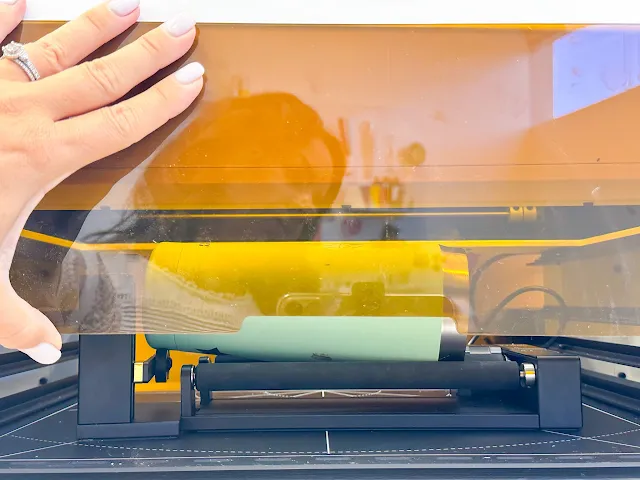
You do not need air assist for engraving tumblers, so if you have air assist set up, pop off the top from over the laser and snap it into the holder.
Setting Up a Design for Engraving a Tumbler
Now it's time to add a design. Because engraving on the XTool M1 can take a while and because perfecting placement on a tumbler will 100% not be perfect on your first tumbler, my suggestion is to use this first tumbler for practice.
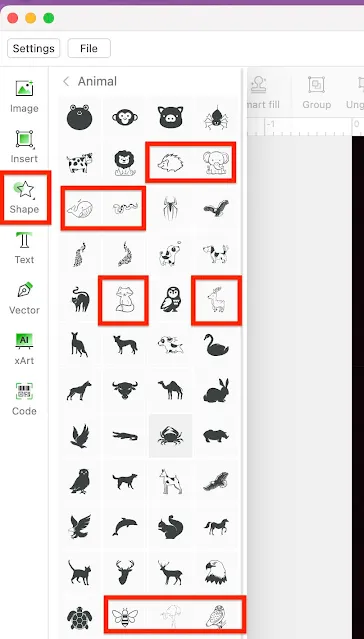
The built in art work in Creative Space is perfect for this as it will engrave in a matter of minutes saving you a lot of time.
If you decide to take this suggestion, click the Shapes button on the left sidebar and select a shape. The porcupine, ghost, and whale are all great options as they can be engraved, but because they are not completely filled in, the time to engrave will be lessened as you learn. (And don't worry you can keep practicing on the same tumbler with repeated engravings!)
Double click the design you want to use or import one and then click "Refresh" so the camera refreshes your view.
It will likely be difficult to see the design outline against the black background of the inside of your craft laser so with the design select click "Engrave" it should then fill in solid making it easier to see.
Size, rotate and position your design. The hardest part about engraving tumblers with XTool M1 is the positioning and it's made even more challenging if you're dealing with a tumbler that has a brand logo on it that you're trying to also position against.
I'm going to be real honest with you so you can let this go right now...for this first engraved tumbler we are not going to worry too much about the position of the design itself - we just want to get the engraving process down. As you use this same stainless steel tumbler for more test engravings you can focus on positioning techniques.
One thing to keep in mind is the M1 will start engraving at the green or yellow line so the edge of your design should be placed there. If it's OVER that line, the engraving will not start.
Best XTool M1 Settings for Engraving Tumblers
With the design selected, set the engraving settings to: Power 80%, Speed 100, and 180 LPC. This should give you a nice shiny engraving and fully remove the powder coat.
Click Start in the Creative Space and then click Start again...and then press the button on the front of the XTool M1 to begin engraving your tumbler.
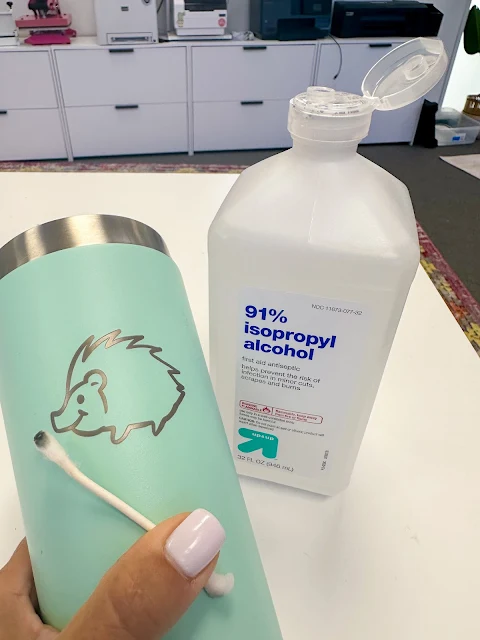
When the engraving is complete use rubbing alcohol to clean up the engraving and really make it shine!













.png)


No comments
Thanks for leaving a comment! We get several hundred comments a day. While we appreciate every single one of them it's nearly impossible to respond back to all of them, all the time. So... if you could help me by treating these comments like a forum where readers help readers.
In addition, don't forget to look for specific answers by using the Search Box on the blog. If you're still not having any luck, feel free to email me with your question.