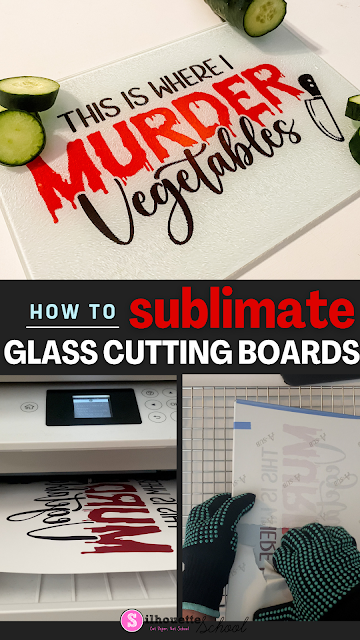
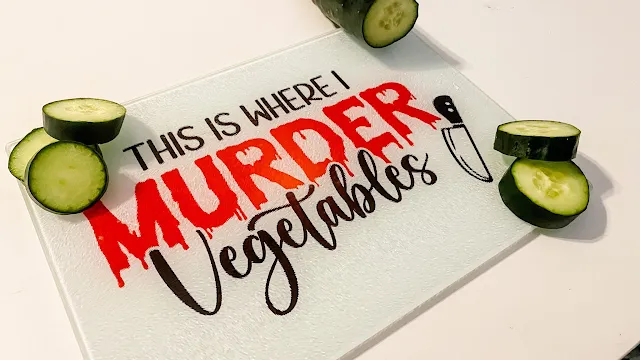
These custom cutting boards can be customized in so many different ways which makes them super popular with crafters and small businesses. Follow along for the step by step on how to do sublimation on glass cutting boards.
Start by grabbing some sublimation glass cutting boards and finding your design. I've also included a full supply list for this project at the bottom of the blog post if you want to grab everything you need.
I'm using this funny cutting board saying from So Fontsy which you can find as part of this cutting board design set.
Start by measuring your cutting board. The ones I'm using are about 8x11. You'll need this to know how size your image when printing.
Launch Silhouette Studio. Make sure the sublimation printer you are going to pick from is selected from File > Print Page Setup.
How to Use Silhouette Studio for Sublimation
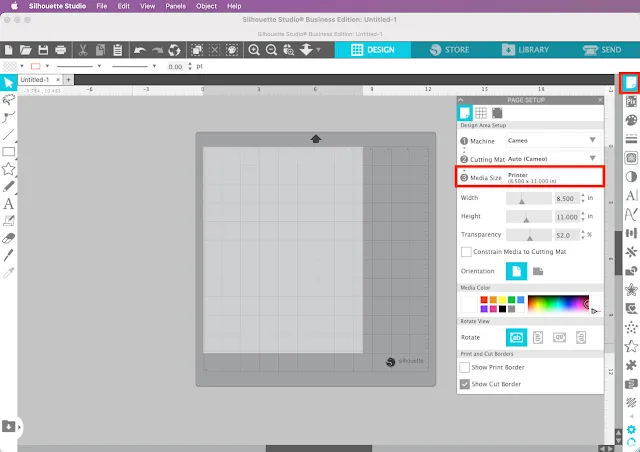
From the Silhouette Studio Page Setup panel change the page size to "Printer" so it matches your selected printer.
Now go to File > Merge and open the cutting board design.
If you have Silhouette Studio Designer Edition, open the SVG file type so you more easily change the color of the single section.
If you do not have DE and can't open SVG files in Silhouette Studio, you can open the PNG file and change the color but it will require a few extra steps. A full tutorial on how to change colors of a PNG in Silhouette Studio can be found here on Silhouette U.
Head over to preview it (or any of the other 500+ videos on Silhouette U...you can also sign up for a 7 day free trial to watch the full video (along with unlocking access to all Silhouette U benefits including 1:1 chat help with me).
In this case I wanted to change the color of part of the design to red. With the SVG file in Silhouette Studio you can simply select the section of the design to recolor. Open the Fill Color panel and then choose a new color.
Group the entire design together by using your mouse to draw a large selection box across the entire design > right click > Group.
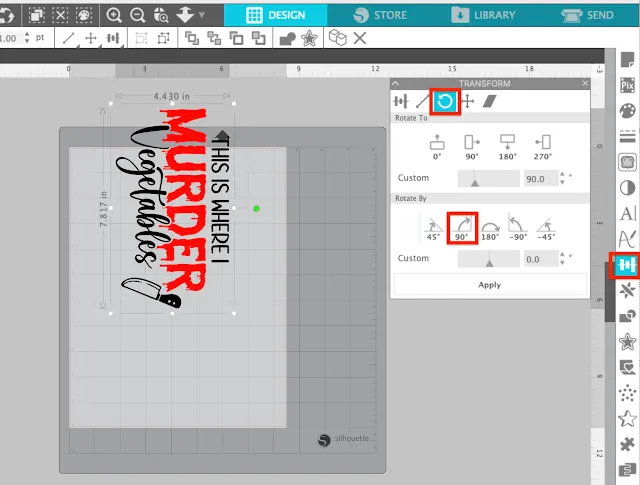
You will likely need to rotate the design so you can enlarge it to fit the sublimation cutting board. Open the Transform panel > Select the third tab > Rotate 90.
Click the second tab in the Transform panel and enter the width dimension of the cutting board or just slightly smaller depending on how you want the design to fill the space. Make sure the lock is on so the design stays in proportion.
How to Print to a Sublimation Printer from Silhouette Studio
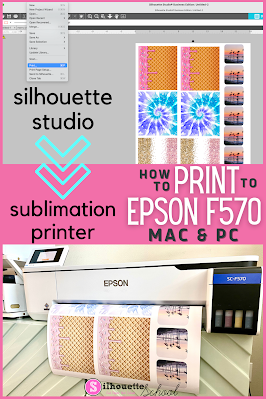
Now you're ready to print the sublimation design. This process is slightly different depending on if you have a MAC or PC and an Epson sublimation printer or Sawgrass. I have tutorials on each combination if you're not familiar with how to print to your sublimation printer from Silhouette Studio.
It's extremely important to make sure your sublimation design for the cutting board does not print in reverse. So be sure to NOT flip the image in Silhouette Studio and turn off the reverse/mirror option in your print manager/settings.
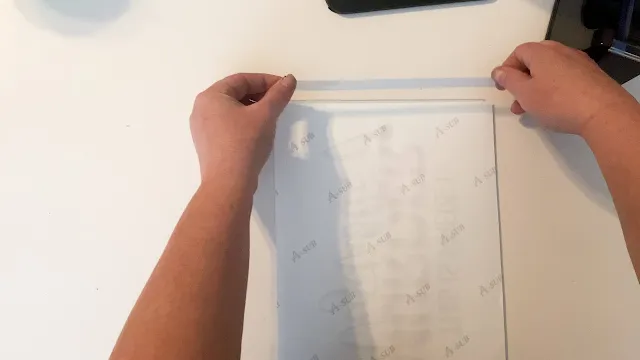
Use high temperature tape to tape the sublimation transfer to the back of the glass cutting board.
Have your heat press warmed up to 400 degrees and set for 5 minutes and medium pressure. Yes, 5 minutes. It takes a long time to sublimate on glass.
When the time is up use heat safe gloves to remove the cutting board from the heat press. Carefully remove the tape and sublimation transfer paper.
Sublimating on glass cutting boards is a great way to make the design permanent since sublimation is dishwasher safe and of course won't peel off!
Grab everything you do sublimation on glass cutting boards by shopping the supply list...the image below is clickable! View more project supply lists.
Note: This post may contain affiliate links. By clicking on them and purchasing products through my links, I receive a small commission. That's what helps fund Silhouette School so I can keep buying new Silhouette-related products to show you how to get the most out of your machine!
Get Silhouette School lessons delivered to your email inbox! Select Once Daily or Weekly.











.png)


No comments
Thanks for leaving a comment! We get several hundred comments a day. While we appreciate every single one of them it's nearly impossible to respond back to all of them, all the time. So... if you could help me by treating these comments like a forum where readers help readers.
In addition, don't forget to look for specific answers by using the Search Box on the blog. If you're still not having any luck, feel free to email me with your question.