If you ever wanted to shape words in Silhouette Studio you've come to the right spot.
In this tutorial we'll walk through how to make words fit in a shape by manipulating the text using edit points in the Silhouette software.
The design that inspired this post is this one - When Life Gives You Lemons, Just Add Vodka. But instead of lemons I want to replace it with a name.
First we need the basic shape to use as a guide for the name. You can use one of the shapes from Silhouette Studio or you can draw your own shape - which I did to create this lemon shape.
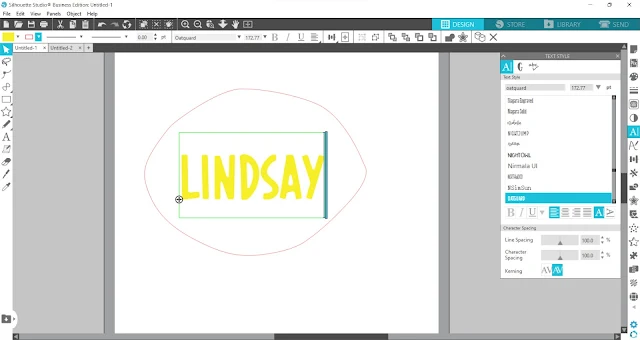
Next, select a font and type out the text.
The font we used is called Oatguard. Both this font and the lemon vodka design can be found in the Design Shop SVG and Font Bundle at So Fontsy.
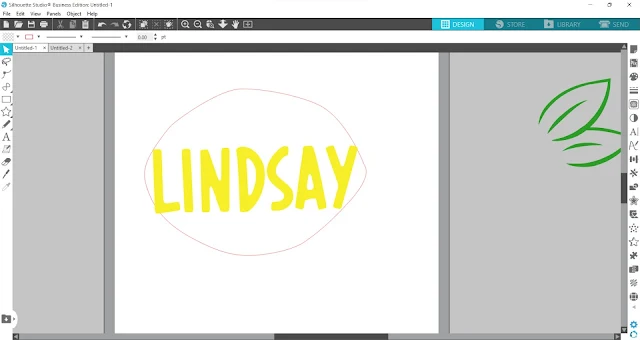
Next, drag one of the corner anchors on the textbox to resize it so that the width fills the shape. The first and last letter (the L and the Y in this case) should overlap the edge of the shape - even if they just overlap a very small amount.
You'll need to be able to edit each individual letter, so click the textbox once, right-click over it, and then click Ungroup.
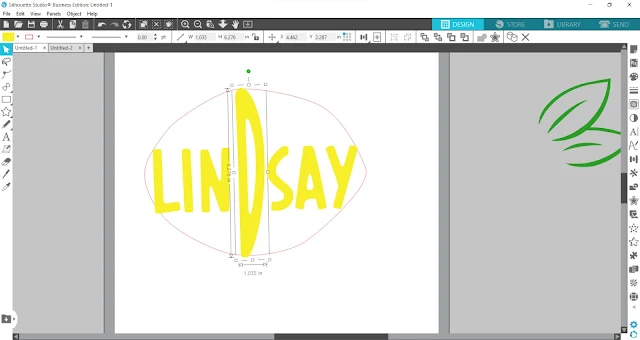
Now, you can click on each letter individually, and use the anchors around the selection box to resize the letters to fill the height of the shape. It's okay that the letters get "stretched out."
Do that for all the letters - resize the height of each letter so that the tops and bottoms barely overlap or almost overlap the top and bottom of the shape.
Now you're going to use edit points to further edit each letter and get it fill the shape.
Double-click on one of the letters and you'll then see each of the "nodes" or edit points of the letter you clicked on.
Click and drag some of the edit points near the top and bottom of that letter to the outside of the shape. This will further stretch the letter so that the letter overlaps the shape.
You don't have to be perfect with how the edit points look outside the shape - this part of the letter will be deleted anyway. So if they look a little wonky - that's totally okay. The important thing is that you stretch each letter so that it overlaps the shape.
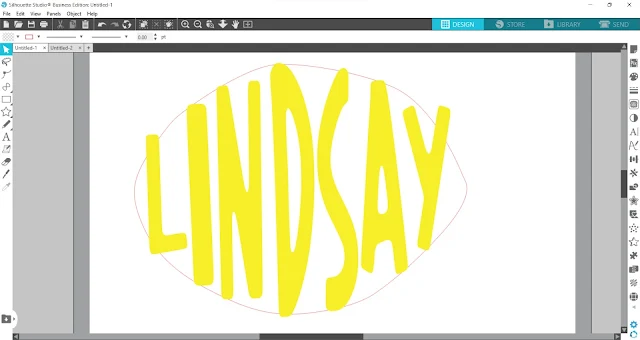
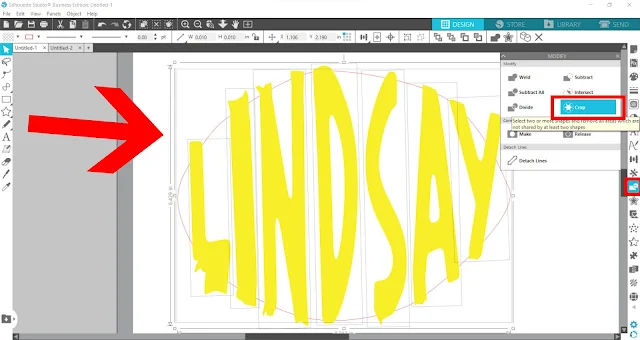
After you've done that with each letter, select all the letters and the shape. Open the Modify panel and click Crop.
This will crop the letters to the shape! The crop works by eliminating the parts of the letters that fall outside the shape (the lemon). That's why it was so important that the letters overlap the shape - so that they would be cropped to the shape!
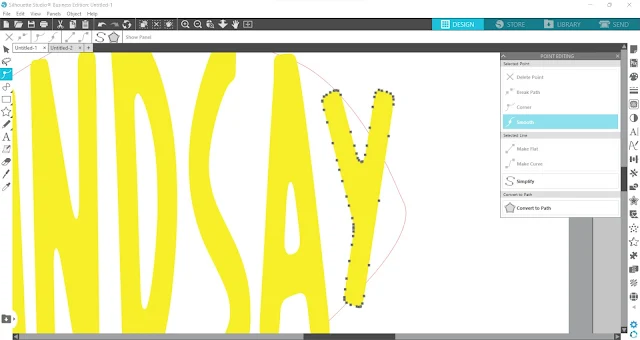
To make further edits to the letters so you can get them to look exactly how you want, double-click each letter again so you can edit more edits points. Try clicking the Simplify option in the Point Editing panel.
This will reduce the number of edit points in that shape and can make editing the shape a little easier.
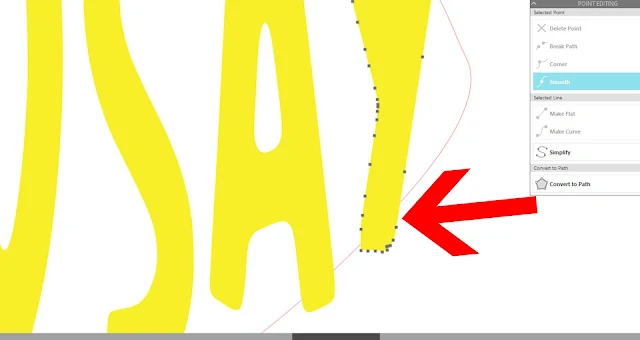
One thing you can do is turn sharp corners into curved edges. Click on a corner edit point. And then click Make Curve in the Point Editing panel.
See how it curves that edge?
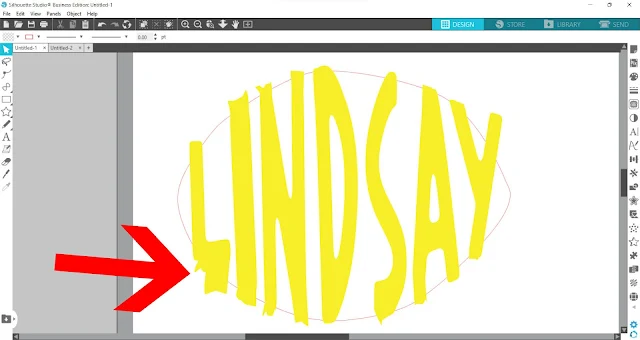
Continue editing points until you are happy with how it looks. Some of this editing part is a little bit trial and error - so don't be afraid to try something and then just click the Undo button if you don't like how it turned out.
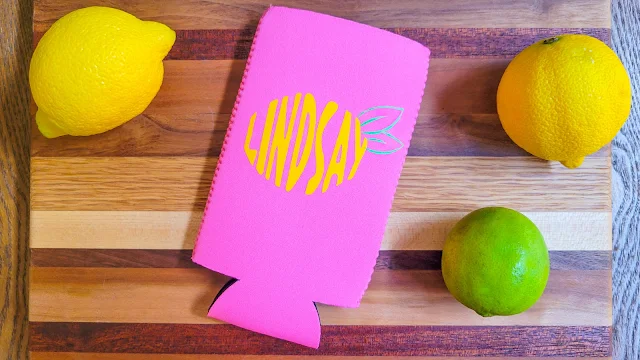
When you're happy with how it looks, then cut it out! We took our lemon-shaped names, cut them into HTV, and then pressed onto a neoprene can coolers.
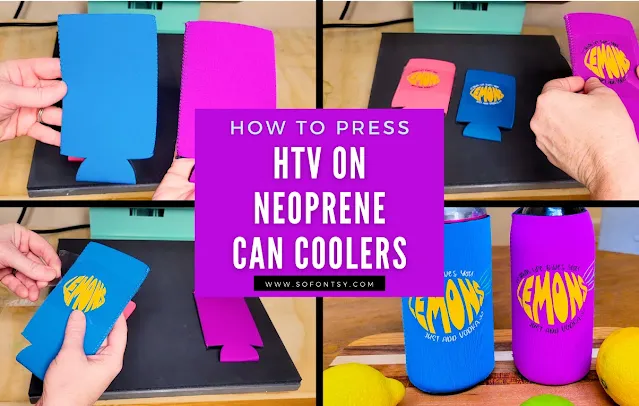
To see more about how to press HTV on to neoprene can coolers, check out the following blog post on the So Fontsy blog.
Grab the fonts and designs used in this project from So Fontsy in the the Design Shop SVG and Font Bundle.
Note: This post may contain affiliate links. By clicking on them and purchasing products through my links, I receive a small commission. That's what helps fund Silhouette School so I can keep buying new Silhouette-related products to show you how to get the most out of your machine!
Get Silhouette School lessons delivered to your email inbox! Select Once Daily or Weekly.







.png)


No comments
Thanks for leaving a comment! We get several hundred comments a day. While we appreciate every single one of them it's nearly impossible to respond back to all of them, all the time. So... if you could help me by treating these comments like a forum where readers help readers.
In addition, don't forget to look for specific answers by using the Search Box on the blog. If you're still not having any luck, feel free to email me with your question.