Setting up the Roland BN-20A for the first time is a several step process, but it's nothing to be overwhelmed about!
In this Roland BN-20A beginner tutorial I'll take you step by step to set up the 20" eco solvent print and cut machine including the machine, (optional) stand, software package, blade and material to get you ready for your first print and cut with the Roland BN-20A.
The Roland BN-20A is an eco solvent, desktop print and cut machine that will take any small vinyl business to the next level and open up expanded opportunities for Etsy sellers and their customers! It's similar to the original Roland BN-20, but without the white and metallic ink options allowing a lower price point.
If you're coming from the crafting side where you're used to a Silhouette CAMEO machine the Roland will seem like a print and cut dream! But before you can get to printing and cutting vinyl stickers on this 20" printer and cutter we need to get it all setup....and I would recommend devoting a few hours to a half day to do that.
Roland BN-20A Unboxing and Machine Set Up
Unboxing the Roland BN-20A is actually pretty fast and easy! It's just a lot of...box...and packing material.
This pallet has three boxes but if you only ordered the BN-20A and not the inks or stand you'd only have the largest of the three boxes. I would highly recommend getting this Roland BN-20A ink and stand bundle so you get both add ons.
What's Included in the BN-20A Box?
Inside the BN-20A box is of course the 20" cutter along with a bunch of other supplies, accessories, and tools you'll need to run it and keep it clean.
- 20" Ecosolvent Printer and Cutter
- 20" x 10' Roll of Sample Print Vinyl Media
- Cutting Blade and Housing
- Media Bar Rollers
- 4 Gray Foam Dummy ink cartridges - don't mistake them for trash
- Cleaning Cartridge
- Power Cord
- USB Cord
- Tools: Tweezers, Cleaning Solution, Swabs
- Software is included but digital download
Like all of Roland machines, with the exception of the BT-12 Direct to Garment printer, inks are not included in the box, but all bundles from Swing Design include them at a discounted price when bundled with the machine.
When you take the BN-20A out of the box do not take the packing material out of it yet - wait to do that until you have the machine either on the stand or on the surface where you plan to run it.
Don't throw out the cardboard retainers that are found inside the machine. Keep these to use anytime you need to move the machine to a different location.
How to Set Up the BN-20A Stand
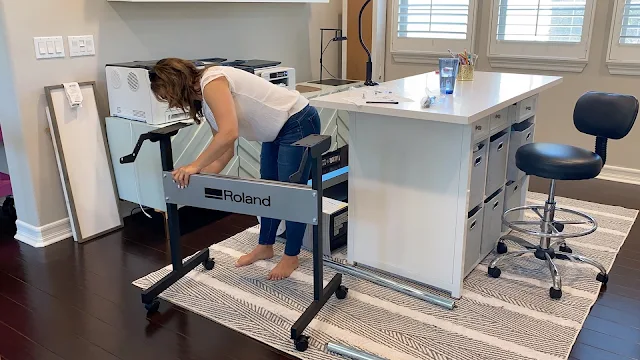
If you have a BN-20A stand, which I highly recommend, put the stand together. The stand assembly is very quick and easy and just a few parts.
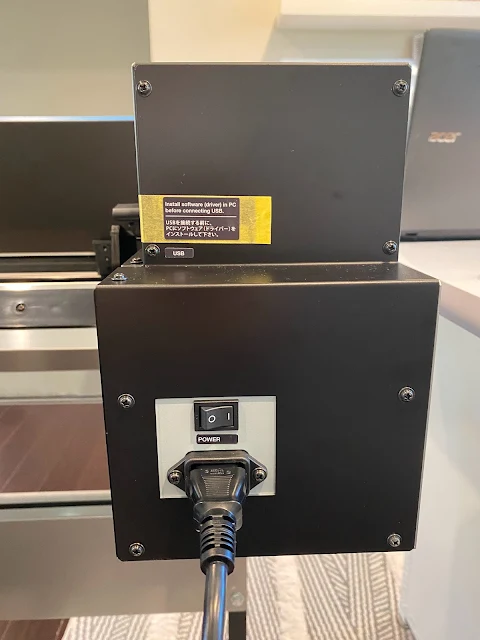
You can secure the printer/cutter to the stand and attach the black power cord to the back of the machine, but don't plug it in or power the machine on yet. And do not connect the machine by USB to the computer yet.
Roland BN-20A Drivers, Utility and Roland VersaWorks Installation
The most time consuming part of the BN-20A setup is the software package installation. There are three parts to this: Driver, Utility, Versaworks.
Keep in mind the software is only PC compatible which makes my MAC-lovin heart hurt a bit..but I do have a backup windows laptop because this seems to be a trend with printers...
Use your phone to scan the QR code on the front of your BN-20A or go directly to the setup manual found here.
The QR code will take you to the online manual to begin the installation process for the printer drivers, utility and VersaWorks. The Roland setup manual is very good and detailed and will walk you through every step. With that being said, I felt a bit of jumping around between installation guides so I have put this step by step in order for you to hopefully make this as easy and straightforward as possible.
Step 1: How to Install the BN-20A Print Drivers
Make sure all other programs on your computer are closed during this installation process.
To start, go to the Roland software download page linked from within the manual. You'll first need to register your machine by entering the Serial Number. Once the registration is complete, you will be directed to the software downloads page to download the software package and the VersaWorks installer Package to your computer.
I suggest saving either to your Downloads folder or the desktop so you can easily access.
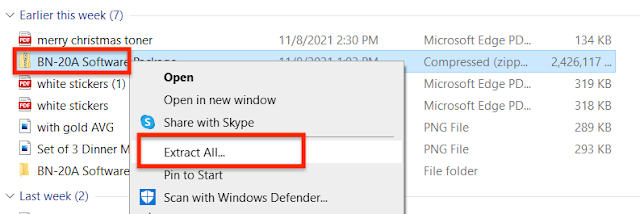
Once downloaded, unzip the software package by Right clicking on the Software Package Zip file and selecting "Extract All..."
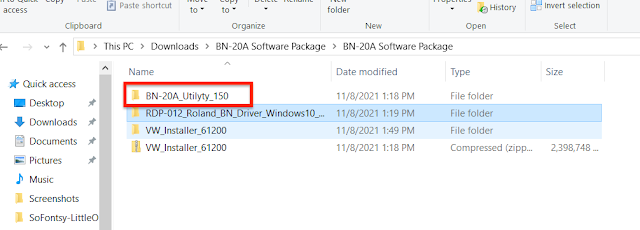
Now you'll see folders for the driver, utility and VersaWorks in the unzipped folder.
The first step is to install the print driver. The driver is needed so that the computer can send information and data to the printer/cutter. Click into the Driver folder.
Scroll down and double click "Setup" to launch the driver setup
Follow the detailed step by step instructions for the driver setup found in the "Installing the Software" section here beginning at step 3.
Step 2: Installing the BN-20A Utility
Once the driver is installed you may be automatically prompted to setup the utility. If not, return to Software Package Folder and click into the Utility folder. The utility helps provide necessary updates.
Double click Setup and follow steps 5-14 under "Installing the Software".
Step 3: How to Install Roland VersaWorks Software
The final step is to install the VersaWorks software. Return to the software package folder and double click into the VersaWorks folder (if you only have a VersaWorks zip folder > right click > Extract All first).
Select VW_Installer to launch the installation.
Follow the on-screen prompts to complete the the installation. If you need detailed step by step instructions on each of the prompts, check out the VersaWorks Installation Guide beginning on page 6.
Don't try to launch VersaWorks yet or you'll get this window...which we'll finalize later.
Step 4: Connecting the Printer to the Computer
Now we're ready to connect the printer to the computer.
- Plug the power cord into the back of the BN-20A, if you haven't already, and connect to a power source.
- Flip the power button on the back of the machine to on.
- Press the power button on the front of the machine until it turns blue.
Remove the tape covering the USB port on the back of the machine and plug in the USB cord. Connect the other end to the computer.
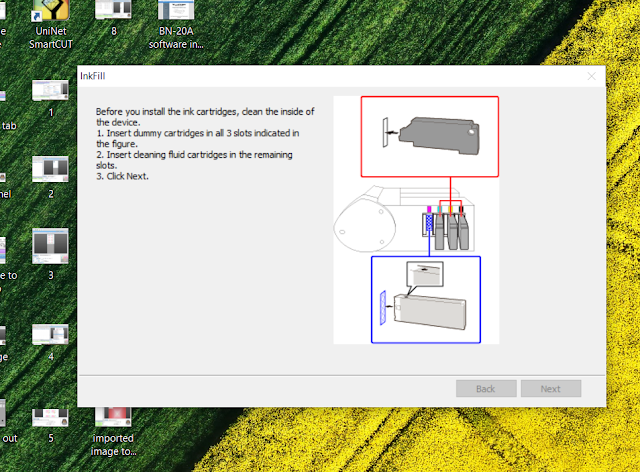
The computer should recognize the new device and a window will pop up with instructions to install the inks for the first time.
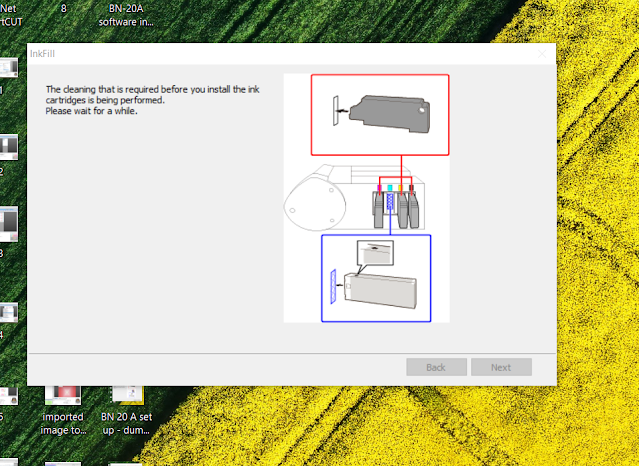
To install the inks you'll follow the on screen prompts. This is an easy process of using three of the foam dummy cartridges and the cleaner. Be aware, this part of the process will take 15-20 minutes as you have to cycle through each of the four ink slots three times each.
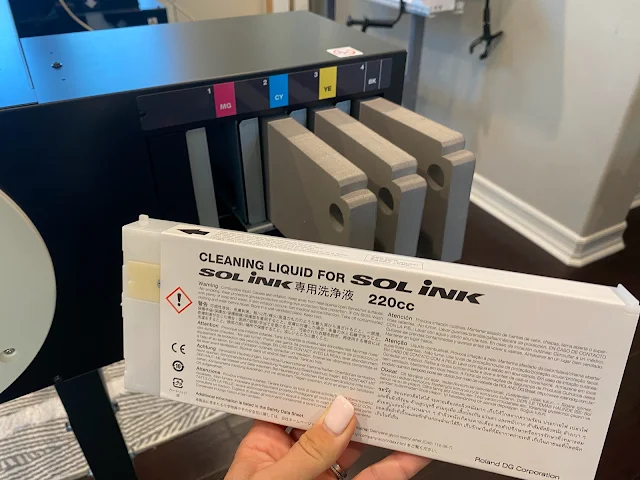
The prompts will tell you to put the three dummy cartridges into three of the slots...
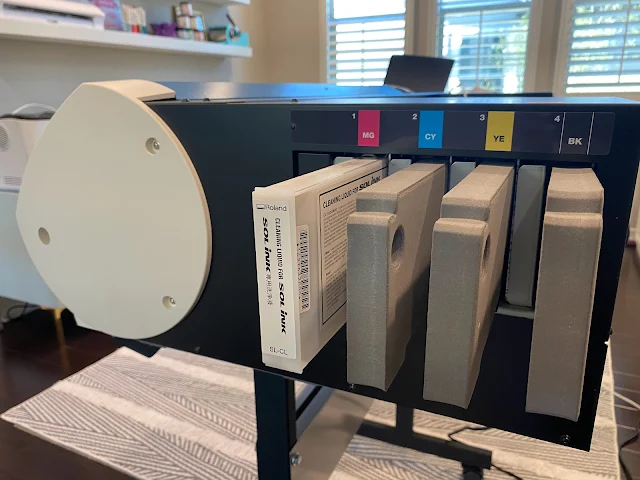
...and the cleaner in the other.
This removing and installing the cleaner into the same slot will repeat three times.
When the prompt window tells you, swap the position of the dummy cartridges and repeat for the next ink slot. Make sure the cleaner cartridge is in the correct slot, to match the on-screen prompt, for each round.
You'll do this process for all four ink slots.
When the slot cleaning is complete you'll be prompted to install the four ink cartridges.
Make sure to shake each back and forth for about 20 seconds before installing.
Push each ink cartridge in until it clicks into place then wait for the confirmation screen that the ink tanks are being filled.
Step 6: How to Assemble and Install the BN-20A Cutting Blade
The next step is to install the blade.
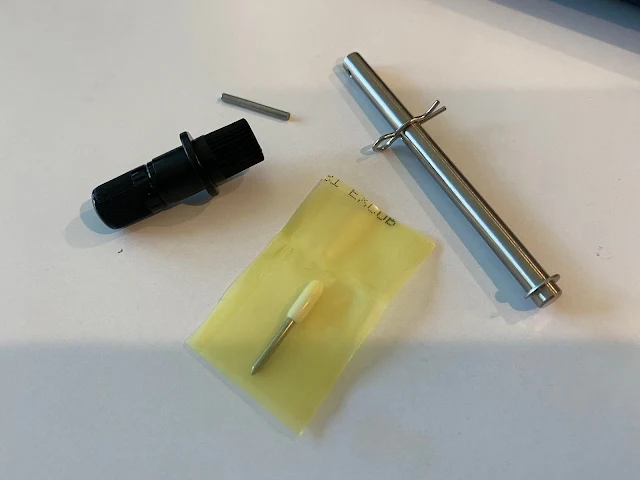
Find the blade package in the box of supplies that came with the BN-20A. The blade is three parts that need to be assembled then installed into the machine.
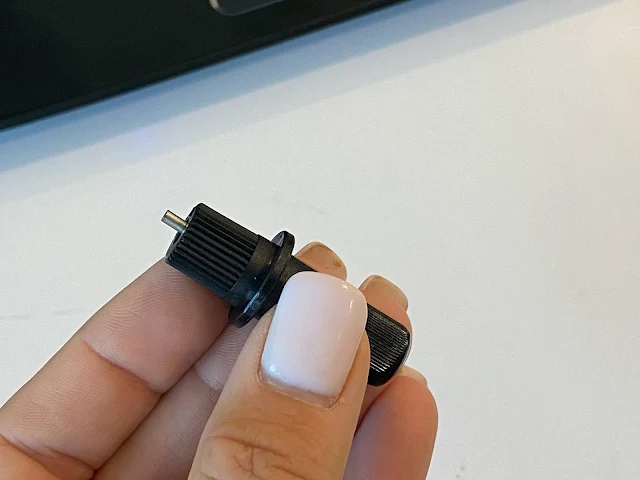
Take the straight rod and insert it into the top of the blade housing. You'll feel it almost snap into place like a magnet.
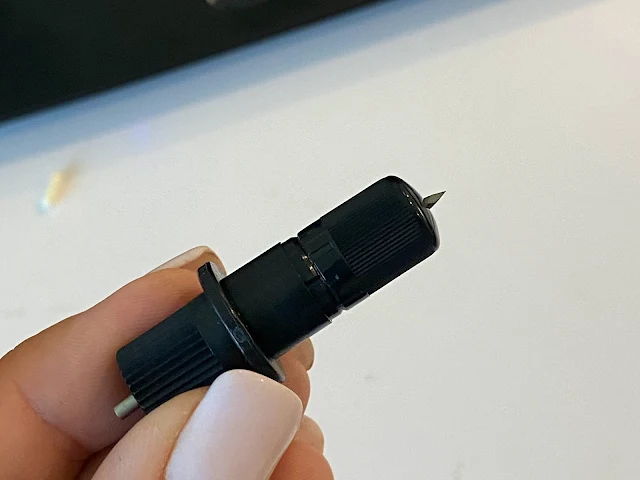
The blade goes in the other end of the housing. Insert the pointy side, without the protective cover, into the hole on the bottom of the blade housing.
Remove the protective cover to expose the cutting end of the blade.
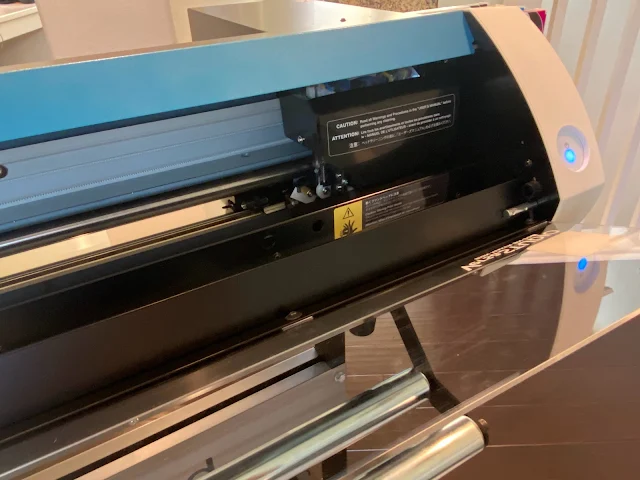
To install the BN-20A blade into the machine, flip open the cover on the BN-20A. It's dark in there and kind of hard to see so it's helpful to shine a light.

With the blade in one hand, use one finger on the other hand to support the bottom of that gold screw.
Drop the blade into the carriage until it's seated completely in the carriage. Twist the gold screw clockwise to tighten the blade carriage and secure the blade in place.
Make sure the blade doesn't move if you try to pull it up. If it does, tighten the screw more.
Step 7: Setting Up the Media Roll Feed
The media bar comes in three pieces: a bar and two flanges.
Install the end of the bar with the hole in it, into the larger of the two flanges. If you're using media with a 3" core, the larger side of the flange should be facing in towards the bar. Secure the flange to the bar by putting the pin through the small hole.
Place the flange and rod on a flat surface so the flange is your left. Put a roll of media through the bar making sure the end of the roll falls over top the roll rather than feeding under. Push the media all the way against the flange so it's tight and there's no gap.
Secure the other, smaller flange on the other end of the media bar.
Before loading the roll of media into the BN-20A, push the loading lever on the left side back.
Move the left guide all the way to the left. Now you're ready to install the roll of media. This quick video shows the complete process of correctly loading the media.
Step 8: Launching Roland VersaWorks
Make sure the Roland is still powered on and connected to the computer by the USB cable.
Return once again to your computer and this time launch VersaWorks. This can be done through the Windows Start menu or by double clicking if you have the shortcut on your desktop.
Once you get this window make the following adjustments:
- Create a Nickname for your Printer
- Under Port (P) > Click "Printer Driver"
- Select the BN-20A from the dropdown menu
- Click Verify
- Click Ok and Apply
If you have missed any of the steps - including inserting the blade, installing the inks, or installing the media roller it will tell you the setup is incomplete, otherwise you're good to go!
I'll be sharing more on how to use the Roland BN-20A soon including a first print, first cut, and first print and cut!
Get Silhouette School lessons delivered to your email inbox! Select Once Daily or Weekly.















.png)


No comments
Thanks for leaving a comment! We get several hundred comments a day. While we appreciate every single one of them it's nearly impossible to respond back to all of them, all the time. So... if you could help me by treating these comments like a forum where readers help readers.
In addition, don't forget to look for specific answers by using the Search Box on the blog. If you're still not having any luck, feel free to email me with your question.